External Conversations
The Conversations feature can be extended to include the capability to communicate with mobile phones via SMS and MMS text messaging. This article explains the details of this feature.

Managing External Contacts
External Phone Numbers
Mobile phone numbers can be added to customers or vendors in the standard way through the customer or vendor details page. In addition, phone numbers can be added to a conversation using the Add Phone Numbers button in the header of the conversation.
Adding Within a Conversation

The “Add Phone Number” button above the reading pane opens a window that allows entering the number to be added to the conversation.

A number can be typed in manually, selected from existing contacts, or chosen from automatically suggested numbers related to linked records such as Customers or Orders. Once added, the number becomes part of the conversation’s recipient list.
Adding Within a Customer or Vendor

When adding phone numbers to a conversation within the Customer Details window, Paradigm will suggest any entries for the customer found in the customer’s Contact Methods table or Customer Contacts table. Similarly, within a vendor any phone numbers found in the vendor’s Contact Methods will be shown when the Add Phone Number button is clicked.
Adding Within a Vendor

A number can be typed in manually, selected from existing contacts, or chosen from automatically suggested numbers related to linked records such as Customers or Orders. Once added, the number becomes part of the conversation’s recipient list.
The Contact Card

The Contact Card window is the central place where all information tied to an external phone number is stored and maintained. It can be opened from several locations throughout Paradigm—such as by clicking the phone number in a conversation header or selecting the contact button above an incoming message—but every entry point leads to the same Contact Card. The system treats the phone number itself as the unique identifier, so there is never more than one Contact Card for a given number.
Contact Card Button
There are a number of places throughout Paradigm where the button to open the contact card for a specific phone number appears.
The Conversation Window
Inside the Conversations window, the contact card button appears 2 places.

The contact card button appears within pop up for tagging users into the conversation.

The contact card button appears above every message that was sent by the phone number.
The Customer Details Window

The Contact Methods table inside the customer details window will show the contact card button at the end of every row in the table where the contact method is set to Phone or Cell Phone. No other contact method options will trigger the button to show.

Once the phone number has successfully been marked within the system as opting in to send and receive messages, the contact card button turns green.
Name Fields

The three fields at the top of the card are for Name, Company Name, and Label, along with an optional Notes field. These fields allow users to define how the number will appear throughout the system, and set the text that is searchable when looking for the phone number. Note that the Label is the text displayed anywhere the number appears in conversations, making it the key identifier for recognizing the external participant at a glance.
Disable Texting This Number

The option for Disable Texting This Number allows users to intentionally block outbound messages to a number. This is different than if an external recipient unsubscribes from messaging by texting “stop.” This could be useful if a phone number isn’t a mobile number that’s able to receive messages or the phone isn’t the preferred number for a customer.

Attempting to send messages to this number generates the following error message: “Unable to send message. One or more recipient phone numbers have texting disabled. It can be re-enabled in the phone number screen.”
Use Contact Name

An additional button, Use Contact Name, shows when the contact card is opened from the Customer Details window. This button allows copying the name and company information from the customer’s details to the phone number’s contact card fields.
Customer or Vendor Contact Options

The Customer and Vendor buttons open the options to add an entry to the Contact Methods of a customer or vendor.

Choosing “Add to Existing” opens a dialog window with the options for choosing the existing entity, and setting the information that will be saved to the Contact Methods. Clicking on “Add Customer” or “Add Vendor” will create and open to a new customer or vendor that automatically has an entry created in the Contact Methods.

Opt-In and Opt-Out
In order to make sure that people are given full control over messages that are sent to their phone number, the opt-in and opt-out processes enforce guidelines that must be followed to send messages.
Opt-In
Phone numbers have to be registered in Paradigm as having given consent for messaging. The first time a Paradigm user presses “Send” on a message to a number that hasn’t opted in, a pop up will show to alert the user that opt-in is required.

There are two available choices for opt-in:
- Verbal: Opt-in via verbal agreement
- Selecting this method sets the text inside the “Opt-In Agreement” box to a suggested script that the Paradigm user can read to the customer.
- Clicking the confirmation button “Opt-In and Send Confirmation” indicates to the program that the customer has been verbally informed what they are agreeing to, and has granted consent. This then triggers the confirmation text message to be sent to the mobile phone user informing them that they have successfully opted in to sending and receiving text messages.
- Text: Opt-in via SMS message
- If this method is selected, the confirmation button text changes to “Send Opt-In Request,” and clicking it will send the standard opt-in message to the user.
- The message includes the required text, “START,” that must be messaged in reply in order to opt in to messaging. The required text is not case-sensitive.
The phone number is marked in the system as successfully opting in when either the required text “Start” is received from the phone number or the Paradigm user marked that verbal agreement was obtained. As soon as the system marks the phone number as opted in, Paradigm will automatically send the confirmation message to the phone number that opt-in was successful.

Opt-In Exception
Note that there is an exception to the standard opt-in process if the phone number initiates the connection to Paradigm. If there is no existing conversation for the phone number, and no existing record of the phone number opting in to send and receive messages, the phone number is automatically marked as opted in when the message is received from the phone number.
Opting Out (Unsubscribing)

A phone number can opt out of messaging at any time by sending a message that only contains the keyword “STOP.” This is not case-sensitive.

When a phone number opts out, it is marked in the system as unsubscribed.

Once a phone number has opted out, attempting to send a message to the phone number will will fail with the following message: “Unable to send message. One or more recipient phone numbers have unsubscribed from receiving messages. Unsubscribed numbers must respond with “START”, to re-subscribe.”
Re-Subscribe to Messages

The procedure to opt in again after unsubscribing is the same as the initial opt-in process: a message must be received from the phone number with the keyword “START.” This is not case-sensitive.

Once received, the number is marked as opted in and messaging can resume.
Limitations
- After the first outbound SMS/MMS is sent, no additional numbers can be added to that conversation.
- Adding phone numbers creates a new conversation.
- A conversation is unique based on the phone number endpoints that are in it.
- Group conversations with multiple external numbers are supported.
- If a new conversation window is opened with a number that already has an existing conversation thread, Paradigm automatically redirects to the existing thread.
- Just as with messaging from one cell phone to another, it’s not possible to have two different conversation threads between the same two endpoints. All messages that have been sent and received show in the same conversation.
- A single instance of Paradigm represents a single unique endpoint, and cannot represent two different endpoints. It’s not possible to have two separate conversation threads from Paradigm to a mobile number. If two different users are messaging the same mobile number, all messages from both will show in the same conversation.
Setting Up Company Preferences

The Twilio Integration options are a subset of the preferences available in Company Preferences > Add-Ons > Conversations.
Twilio Integration
To set up the external messaging integration with Twilio, contact Paragon Support.
Twilio API Key

As part of the integration, Twilio will provide an identification number, called the “Account SID,” and a secret key, called the “Auth Token.” These are entered into Paradigm by clicking on the button “Set Twilio API Key.” After entering the information, the SID will show in the text box “Twilio Messaging Service SID.”
Conversation Attachment URL
The size limit for MMS media messages is relatively small. Message attachments for any file that is not an image will instead be sent as a link that allows the end user to download the file.
Privacy Policy and Terms & Conditions
The fields for the Privacy Policy and the Terms & Conditions are intended to allow linking to the relevant webpages so that customers who are opting in can have access to read the legal documentation of what they are agreeing to.
Orphan Conversation Settings
See the section on Orphan Conversations for more information about this aspect of the feature.
Orphan Conversation User Group
The Orphan Conversation User Group is the user group that will be tagged in conversations that are created by messages received from unknown external phone numbers that do not yet have any existing conversations in Paradigm.
Orphan Conversation Type
The Orphan Conversation Type is the type that will be assigned to orphan conversations.
Indicators of External Conversations

There are a number of visual indicators to assist Paradigm users to be aware that a conversation includes an external participant.
- The words “External Conversation” appear in yellow text in the top right corner.
- The list of phone numbers that are included in the conversation appears in the top left corner.
- All messages from the external participant have a phone number contact button above them.
- The message text input box has a yellow outline.
- The message send button has a yellow background, and includes the word “External.”
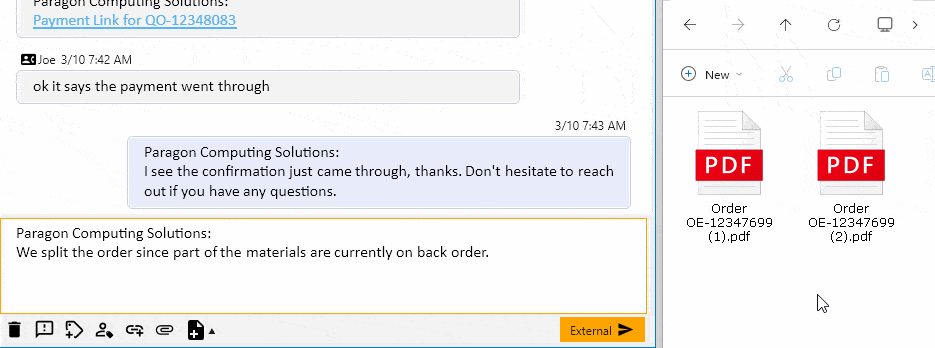
Message Attachments
Files such as pictures and documents can be included in external conversations as message attachments.
How to Attach Files
There are two ways to attach files to messages. Attachments can be added by clicking the attach button in the message input or by dragging and dropping files into the conversation.
Drag and Drop
Any file type can be sent as an attachment. Attachments are sent separately from the message text. Each attachment is delivered as its own message. For example, sending a message with two attachments will result in three messages being sent: one message containing the text, and two messages that each contain an attachment.
The Attachment Button

The attachment button, which has an icon that looks like a paper clip, allows the user to choose a file from their computer to attach to the message. Clicking the button will open up the Choose File window, and selecting a file and clicking “Open” or double-clicking on the filename will add the file as an attachment to the message.
Picture Attachments
Image files are sent as MMS messages and appear directly within the recipient’s messaging app. If an image exceeds the maximum MMS size, delivery may fail.
Attachments Other than Pictures
All non-image attachments are sent as a download link. This ensures that file size limitations do not prevent delivery.

Tapping the link opens a mobile browser page that initiates the file download. Most devices will prompt the user to confirm the download. Download links for non-image files remain active for 14 days. After this period, the link will expire and the file will no longer be accessible.
Barcodes and QR Codes

The ability to attach a barcode or a QR code to a message is a special feature that is only available from the Conversation Side Panel within any transaction. Every time the button for this feature is clicked, it generates the image for the Transaction ID for the current window. Consecutive clicks generate the same image again.
This is a useful feature for allowing a Paradigm user to send a scannable picture to a customer so that team members who are responsible for pulling orders for customers have an easy way to identify which order the customer should be receiving.
Barcodes

When the option in Company Preferences is set to Barcode, the button for this feature has a picture of a barcode. Clicking it creates a barcode that corresponds to the Transaction ID for the current window.
QR Codes

QR codes work the same way but provide a more flexible format that scans reliably across a wider range of devices. Like barcodes, QR codes always represent the order ID and regenerate identically if the button is clicked multiple times.
Links

For information on links, see Setting Up Custom Links and Adding Links to Conversations.
Create Transaction

The “Create Transaction” button only appears when the message is not yet associated with a transaction of any kind, such as a quote or a purchase order.
If the phone number is not connected to any Customer or Vendor, Paradigm will present all transaction options in the pop up menu. However, once the phone number is connected to a Customer or Vendor, only the options that apply to A/R transactions for Customers or A/P transactions for Vendors will show in the pop up menu.
Choosing a transaction option from the pop up menu will create the transaction and automatically tag it in the conversation.
Deleting Messages

Messages, including attachments, can be deleted within Paradigm. However, deleting a message does not remove it from the recipient’s mobile device.
Orphan Conversations

An orphan conversation is created when an external phone number sends a message into Paradigm and no existing open conversation is associated with that number. This includes the situation where there is an existing conversation with the phone number, but it has been marked closed in Paradigm.

When an orphan conversation is created, the user group that is configured in System Preferences under “Orphan Conversation User Group” is set as the entity that is tagged in the conversation, and the conversation type is set to the value configured under “Orphan Conversation Type.” The User Group functions as a landing spot for these conversations, to bring them to the attention of a selected set of users. When a conversation is in this state, there are two new options besides the standard methods of the Tag Selectors and Add Users buttons.
Claim the Conversation

For users that are able to view the conversation, a button labeled “Claim” appears in the top corner above the reading pane. Clicking Claim swaps the conversation from being tagged with the User Group to instead be tagged with the user who is currently logged in.

If the phone number is not yet saved, it can be named and stored as a contact directly from the conversation. This allows future messages from the same number to be associated with a known contact and existing conversation history.
Assign the Conversation

Clicking on the name of the Orphan Conversation User Group opens the pop up that shows users currently tagged in the conversation. Within this pop up, clicking on the “Tag Users” button opens a dialog box that allows choosing which one of the users from the Orphan Conversation User Group should be tagged in the conversation.

Clicking Accept removes the user group from the conversation’s tags and instead adds the selected user.
