- Home
- Add-Ons and Integrations
- Trim Draw
Trim Draw
This FAQ will go over how to use trim draw in Paradigm. This feature is used when special trims are entered onto a transaction. To learn more about setting up special trims, follow this FAQ: Special Trim Set Up
To start, click the trim draw icon on the special trim that was entered.

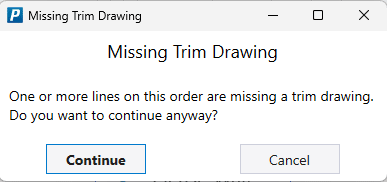
If a user attempts to release an order and there are lines that still need trim drawings, the following warning will appear: One or more lines on this order are missing a trim drawing. Do you want to continue anyway?
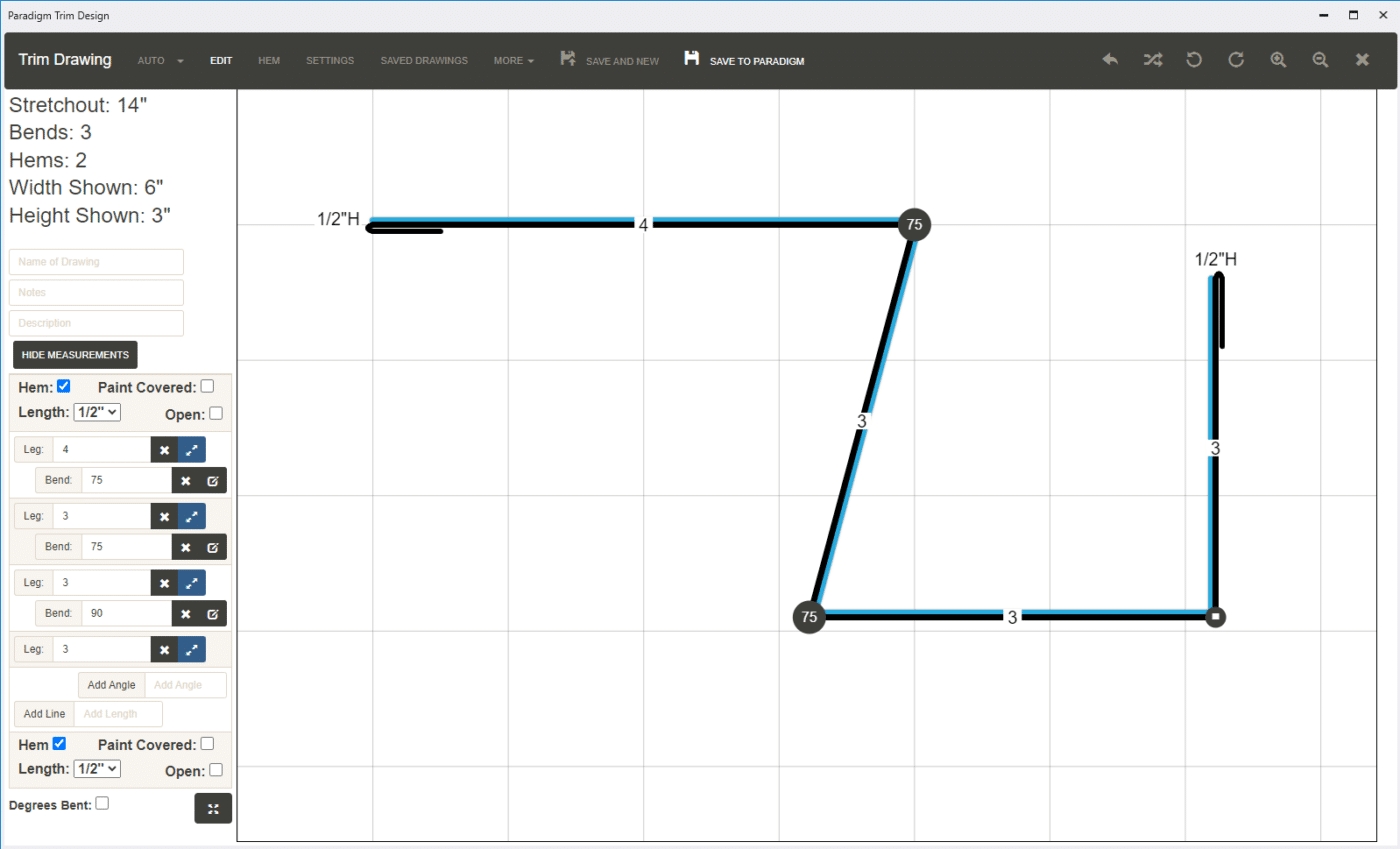
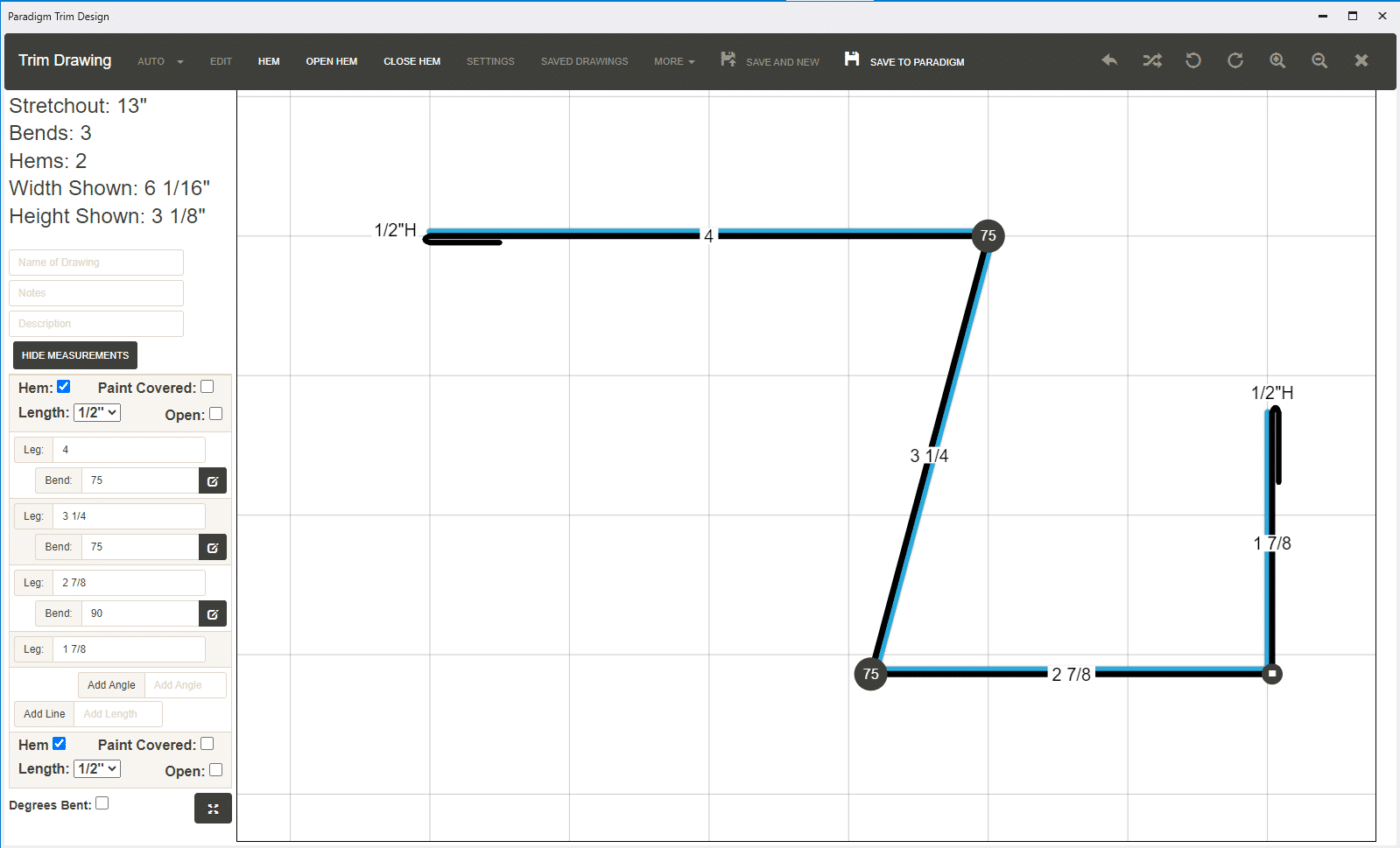
Paradigm Trim Design
- Stretchout – Total trim stretchout.
- Bends – Total Bends
- Hems – Total Hems
- Width Shown – Not the max width, the width as it is currently rotated in the editor.
- Height Shown – Not the max height, the height as it is currently rotated in the editor.
- Name of Drawing – This field allows for the drawing to be titled. The drawing name helps organize the drawings in favorite or recent drawings.
- Notes – This field can be used to show any notes/comments on the drawing. Once it is filled out, it will highlight the note in the comment line on the order.
- Description – This field can be used to show any customizations, or give some context to what the product is.
- Measurements – This form shows the measurements and degrees of each leg, as well as the length of each hem. This can be used to make adjustments to the drawing.
Header Buttons

- Undo
- Toggle Paint Side – Switches to the paint side.
- Rotate Clock-wise or Counter Clock-wise
- Zoom In or Zoom Out
- Save to Paradigm – Saves the drawing and closes the window.
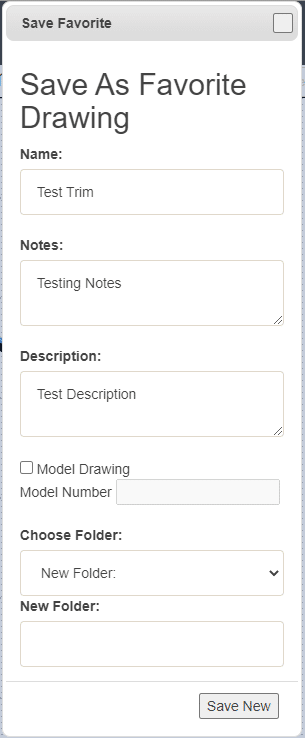
- When using the drawing admin, the form below will appear. Fill out the info for the trim and name the new folder or add it to an existing one.
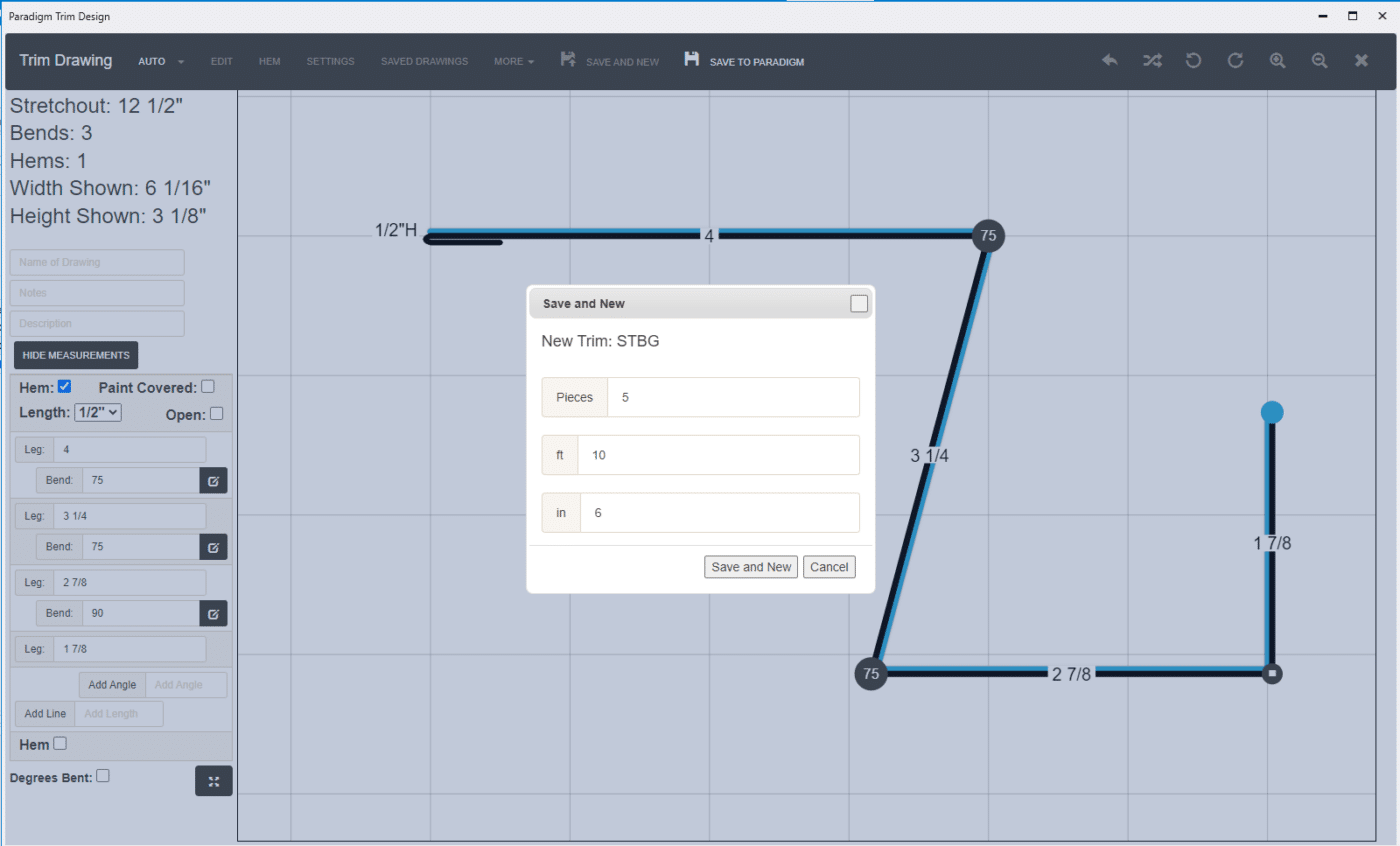
6. Save and New – Saves the drawing to Paradigm and prompts to enter the information for the next trim.
Auto
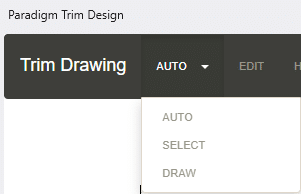
- Auto – Click to draw a segment or select parts of the trim to adjust them.
- Select – Select parts of the trim and adjust them.
- Draw – Click to draw a segment to where the cursor is.
Edit
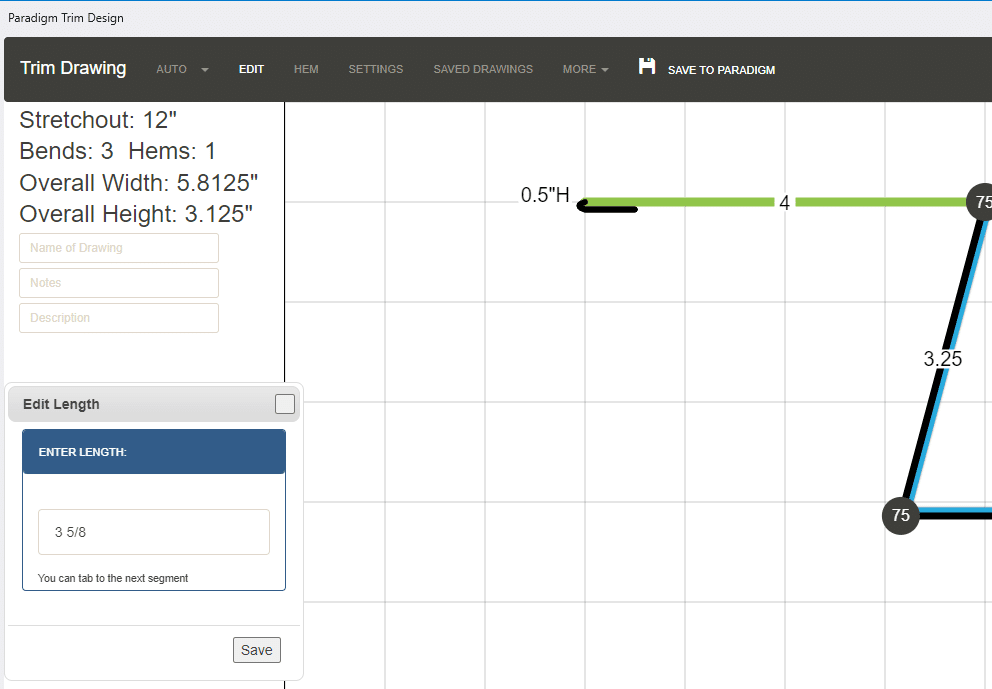
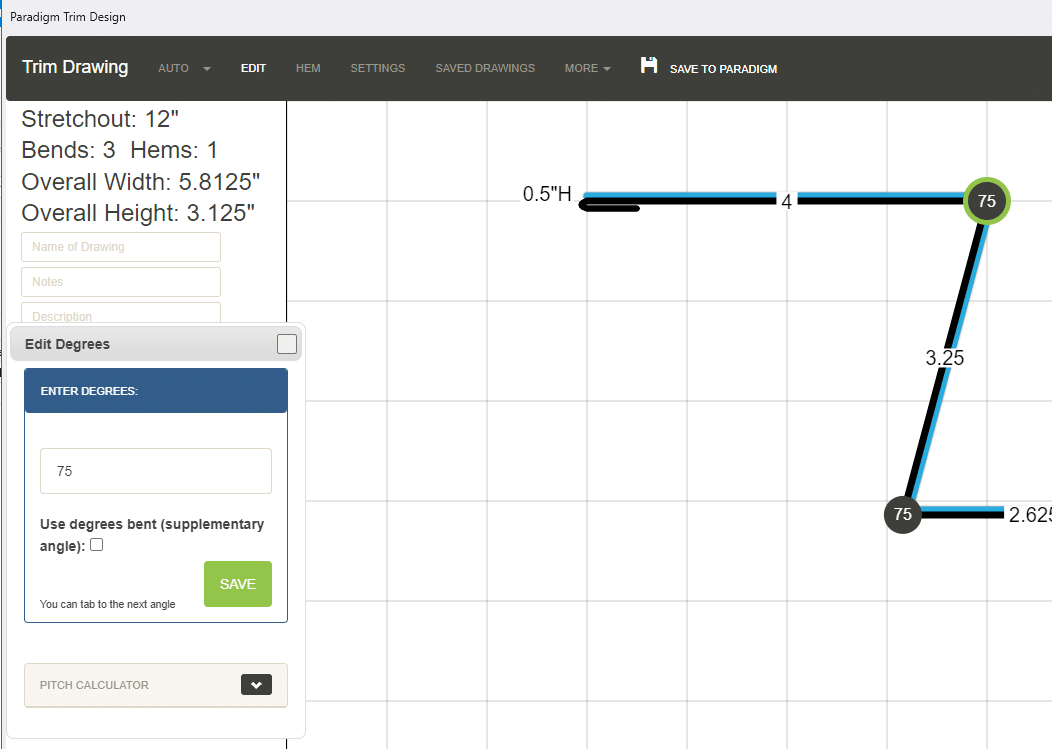
Clicking the “Edit” button in the header allows for the user to click a segment or bend and then manually enter the length or degree. Pressing enter will highlight the next part of the trim.
Pitch Calculator
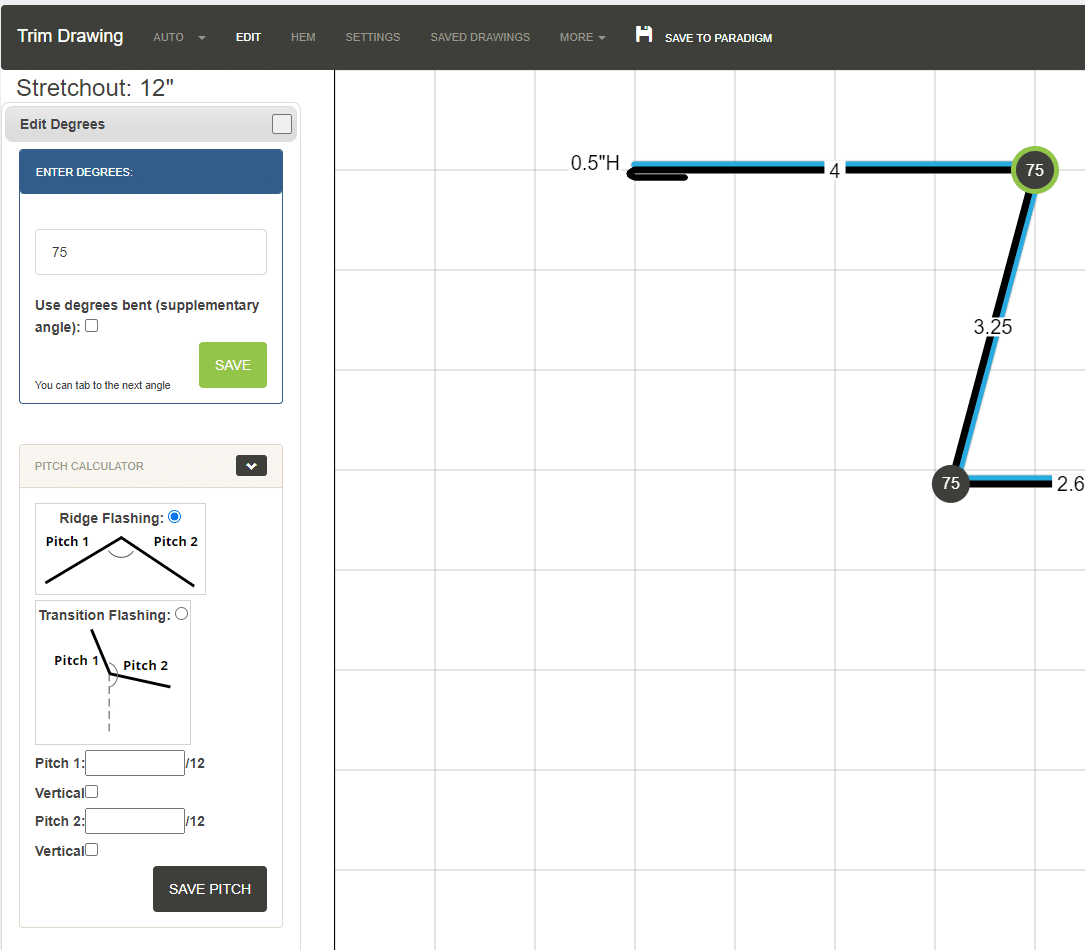
The pitch calculator can be accessed when a bend selected in edit mode, click the arrow to display the drop down and enter in the pitch info. The pitch of both sides of the bend are needed for this to work.
Hem
Clicking the hem button will allow the user to add hems to the trim (also CTRL + H). Clicking and dragging will allow the user to change the length of the hem. Select “Open Hem” or “Close Hem” and then click on the hem to set it as an open or closed hem. The measurements form can be used to edit the hem as well. The default hem size can be set in the “Advanced Config” form, shown later in this FAQ.
Right Click
Right clicking in the trim drawing area will display the options listed below.
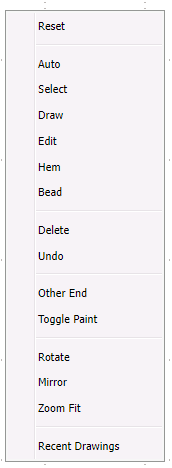
- Reset – Reset the drawing to nothing.
- Auto – Click to draw a segment or select parts of the trim to adjust them.
- Select – Select parts of the trim and adjust them.
- Draw – Click to draw a segment to where the cursor is.
- Edit – Turns on edit mode.
- Hem – Allows the user to add hems.
- Bead – Click a leg to add a bead to it. Paradigm will prompt for an amount of beads to be entered.
- Delete – Select a line or bend to delete.
- Undo
- Other End – Draw from or mirror the other end of the sketch.
- Toggle Paint – The colored side is the painted side. This will switch it to the other side.
- Rotate – Rotate the drawing Clock-wise or Counter Clock-wise
- Mirror – Create a mirrored duplicate attached to the active end.
- Zoom Fit – Fit the trim to the drawing area.
- Recent Drawings – Opens the recent drawings list.
180 Degree Bends (Reversal)
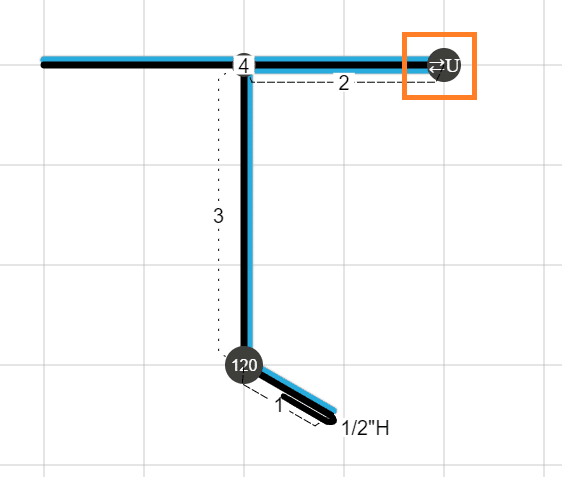
When a trim is bent 180 degrees (also known as a reversal), a “P” or “U” will be displayed on the bend and “REV-P” or “REV-U” will be shown on the saved drawing. Clicking on the bend will switch between them. “U” means that it will be bent towards the unpainted side, and “P” means that it will be bent towards the painted side.
Settings (User Preferences)
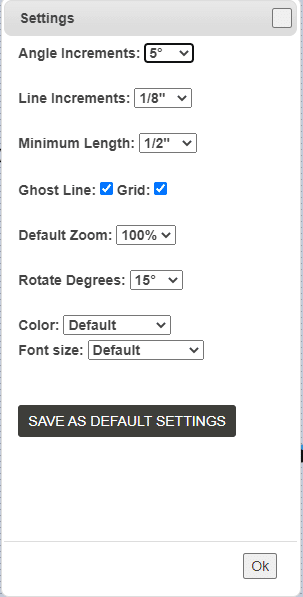
Here the trim draw settings can be edited and saved as the default settings. These preferences are set just for the current user.
Saved Drawings
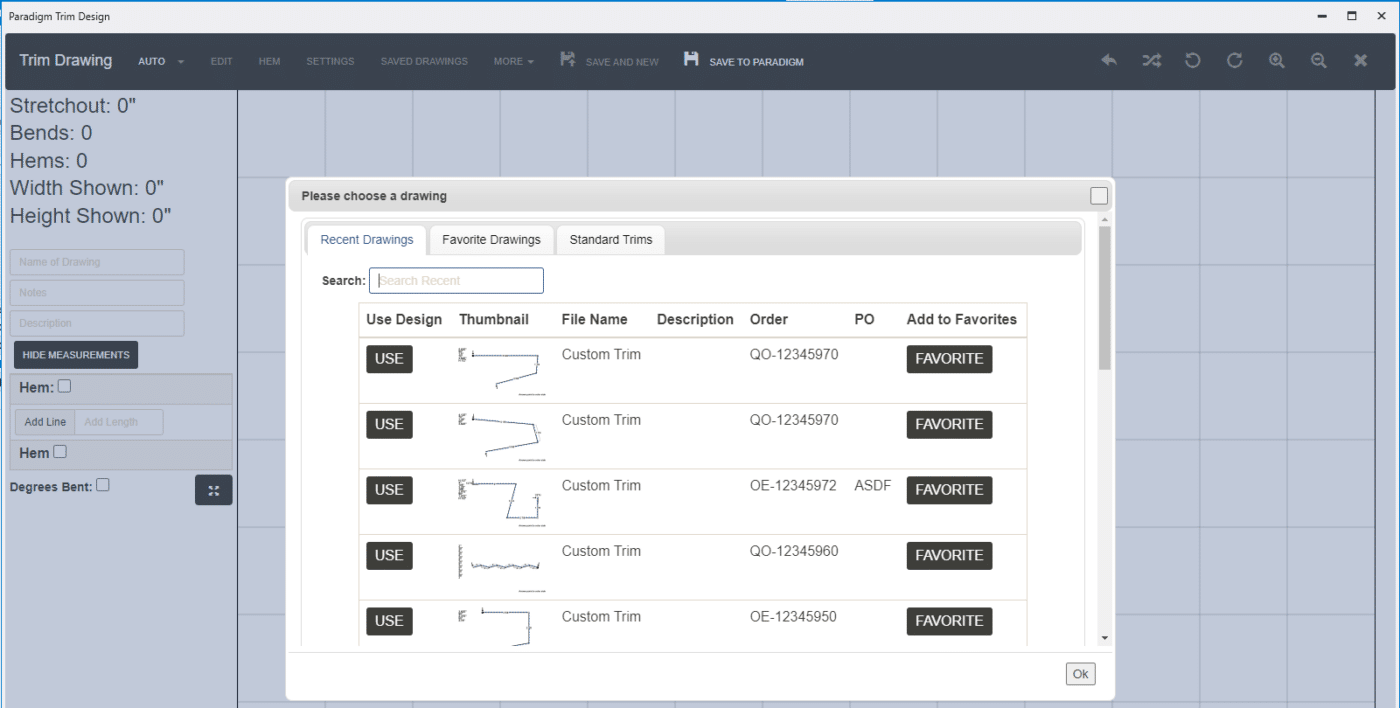
From the saved drawings window, recent drawings, standard trims, or favorite drawings can be selected. To favorite a trim, click the “Favorite” button. Once a trim is selected it will be shown in trim draw and can be edited. More information on creating standard trims can be found here: Company Standard Trims
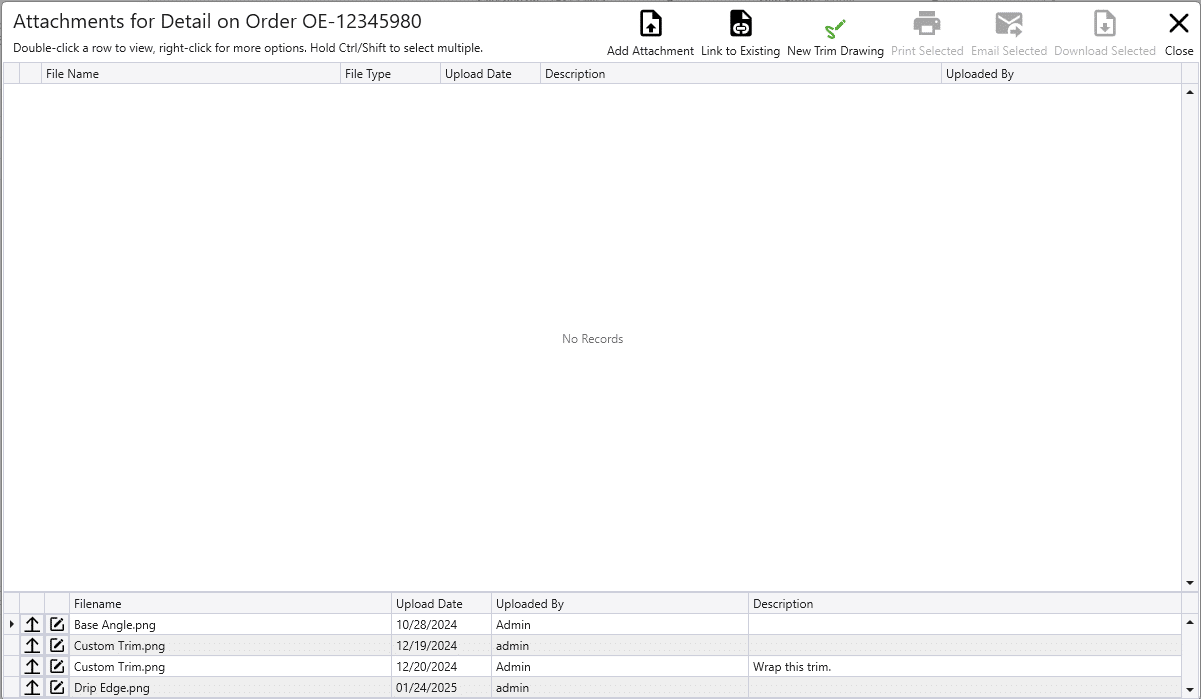
Selecting the attachment button on a special trim line will allow the user to select a favorited trim here as well.
More
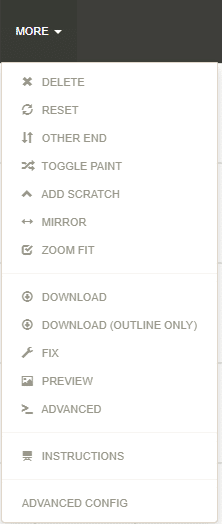
- Delete – Select a line or bend to delete.
- Reset – Reset the drawing to nothing.
- Other End – Draw from or mirror the other end of the sketch.
- Toggle Paint – The colored side is the painted side. This will switch it to the other side.
- Add Bead – Click a leg to add a bead to it. Paradigm will prompt for an amount of beads to be entered.
- Mirror – Create a mirrored duplicate attached to the active end.
- Zoom Fit – Fit the trim to the drawing area.
- Download – Download a PNG file of the drawing.
- Download (Outline Only) – Downloads a PNG file of the drawing that is only the outline.
- Fix – View in fixed mode. This is helpful for pieces with a combination of long and short sections. Note that when in fix mode, the drawing will be saved as it is on the screen. Make sure it is entirely visible, it can be adjusted by right clicking and dragging, using the arrow keys, and the zoom buttons.
- Preview – View what the saved drawing will look like.
- Advanced – A string can be entered that was generated by a previous drawing, or the string from this drawing can saved to use later.
- Instructions – This is a window that will display explanations for the different features.
- Advanced Config – Only available from the Drawing Admin.
Advanced Config
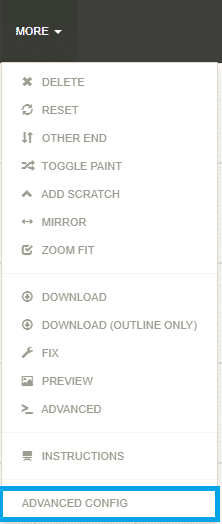
To open the “Advanced Config”, click the “More” dropdown:
Settings
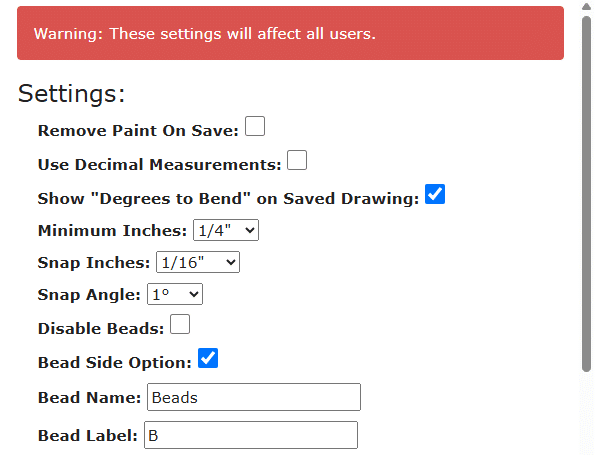
- Remove Paint On Save – Does not show paint line on the saved drawing, just the paint-side arrows.
- Use Decimal Measurements – Save drawings with decimal measurements. (0.5″ instead of 1/2″)
- Show “Degrees to Bend” on Saved Drawing – Shows the degrees to bend (exterior angle) when enabled.
- Minimum Inches – Minimum leg length allowed.
- Snap Inches & Snap Angle – The minimum allowed values for each field.
- Disable Beads – Disables adding beads.
- Bead Side Option – Adds an additional prompt when adding beads, to choose the side of the trim the bead should be placed on.
- Bead Name – Sets the name in the “More” drop down.
- Bead Label – This will be used on the drawing as the text indicating where the bead should be placed.
Hems
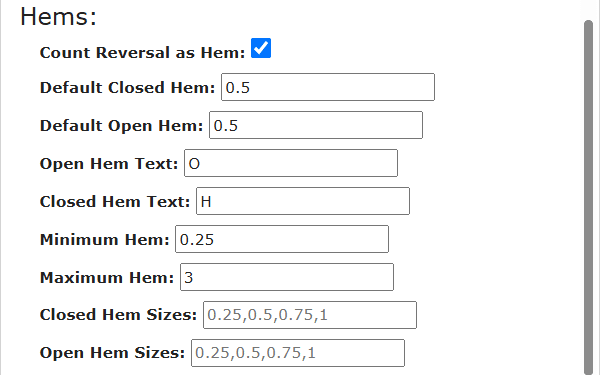
- Count Reversal as Hem – Counts a reversal as a hem.
- Default Closed Hem – Default length for a closed hem.
- Default Open Hem – Default length for an open hem.
- Open Hem Text – Open hem text shown on the drawing.
- Closed Hem Text – Closed hem text shown on the drawing.
- Closed & Open Hem Sizes – A list of allowed hem sizes, in decimal, separated by commas.
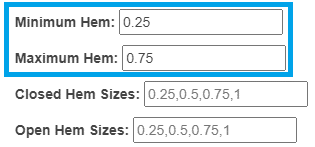
- Minimum and Maximum Hem – If hem sizes are not specified, the minimum and maximum hem field will be shown.
Min and Max Size
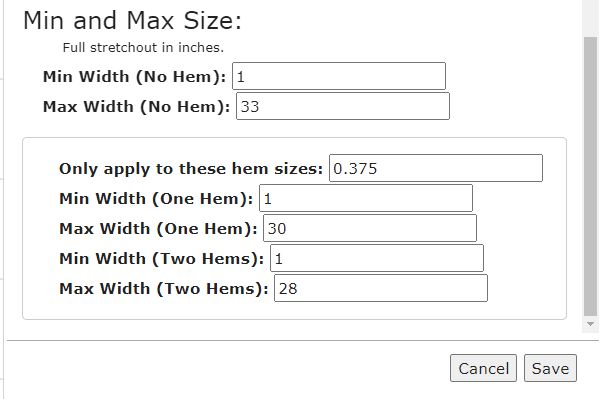
Set the minimum and maximum sizes based on the full stretchout in inches. This is to prevent a case like having a 60″ stretchout drawing for a 42″ coil. Only actual hems count, does not include reversals.
- Min Width (No Hem) – The minimum width for a drawing with no hems.
- Max Width (No Hem) – The maximum width for a drawing with no hems.
- Only apply to these hem sizes – Only applies the min and max widths to trims that include a hem of the listed sizes.
- If the trim does not have a hem that is the same size as the ones listed, the “No Hem” minimum and maximums will apply.
- For example if the listed hem sizes are 0.375 and 0.5, but a 1″ hem is used, the “No Hem” min and max will be used.
- Min Width (One Hem) – The minimum width for a drawing with one hem.
- Max Width (One Hem) – The maximum width for a drawing with one hem.
- Min Width (Two Hems) – The minimum width for a drawing with two hems.
- Max Width (Two Hems) – The maximum width for a drawing with two hems.
Contents
Categories
- Purchase Order and Vendors (19)
- Production (34)
- Order Entry and Customers (75)
- NEW! (6)
- Job Costing (16)
- Inventory and Pricing (92)
- General (54)
- Fulfillment Pro (29)
- Dispatching (23)
- Administration and Setup (39)
- Add-Ons and Integrations (29)
- Accounting (51)

