- Home
- Inventory and Pricing
- How To Add Locations To A Warehouse
How To Add Locations To A Warehouse
This FAQ will go over how to add a location to a warehouse and assign a product to that location?
Warehouse locations can be used to provide more detailed stocking location information for a given item. This will allow Bill the New Employee to find a bucket of roofing cement in 15 minutes. This is still much slower than George (a veteran of 15 years) who can find that bucket in 3 minutes flat with his eyes closed but far better than the 35 minutes it would have taken Bill without this information. To track even more detailed stocking location information, considering adding the shelf management feature.
Warehouse locations can also be thought of as “Product Type” groupings. They are used primarily in two places, Pick Tickets and Fulfillment Pro. Pick tickets group each warehouse location together to help make gathering the items more efficient – all the items from a certain location are listed sequentially on the report. Fulfillment Pro builds on this idea by having filtering options by warehouse location, so the employee can filter their list to just items that are their responsibility.
Adding Locations
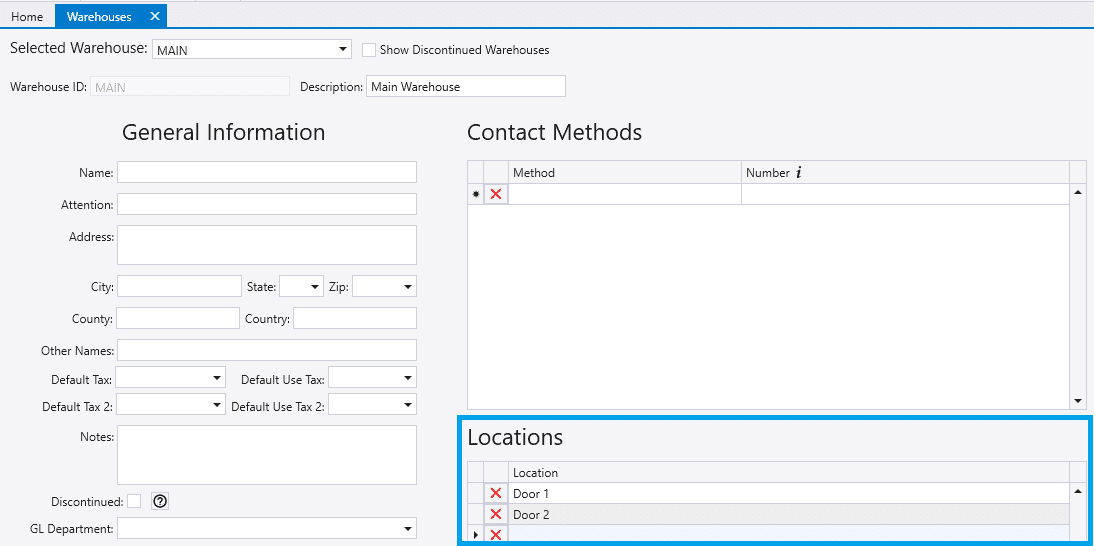
Go to Inventory > Inventory Settings > Warehouses

Then fill in the locations.

Add a Product to a Warehouse Location
1. Go to the inventory tab and find the item.
2. Then click on the Warehouse Stock tab
3. Select the location from the dropdown for the corresponding warehouse.

Contents
Categories
- Purchase Order and Vendors (19)
- Production (34)
- Order Entry and Customers (75)
- NEW! (6)
- Job Costing (16)
- Inventory and Pricing (92)
- General (54)
- Fulfillment Pro (29)
- Dispatching (23)
- Administration and Setup (39)
- Add-Ons and Integrations (29)
- Accounting (51)
