How to Discontinue a Batch of Items
To discontinue a batch of items, they must first have their stock set to zero. Once that is done, a list of those items on an excel sheet must be imported in a format that sets them to discontinued.
Inventory Adjustment
First, check and make sure there is no received quantity for the items that will be discontinued.
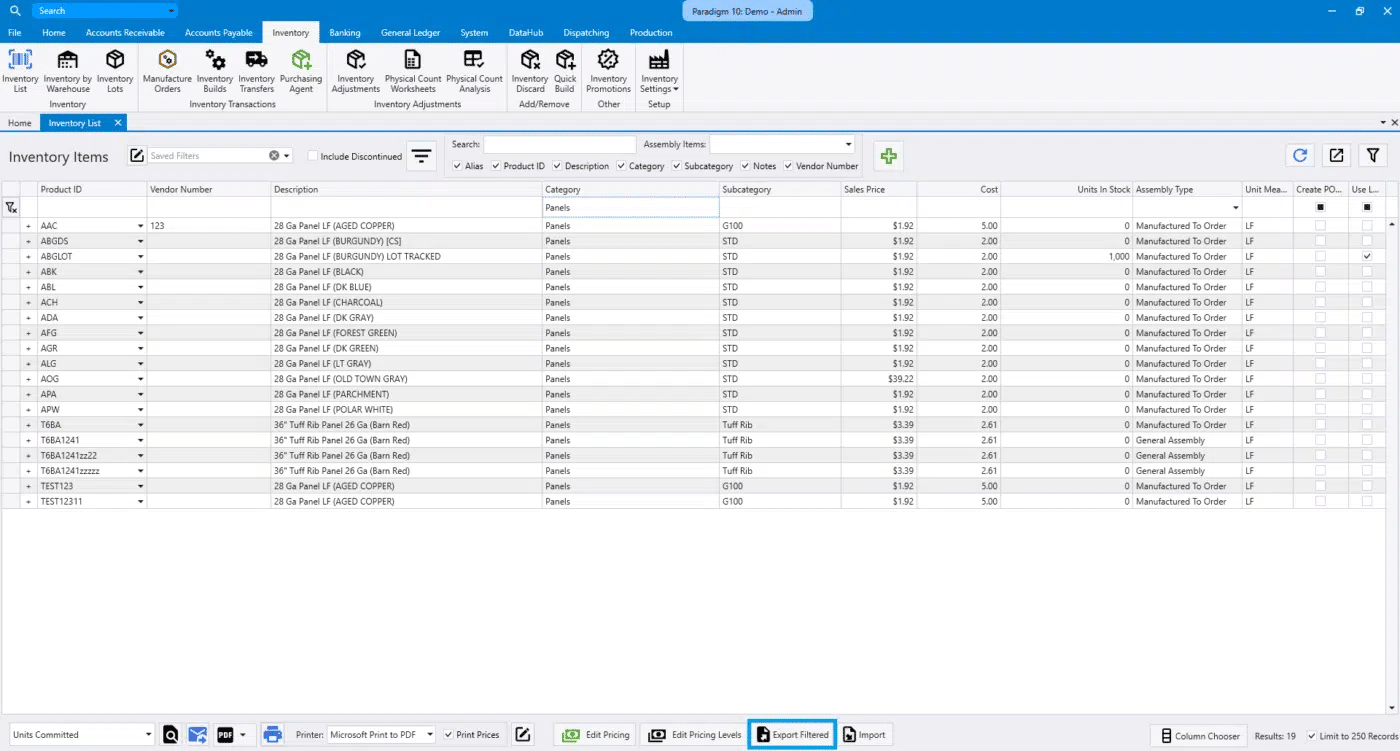
Then, go to Inventory > Inventory List and filter the list down to the products to be discontinued. Then export the product ID column, more information on exporting can be found here: Inventory Import & Export
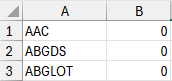
Remove the column headers and add a column with a 0 in each row, as shown below.
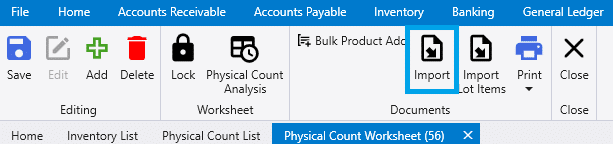
Then create a new physical count worksheet and import the worksheet. More information on importing Excel sheets can be found here: Excel Imports On Physical Count Worksheets
Once the file is imported, complete the rest of the physical count process and post the inventory adjustment. More information on that can be found here: How to do a Physical Inventory
Discontinue Import
Once the inventory has been adjusted, open the excel sheet and add a column header for the product IDs called “strProductID”. Then in the second column, label the header as “ysnDiscontinued”, and then put a “1” in those rows like the example below.

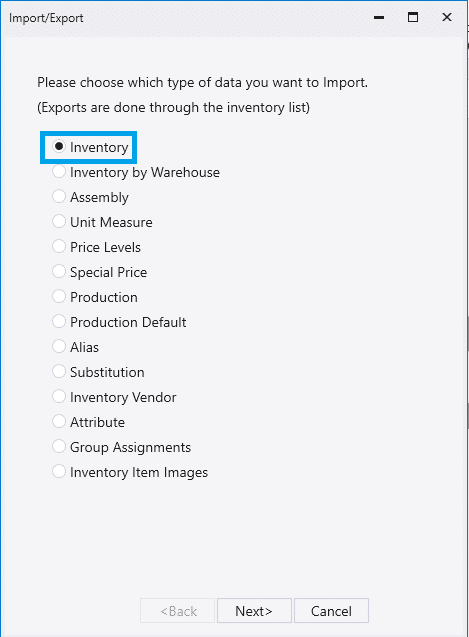
Once that has been completed, save the excel file. Then go to Inventory > Inventory Settings > Inventory Import
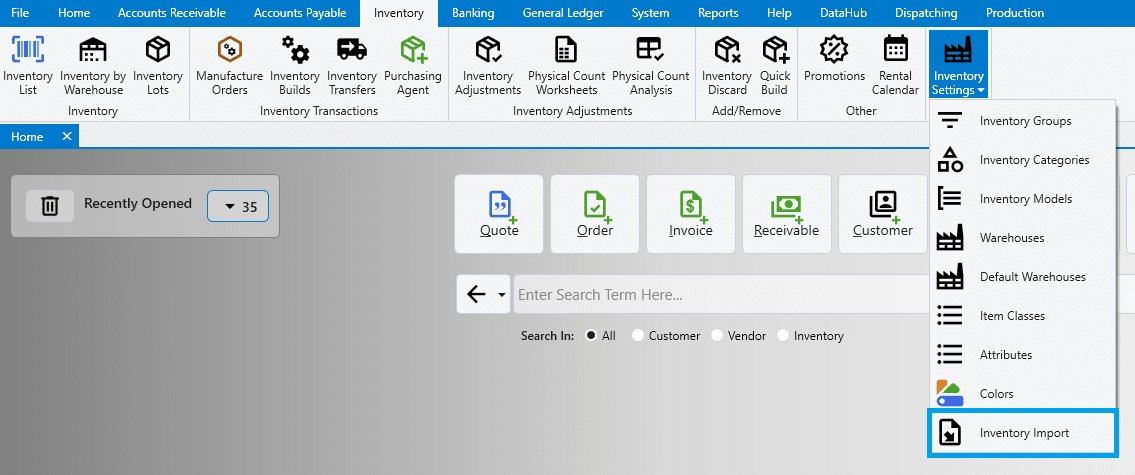
Then choose “Inventory”.
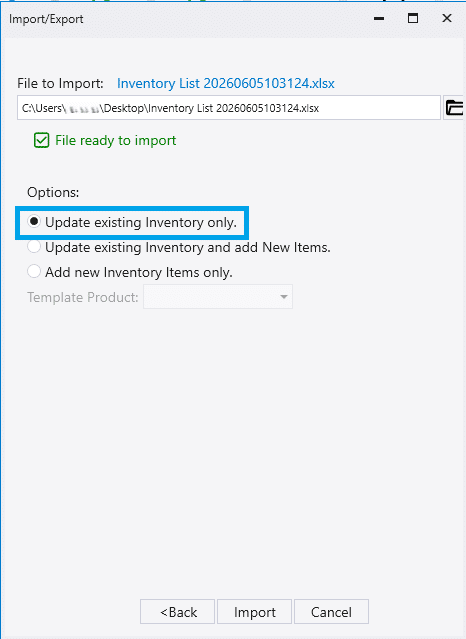
Then choose the file and select “Update existing Inventory only.”
After that, check a few items to ensure that they are marked as discontinued.