Import New Profiles
This FAQ will go over how to add new trim profiles in Paradigm.
Export Template Items
- To add a new trim profile, start by filtering the inventory list to an existing profile that has the same availability and pricing as the new profile. Information from the template items will be used on the new items, unless new information is specified on the import sheet.
- More information on importing and exporting in Paradigm can be found here: Inventory Import & Export
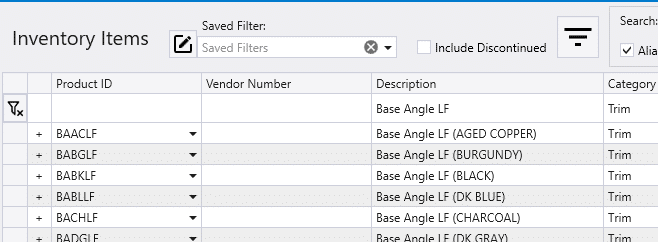
- After the list is filtered, click the “Export Filtered” button at the bottom of the list.

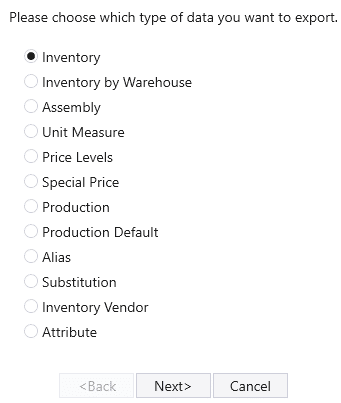
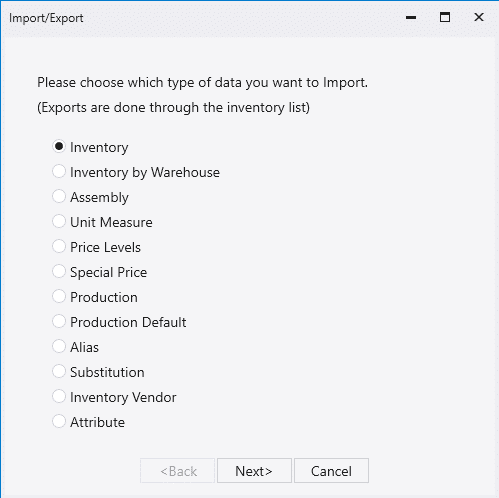
- Choose Inventory and click “Next”.
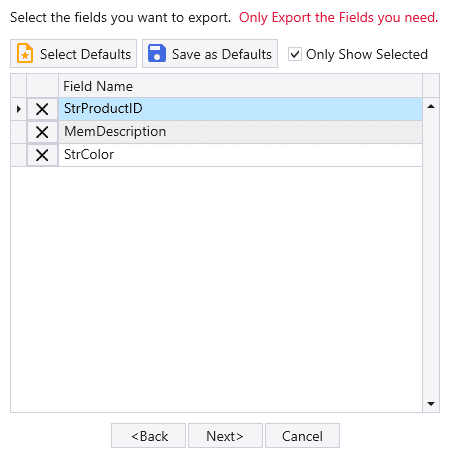
- The following fields are required: strProductID and memDescription. Any other fields that need to be adjusted can be selected as well.
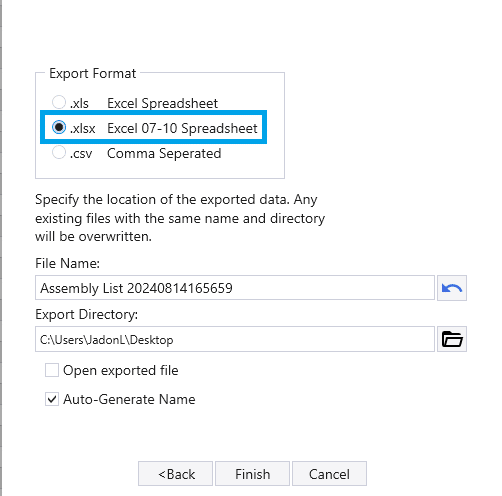
- After that select “.xlsx” as the export format and click “Finish”.

Item Import Sheet Changes
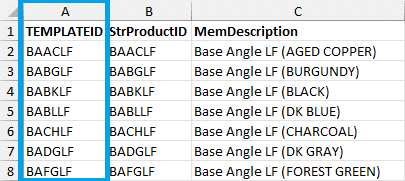
- The first step to prepare the sheet for import, is to create a new column called “TEMPLATEID” and copy the exported IDs into that column. Paradigm will use these columns as a “Template” item when importing. If a row in the TEMPLATEID column is left blank, the template item selected during import will be used.
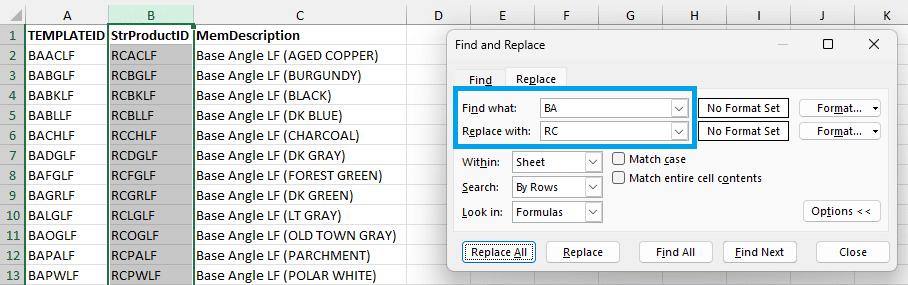
- Next, highlight the “strProductID” column and use the Find and Replace feature in Excel (Ctrl + H).
- In the “Find what:” field, enter the existing abbreviation.
- In the “Replace with:” field, enter the new profile abbreviation and click “Replace All”.
- In the example below the Base Angle abbreviation (BA) was replaced by the new profile, Ridge Cap (RC).
- Be sure that the new abbreviation is not already be used in Paradigm, and that the new IDs do not match with any product IDs in Paradigm.
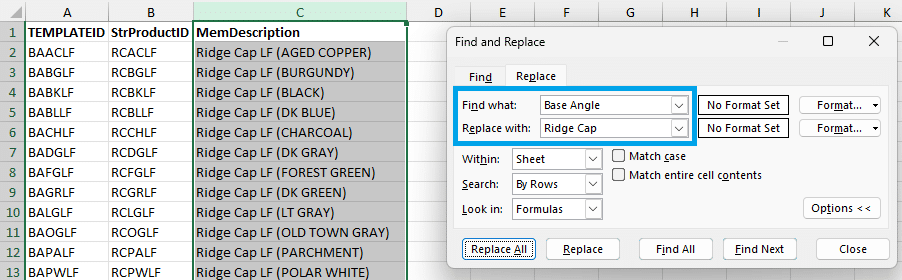
- After that, highlight the “memDescription” column. Then use the Find and Replace feature again to replace the existing profile (Base Angle) with the new profile (Ridge Cap).
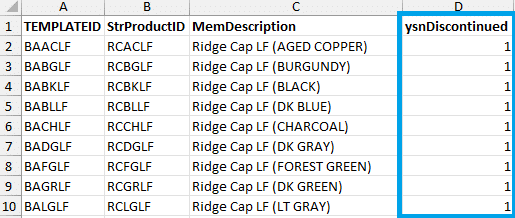
- The final step is to make any other needed adjustments (sales price, cost, etc.), and then add a column called “ysnDiscontinued” and set it to “1” for every row.
- This sets the items as discontinued and will prevent the items from being used before the set up is completed.
Import Into Paradigm
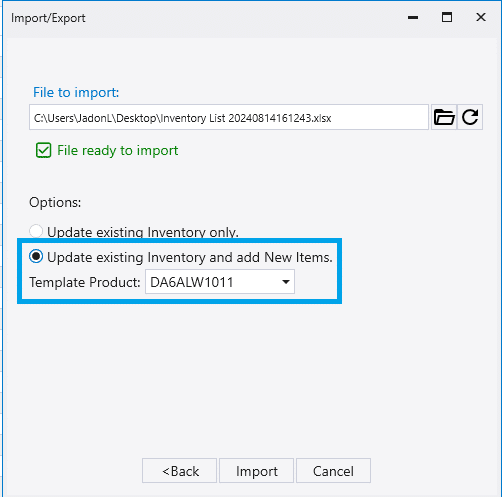
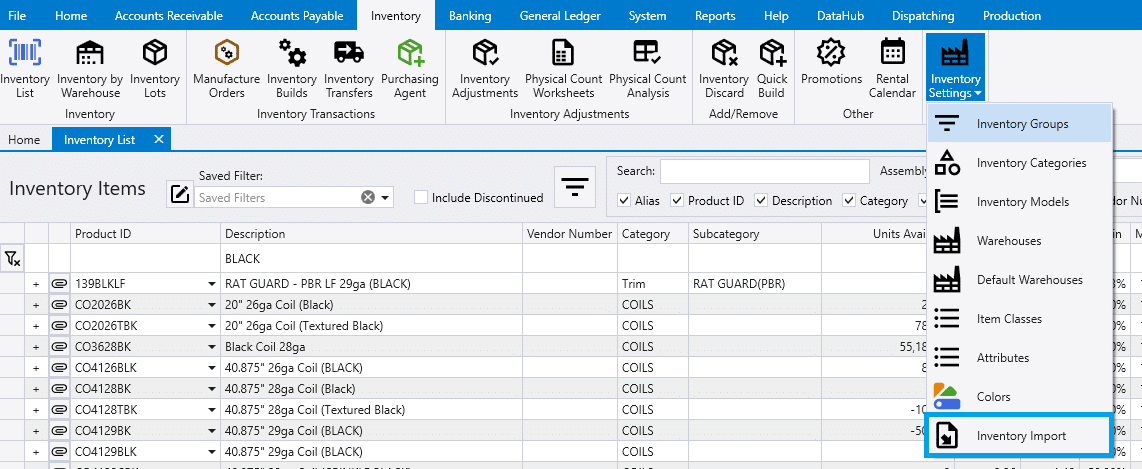
- Once the changes are complete, save the sheet and close it. Then go to Inventory > Inventory Settings > Inventory Import

- Choose Inventory and click “Next”.
- Then select the file and choose “Update existing Inventory and add New Items.”.
- The template product can be set to any product ID, as the template item will be used from the “TEMPLATEID” column on the sheet.
Update The Assembly Components
After the items are imported, the assembly on the new items will need to be updated for the new profile since the imported items used the assembly information from the template items.
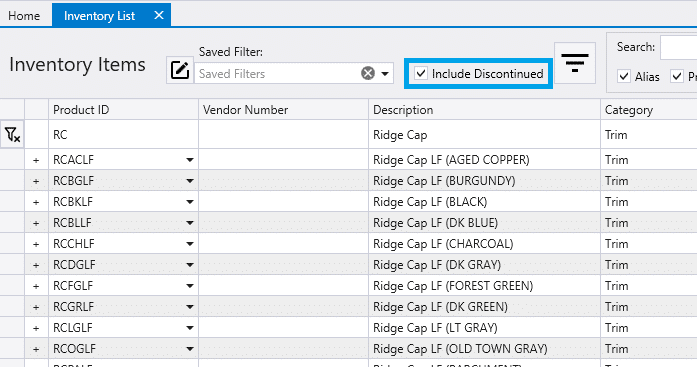
- To do this, start by filtering the inventory list to the new profile items.
- Be sure to check the “Included Discontinued” checkbox.
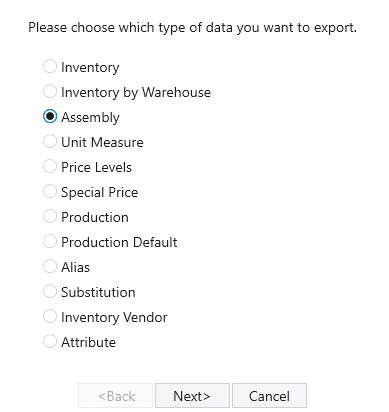
- After the list is filtered, click the “Export Filtered” button at the bottom of the list.
- Choose “Assembly” and then click “Next.
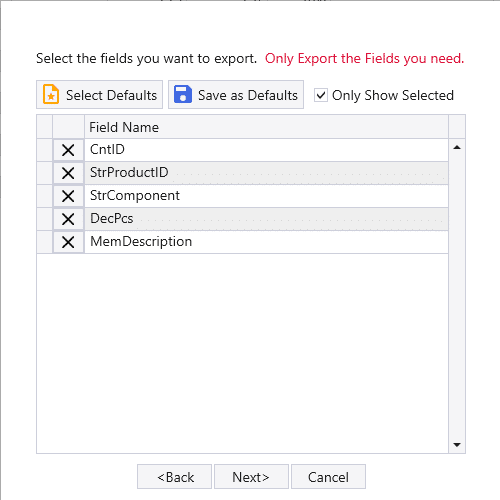
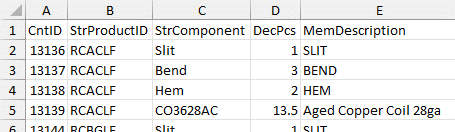
- The following fields are required: cntID, strProductID, strComponent, memDescription, and decPcs.
- After that select “.xlsx” as the export format and click “Finish”.
Assembly Import Sheet Changes
- Open the exported sheet and update the Pcs of the coil component to be the correct width of stretch out for the new trim profile.
- Also, be sure to update the Pcs for the bends and hems items as well if necessary. This can be done easily by filtering, see this link for more information: Filtering Data
- Once the changes are complete, save the sheet and close it. Then go to Inventory > Inventory Settings > Inventory Import
- Choose “Assembly” and click “Next”.

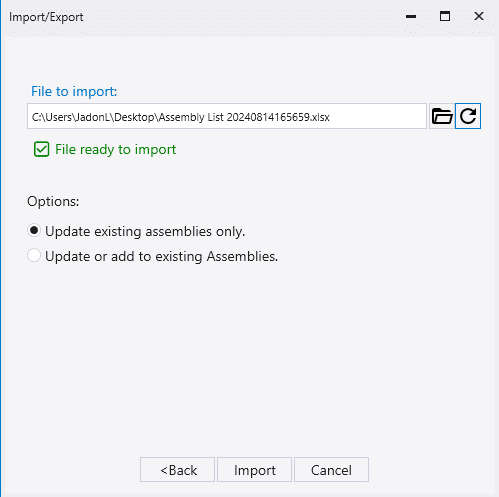
- Then select the file and choose “Update existing assemblies only”.
Set As Non-Discontinued
- Once the components are updated, the items can now be “un-discontinued“.
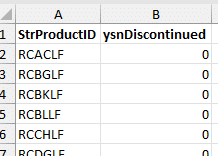
- To do this, use the list of new product IDs in a sheet and add a column called “ysnDiscontinued” and set it to “0” for every row.
- Then import that into Paradigm to complete the new profile import.