- Home
- Inventory and Pricing
- Lot-Based Inventory (Track Coil Inventory By Coil ID)
Lot-Based Inventory (Track Coil Inventory By Coil ID)
This FAQ will cover how to use lot-based inventory in Paradigm.
Setting an Item to Track Lots
The first step to start tracking lots on your inventory is to set the item in Paradigm to track lots. Go to the detail tab of the product, and check the box beside “Use Lots”.

This can only be done when the the stock is 0 on that product for all warehouses. If there is stock, use an inventory adjustment to remove it before setting the product to track lots.

Then use a second inventory adjustment to bring the stock back into the product.

Before posting it, click the box icon highlighted above to assign the inventory to lots.

Costing Method
Costs can be calculated one of two ways for lot-based item: Average cost across all inventory in that product, or FIFO based for just the selected lot. This can be set on the items general tab. Selecting FIFO will make the cost that posts when a lot is used to match the cost at which the product was posted. If this is not needed, select “average cost”. Do note that average cost is not based on just the selected lot, it is based on all of stock in the product, regardless of lot. More information on cost methods can be found here: Cost Methods

Creating a New Lot
When creating a new lot, four fields are shown that are designed to record information about lot-tracked coils.

These fields are length (in feet), width (in inches), weight (in pounds), and grade. Production can use these measurements in the “Quick Adjust” form to assist with calculating new coil weights when slitting one coil into another coil. Additionally, each lot has a place for notes that will appear anywhere the lot is selected to be used.
Using Lots
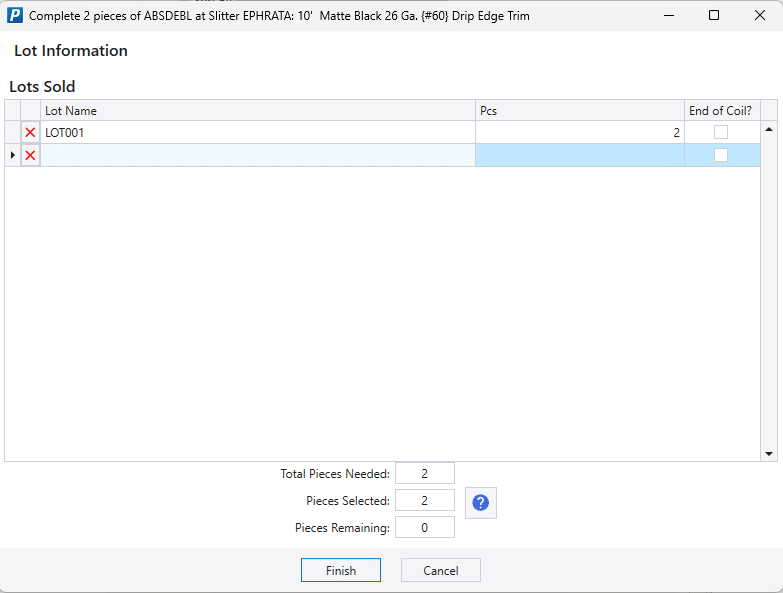
After setting an item to track lots, every sale, purchase, or use of that item will require a lot to be defined. Learn more about defining lots on this FAQ: Lot Selection Form on Orders. If lots have not been defined, posting that transaction will be disallowed until lots have been entered. When adding inventory to stock, an existing lot can be selected to add inventory to that lot, or a new ID can be entered to create a new lot. When selling inventory, an existing lot will need to be selected.
Physical Inventory
When doing an entire physical inventory on a lot-tracked item, a physical count worksheet can be used. These lines will be summarized into a single line on an inventory adjustment through the physical count analysis, but the line will not be editable on the adjustment due to data constraints. Adjustments can also be made manually for lot-tracked items, with one lot going on each line (just be sure to edit the “Quantity Diff” column instead of “New Qty” when adjusting more than one lot.)
Production
Production will require the user to enter the lot ID used if they produce an item out of a lot-tracked component (or if they produce a lot-tracked item, they will be prompted to create a new lot ID), for example, when they produce a trim out of a lot-tracked coil. They can also be assigned using the Coil Assignment Tool.

If the machine in production is already set to prompt for coil information, the coil information popup will be bypassed if the item tracks lots, instead only giving them the popup for lot ID.
Lot Depletion
Throughout Paradigm and Production, every place that records lot usage has a checkbox for “depleted” or “end of coil”.

This checkbox is used to record when a coil or other lot item is completely used, but some inventory still shows on that lot in Paradigm. This can commonly happen on coils, due to waste, manufacturing mistakes, variations in coil thickness, etc. Marking an item as “depleted” will cause it to show up in the lot depletion form, which is accessed through the “Lot Depletion” button on the inventory adjustment form.
This form allows the lots to be adjusted to 0 easily to keep inventory correct in Paradigm. Do note that a lot depletion is only needed if the stock does not equal 0 at the end of the lot. Additionally, large differences should be investigated to check for assembly issues or other preventable mistakes.
Adding Depleted Lots to an Inventory Adjustment
To adjust depleted lots to zero, go to Inventory > Inventory Adjustment and click on “Lot Depletion” in the header.

From there, select the lots to adjust to zero and click “Add Lots” to add them to the inventory adjustment.

Lot Management
Lots can be managed by going to Inventory > Inventory Lots

From here, enter the Product ID of the lot tracked item, and it will bring up a list of its lots. Clicking on a lot will show a list of the transactions it was used for in the section on the right.

Contents
Categories
- Purchase Order and Vendors (19)
- Production (34)
- Order Entry and Customers (75)
- NEW! (6)
- Job Costing (16)
- Inventory and Pricing (92)
- General (54)
- Fulfillment Pro (29)
- Dispatching (23)
- Administration and Setup (39)
- Add-Ons and Integrations (29)
- Accounting (51)
