- Home
- Inventory and Pricing
- Custom Options
Custom Options
Model options are all designed to prevent the user from needing to create a new product code for products that have very few differences from another product. They also allow standardization of data entry for non-stock products that have many attributes that need to be specified. Information on machine options can be found here: Machine Options
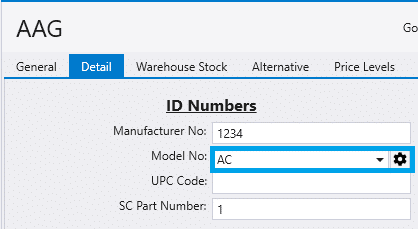
If model options are going to be used, the ‘Model Options’ field should be added to most forms (see Changing Form Layouts).Items are assigned to particular models by selecting a model in the item’s ‘Detail’ tab. New models can be created by selecting the gear icon.
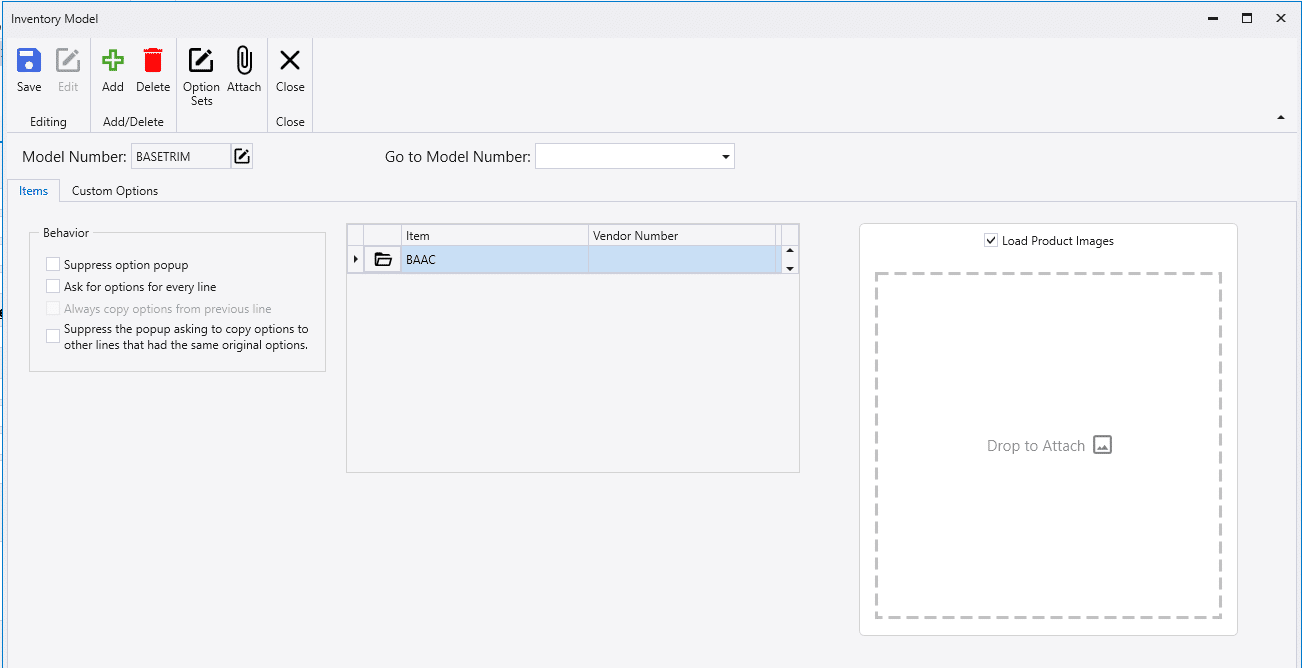
From there, new models can be added or deleted. The settings for how often the model options appear are here too.
These options cannot be used to alter an item’s assembly. The same components will be used to create the product no matter what options are selected. For example; custom options may be used to specify a list of available colors for a panel that is special ordered, but they cannot be used to specify a list of available colors for panels that are produced as each color of panel needs to take stock out of a different coil code.
Creating Custom Options
Custom options can be created or deleted from an item’s detail tab by clicking on the gear icon beside the model number.

Then go to the custom options tab. Here the custom options can be created, edited, and deleted.

- Sort – The order the options will appear on the list.
- Option – The name of the custom option when it appears on the list. Each option name must be unique per warehouse. (the same ID could be used twice if on separate warehouses.)
- Description – A description of the custom option
- Option Set – A set of all the values allowed for that option. If no option set is given, the value will not be limited to any list. Info on creating option sets can be found below.
- Default Value – The default option that is applied from the option set.
- Warehouse ID – The warehouse ID option will be available from.
- Tag to Replace – A value that will get replaced with the actual option value selected by the user, anywhere the tag appears in the description. For example “Product Color: [COLOR]” would become “Product Color: Blue” if the user selected “Blue” as the option value.
- The line will be highlighted in red if no products that use this model option have the tag in their descriptions and orange if some of the items are not.

- Format – The format that the option sets are in. The format options are: text, integer, decimal, or date.
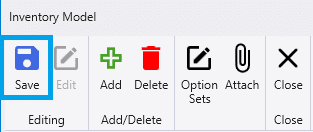
Once that has been filled out, click the “Save” button and those custom options will now appear for that model.
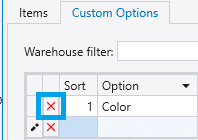
To delete a custom option from the list, click the red “X” beside it.
The behavior for the model option can then be set.
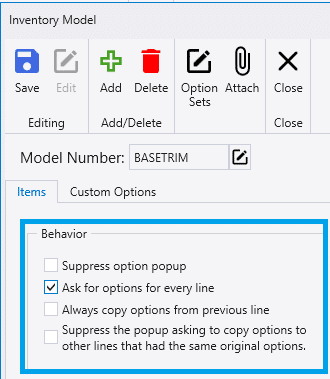
- Suppress option popup – A popup will not appear when the item is added to an order, but the options can still be accessed by clicking on the icon beside the description.

- Ask for options for every line – This will bring up the popup in the description every time the item is added to an order.
- Always copy options from previous line – This can only be selected if the “Ask for options for every line” check box is selected. This will still bring up the popup and it will fill in the option that was selected for the previous line.
- Suppress the popup asking to copy options to other lines that had the same original options – This will suppress the pop up asking to copy options to other lines that had the same original options, when the selected option is being changed on a line.
Using Custom Options
Custom model options can be set when entering a line on an order or a quote. A pop up will appear depending on the behavior settings that were set when the options were created. From here, just select the value from the list and click accept.

Then the dollar adder will be applied and the description will change to the value selected if the place holder was added like below.

Creating Option Sets
Option sets can be created by clicking on the “Option Sets” button from the model creation window.
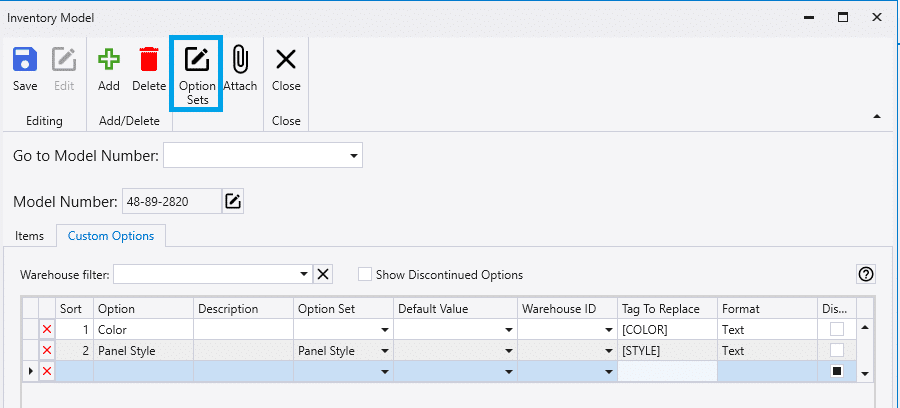
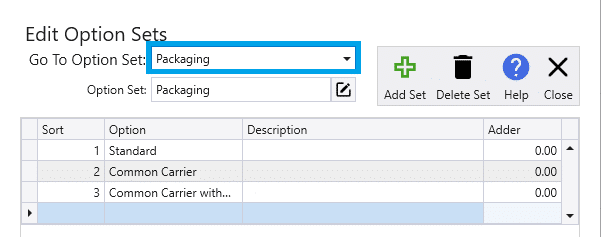
- First name the new options set in the “Option Set” box.

- Then type in the options, description, and dollar adder if needed. This is can be something like a list of colors or a Yes/No. Once that has been filled out, click “Add Set”.

- To edit an existing option set, select it from the “Go to Option Set” dropdown.
Common Use Cases
Pitch
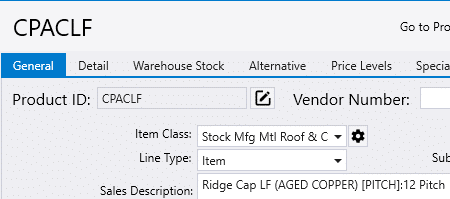
One way that custom options are commonly used is for pitches, so that it can be specified at the time of the order. The pitch will then be displayed in the description so that it can be produced according to what the customer needs.
To start, create or use an existing model number. Then go to the “Custom Options” tab and set the default value to 4 (Most pitches are 4:12), choose a tag to replace in the description, and change the format to “Integer”.
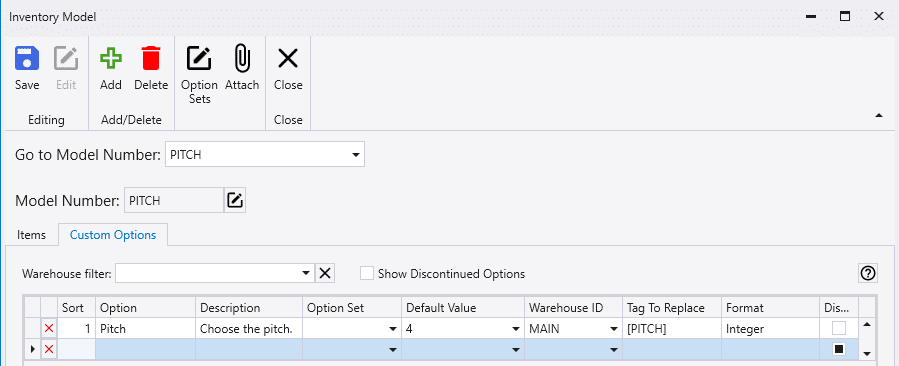
Edit the sales description by adding the tag and putting “:12 Pitch” beside it, like the example below.
Reverse Run
Another way that custom options are commonly used is for reverse run panels, so that it can be specified at the time of the order. “(Reverse Run)” will then be displayed in the description so that it can be produced according to what the customer needs.
To start, create or use an existing model number. Then go to the “Custom Options” tab and choose a tag to replace in the description.
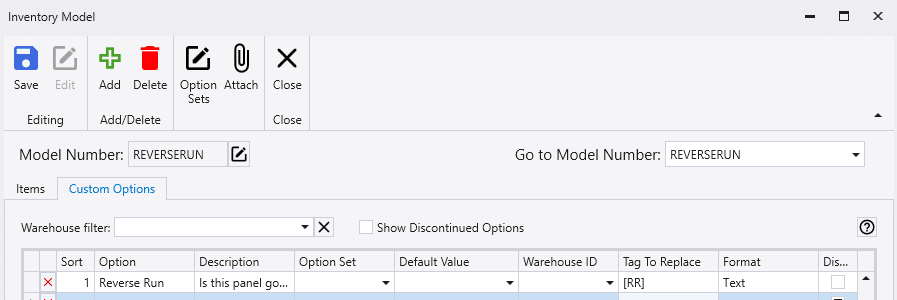
Then create an option set to choose “(Reverse Run)” and set a dollar adder if needed.

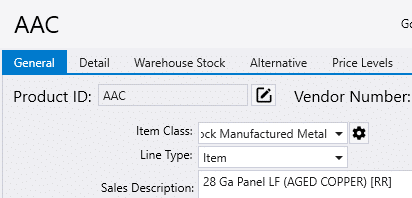
Edit the sales description by adding the tag, like the example below.
Contents
Categories
- Purchase Order and Vendors (19)
- Production (34)
- Order Entry and Customers (75)
- NEW! (6)
- Job Costing (16)
- Inventory and Pricing (92)
- General (54)
- Fulfillment Pro (29)
- Dispatching (23)
- Administration and Setup (39)
- Add-Ons and Integrations (29)
- Accounting (51)
