Purchasing Agent and Reorder Points
Reorder points, quantities, and users can be defined for each stocked item in Paradigm to allow for faster reordering using the Purchasing Agent form. This can also be used for manufacturing items to create manufacture orders for stock. This how-to will cover how to set items up to be reordered and how to use the Purchase Agent form.
Setting Items to be Reordered
To begin, open a stocked inventory item and go to its warehouse stock tab. More info on the inventory count columns in the warehouse stock tab can be found here: Inventory Count Columns. Enter a buyer, reorder point, reorder quantity, and optionally a maximum quantity. These fields are only editable if “Keep Stocked” is checked for the warehouse. When the stock is at or below the reorder point, the item will show in the purchasing agent to purchase the reorder quantity of that product. It is also very helpful (though not required) to set a default vendor on the item as well.
The maximum quantity field controls the max total inventory, not the max per PO, and allows the reorder quantity to be limited. Maximum quantity is only used if the Max Quantity – Stock – On Order + Committed reorder option is selected.

Using the Purchasing Agent
The Purchasing Agent can be found by going to Inventory > Purchasing Agent.

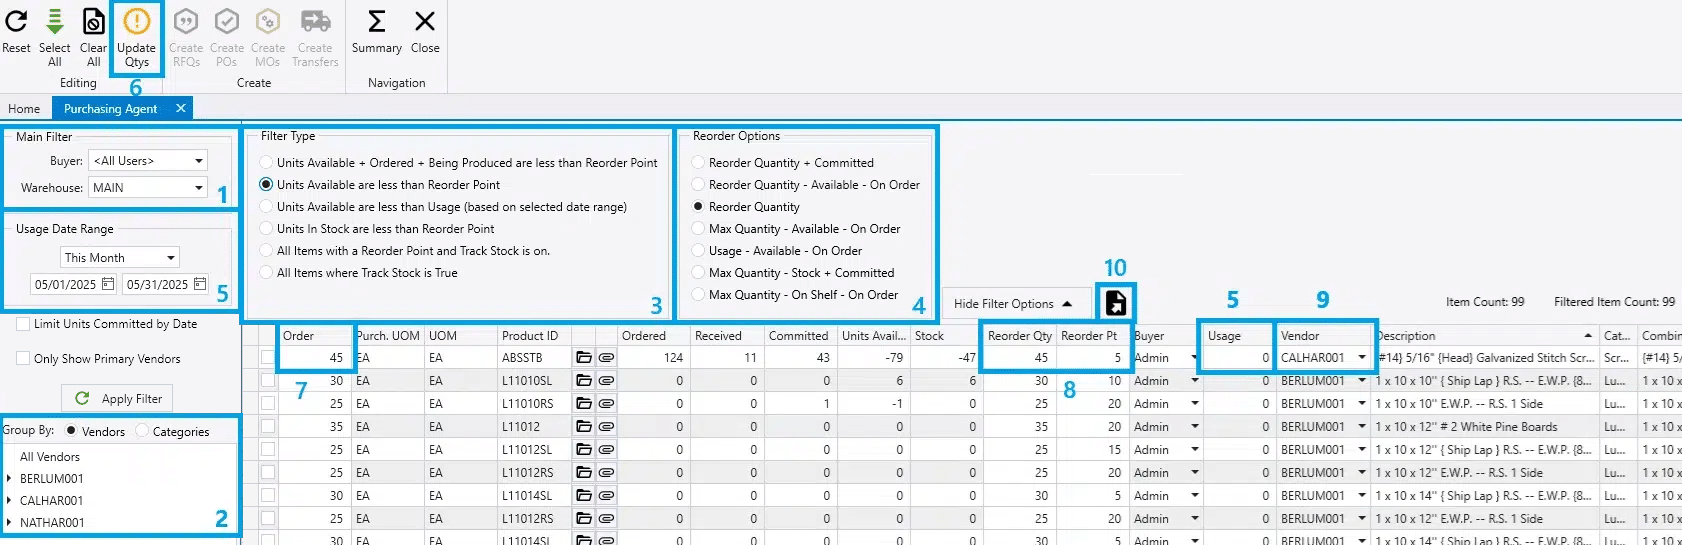
The purchasing agent form has many controls to allow you to create POs as efficiently as possible. Note that the column order can be controlled with via Custom Setup.
- To start, verify that the ‘Buyer’ name is set to the user’s products you want to see and select the warehouse for which you want to order product.
- You can then filter the list using the tree at the left by clicking on the section of items you wish to view, grouped either by inventory category or vendor.
- The list of items can be further filtered using one of the ‘Filter Type’ options at the top of the form.
- The quantity to order can be populated for all lines at once by using the ‘Reorder Options’ section at the bottom of the form.
- The ‘Usage’ column which shows how many of that product has been sold in a date range, is controlled with the date range filter at the top of the form.
- The ‘Update Qtys’ button can be used to recalculate all the Stock, Committed, and On Order quantities to verify them. When calculating this, it takes the actual number of units needed, and divides it by the purchase UoM. So if 12 units are needed, and they are bought by the bag of 10, it will put 1.2 units on the PO. Then decide which way to round the quantity before submitting the PO.
To select items to purchase, use the checkbox to the far left. This will trigger the ‘Order’ column [7] to be populated with the quantity that will be entered onto the PO. The Order quantity can be changed to adjust it for just this PO, or the reorder point/reorder quantity [8] can be adjusted to change what is stored on the item. The vendor to purchase the product from can be adjusted as well [9]. The export button can be used to export the purchasing agent list data [10].
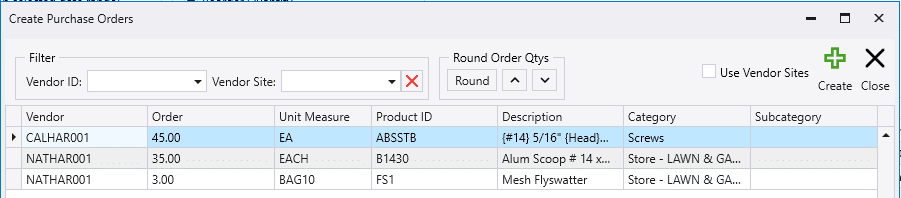
After selecting all of the items to order, click ‘Create PO’ or ‘Create RFQ’. Another prompt will appear to allow you to adjust any information that needs to be adjusted before creating the PO or RFQ. There will also be buttons to round the quantities up or down, as shown in the screenshot below.
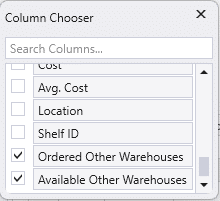
Ordered and Available Other Warehouses Columns
These columns will display the total units on order or units available at all warehouses other than the currently selected warehouse.

To display these columns, select them from the column chooser.
Alternate Vendors
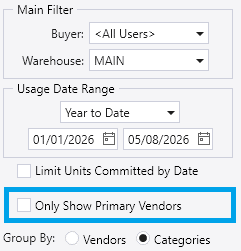
In purchasing agent, items with alternate vendors will show up in both lists of vendors, not just the primary one. If only the primary vendors are to be shown in the list of vendors, select the “Only Show Primary Vendors” option in the filters. More info on alternate vendors can be found here: Setting Up Alternate Vendors
Limit Units Committed by Date
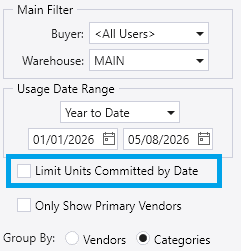
If the option for Limit Units Committed by Date is checked, the amounts for all calculations within the window are handled differently. The only orders that are factored into the values throughout the window for “Committed” are orders that fall within the dates specified by the selected date range.

Checking the box shows the start and end drop down boxes for selecting the date range. This can be useful if, for example, orders have been placed into the future, which affects the amount of inventory that’s committed.