How to Receive Inventory Items By Scanning Them
This FAQ will go over how to receive inventory items by scanning them. Once a shipment from a vendor has arrived, convert the purchase order for the shipment into a purchase invoice. In the header of the purchase invoice there is a scan button called “Scan Items”.

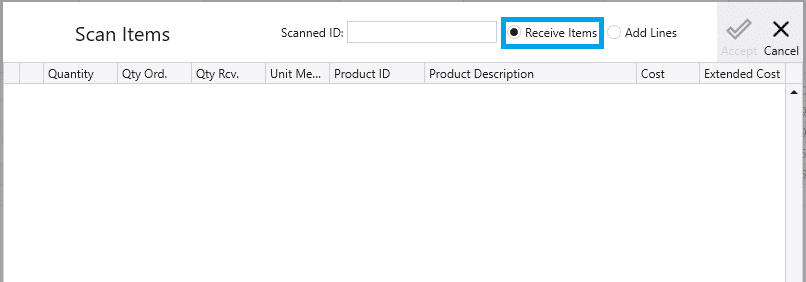
Receive Items
Clicking on this, will open this form and select the receive items checkbox, so that it can be used to scan the items that have arrived with the shipment.
Next scan the bar code on the item being received, and Paradigm will search through Product ID’s, Aliases, item UPC’s, and vendor numbers until it finds a match. In a case when Paradigm finds multiple matches, it will give a prompt to select one of the items from a list.
Once an item has been added to the list, focus is set back to the scan field to allow a user to scan one item after another without any intermediate clicks.
If there are several of a same item that was scanned, it will list them individually in the “Scan Items” window, but will add them together in the Purchase Invoice window. You can also manually enter a quantity as well on the line in the “Scan Items” window.
Once everything in the shipment has been scanned, click “Accept”, and everything in the list will be added to the purchase invoice as “Pcs Received”.
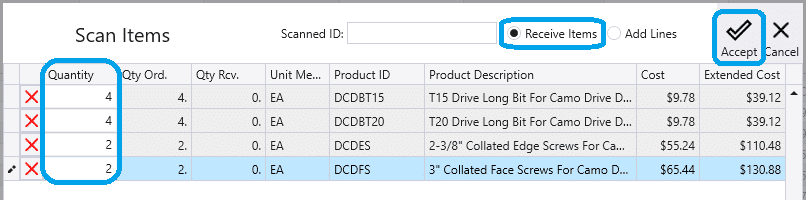

Note: The quantity entered onto the purchase invoice will be based on the units of measure. In the case that the bar code scanned is an alias of the product, the unit of measure will be the one assigned to that alias. Otherwise, this form will use the purchase unit of measure on the item. If neither exist, the sales unit of measure will be used.
Scanning in New Lines
New line items can be scanned in by checking the “Add Lines” option.
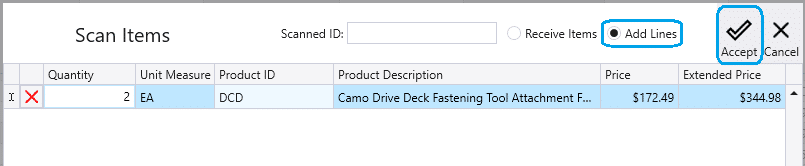
This will add the item on the purchase order once “Accept” is clicked.

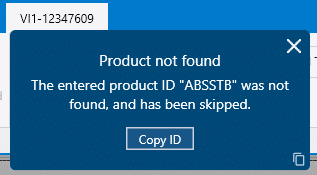
Possible Errors While Scanning
Scanning a Valid Product
While Receive Items is selected, the system is expecting the user to scan products that appear on the current vendor invoice. If a product is scanned that is a valid product, but does not match any item on the invoice, the system will display an error message: “The entered product ID was not found, and has been skipped.” This message indicates that the item cannot be received under the current transaction and must be resolved before continuing.
Scanning an Invalid Product
When an invalid product is scanned, an error message is shown in the scan dialog and the dialog is locked until the error is closed. Invalid means the scanned numbers or letters do not match any product ID, alias, or vendor product ID. While the error is active, focus is taken away from the scan field and the scan process is interrupted. Continuing to scan additional codes without pressing the cancel button will cause an error beep sound.
