
How do I take a Screenshot or Screen Recording?
This FAQ will show how to take a screenshot and how to screen record using Windows built-in app – Snipping Tool. This article was created on Windows 11 Version 25H2, future versions could cause minor differences.
Find Snipping Tool
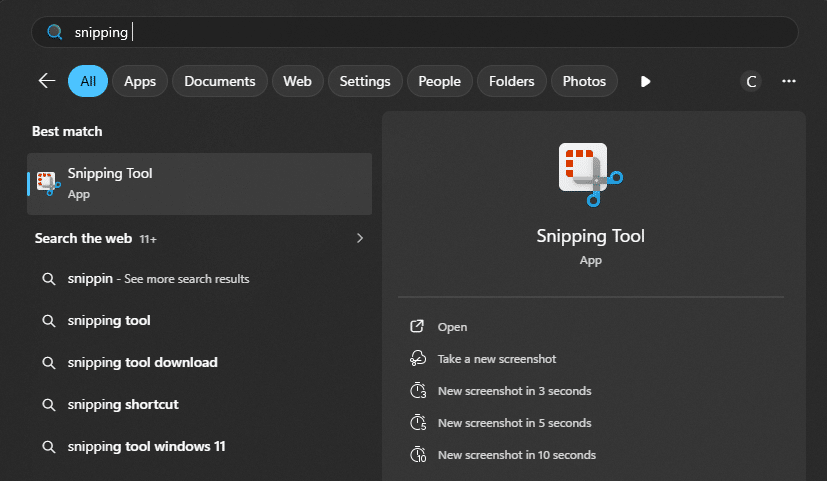
Snipping tool can be found by using the search feature from the windows task bar. If snipping tool was deleted from the workstation, it can be installed from the Microsoft store.

Screenshots
To take a screenshot, open Snipping Tool. Select screenshot mode with the camera icon. Selecting the dropdown will reveal four different modes.
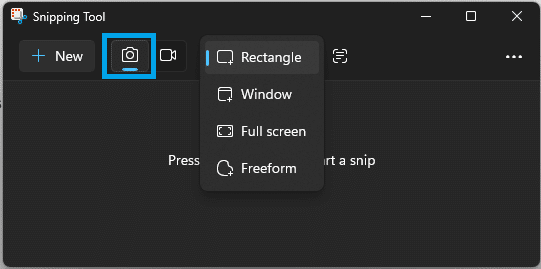
Alternatively pressing Windows Key + Shift + S will open the screenshot menu as if the New button was already selected.

Rectangle
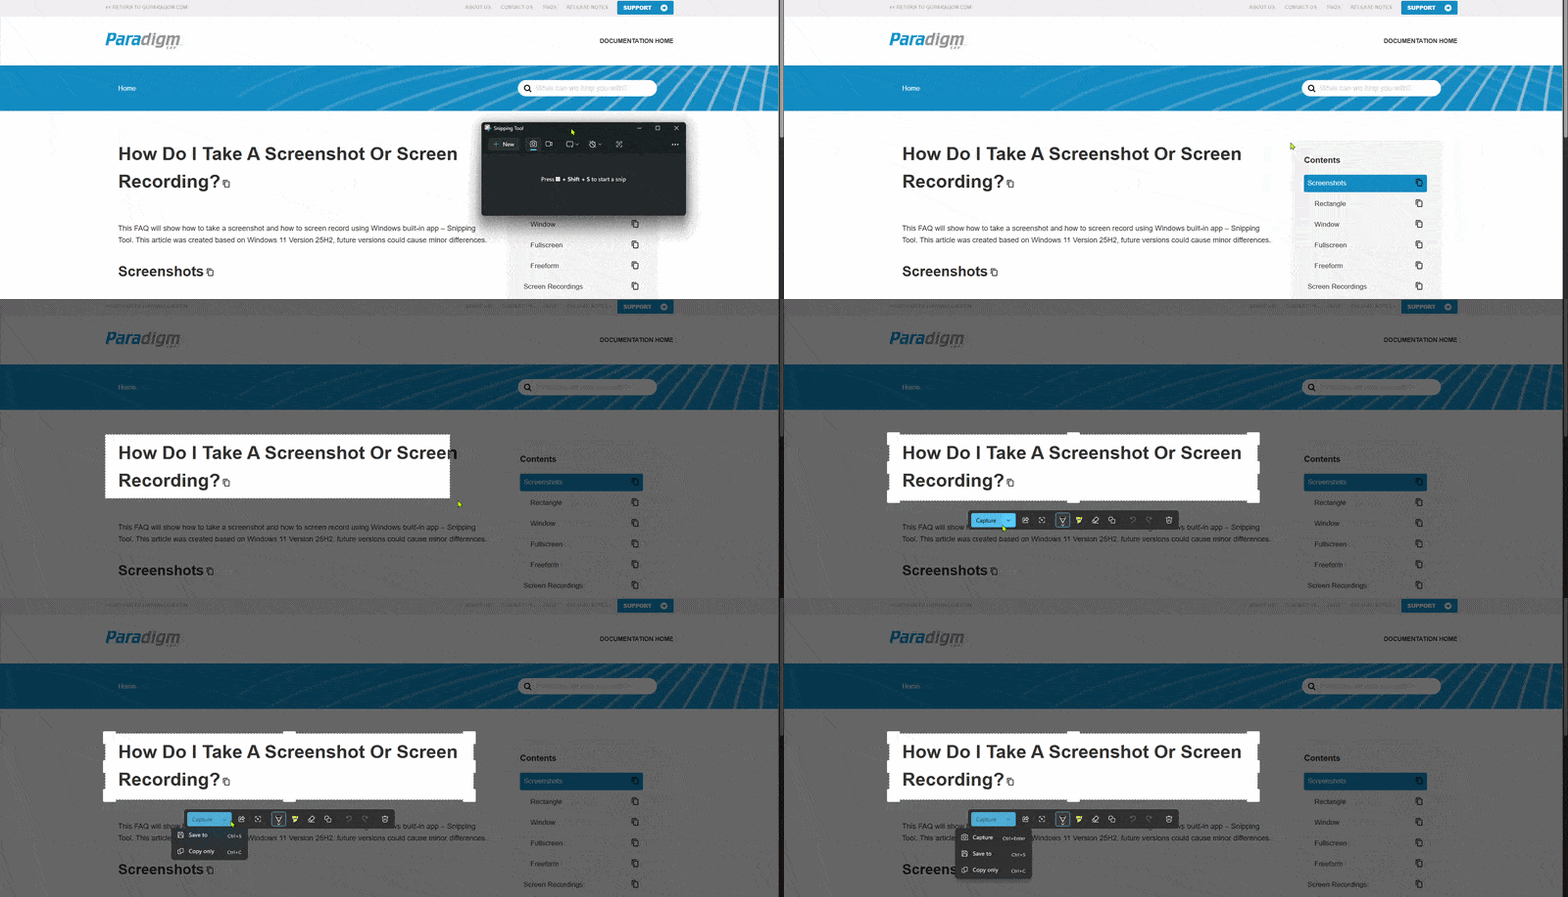
Rectangle is the default mode. When New is selected with the Rectangle setting, click and drag the area of the screen desired for the screenshot.
Window
Window is useful if there are multiple monitors/displays, otherwise it has no extra functionality to the full screen mode. Click on the window/display that the screenshot should be of. The full window will be included in the screenshot.
Fullscreen
Full screen mode will take a screenshot of all displays and monitors and stitch them together into one image. In the example below there are three monitors or “windows”, which are all stitched together for one image. The Window mode (explained above) would only be able to select one of these windows.

Freeform
Draw any shape with the cursor and and a screen shot of that shape will be created (Click Image for better view).

Save Options
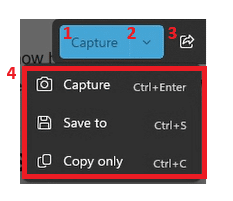
- Selecting
Capturewill copy the screenshot or recording to the clipboard and Save it to the default location in file explorer which can be changed in Snipping Tool Settings. - Selecting the arrow beside capture [2] will bring the dropdown [4]
- The
Share Iconwill bring up a list of applications or people that the file could be added to. Some examples would be email, messaging apps, and others. Windows will often suggest people you email or message frequently to share the file to. - When the arrow [2] is selected it will bring these three options
Capture– Saves the file to the default location in Snipping Tool Settings and also copy it to the clipboard.Save To– Triggers a file explorer pop-up to choose where the file should be savedCopy Only– Copies the file to the clipboard and nowhere else. If the device shuts down or restarts, it could be lost.
Screen Recordings
To take a screen recording select the video icon in the header. The only two modes for screen recordings are Rectangle and Window.
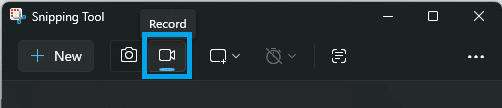
The keyboard shortcut for a screen recording is Windows Key + Shift + R .
Rectangle
Just like for screenshots, click & drag to determine the area which will be recorded.
Window
Again, just like for screenshots, select the window/monitor that should be recorded.
Starting & Ending
When the recording area has been selected, press the Start button when ready to begin. There will be a three second countdown before the recording begins. After the recording has been started the recording can be paused or stopped from the same place.

After the recording has been ended, unlike screenshots, this quick edit menu will pop-up. The normal snipping tools are found on the left side. Options unique to this page are detailed below.
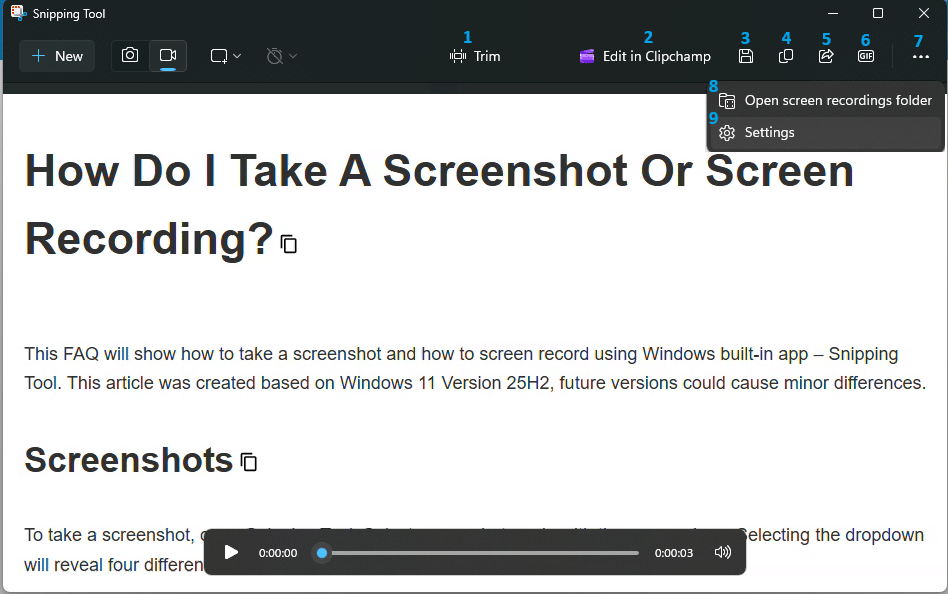
Trim– The trim button is a quick length editor for the recording. Useful to cut out any dead space at the beginning or end of the recording.Edit in Clipchamp– This will open the video in Microsoft’s Clipchamp video editor.Save icon– Opens file explorer to choose where the recording should be saved to.Copy icon– Copies the video to the clipboard without saving.Share icon– Opens a pop-up to share the recording to other applications such as email, messaging applications, or other video editors/players.GIF icon– Exports the file as GIF. Can export in small and large formats.Ellipsis Icon– Triggers the dropdown including [8] and [9]Open Screen Recordings Folder– Opens the folder where screen recordings are set to automatically save to (This folder can be changed in settings)Settings– Opens the settings menu.