Bank Reconciliations
To do a bank reconciliation, start by going to Banking > Bank Reconciliation.

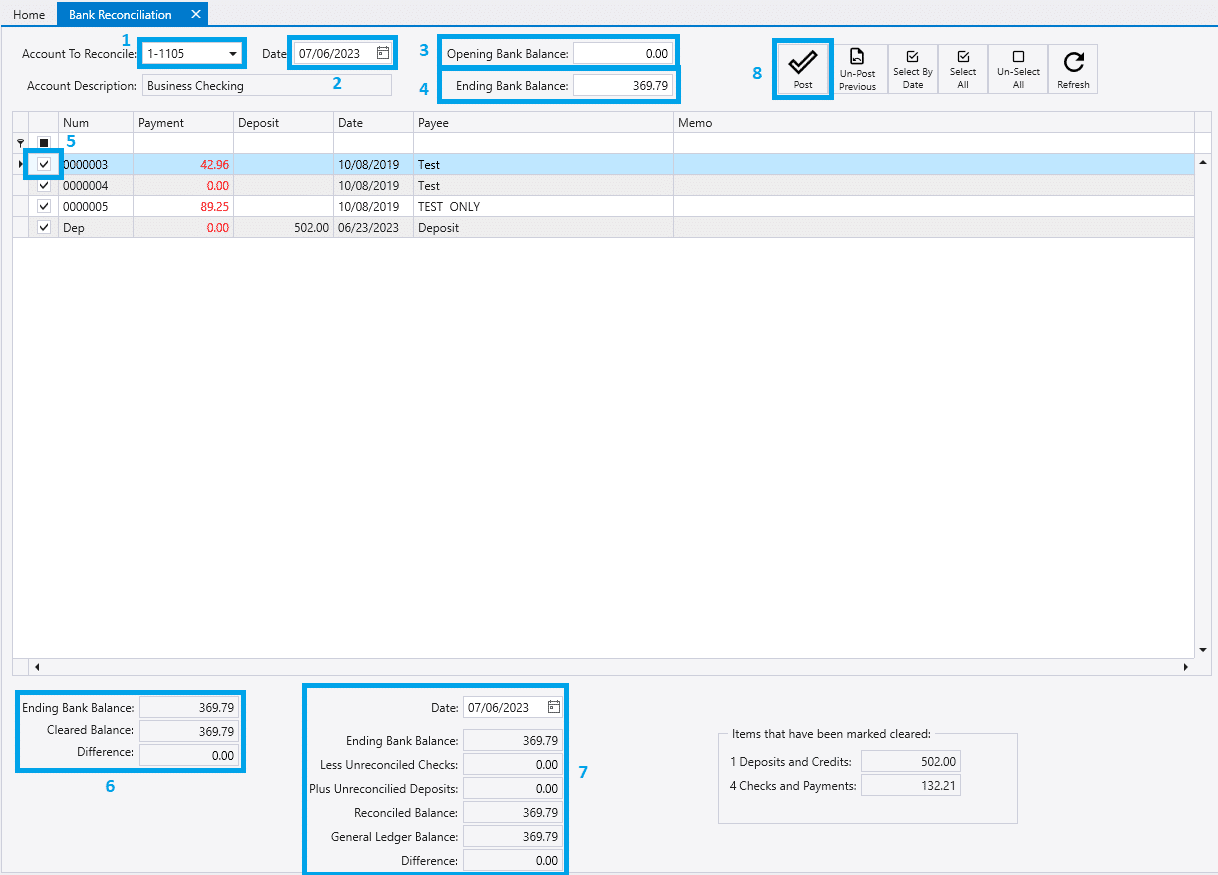
Next, select the account to reconcile [1], and enter the reconciliation date from the bank statement [2] to hide any transactions from after the statement date (this is not a necessary step, but may be useful). The beginning balance will be auto-filled on each reconciliation in the future, based on the last reconciliation’s ending balance. [3] Next, enter the ending bank balance from the bank statement [4].
Check off each transaction in the list that appears on the statement [5], any checked transactions are saved if the form is closed. The top row in this form is a search row, and the payment or deposit headers can be clicked on to sort the list and make transactions easier to find. You can see the remaining difference between the ending bank balance and the cleared transaction in the bottom left of the form [6]. The bottom-middle of the form contains another type of reconciliation number, comparing the ending bank balance plus the unreconciled checks and deposits to the GL account balance from the chart of accounts [7]. Both the difference in the bottom-left and bottom-middle should be zero when all transactions have been marked as reconciled. If the differences are not zero, but are the same, there is most likely either a missing or extra transaction in Paradigm. If the differences are not the same, contact Paragon for detailed support.
Once both differences are zero, click the post button at the top of the reconciliation [8] to finalize the entry. Note that it cannot be posted if there is a difference on the reconciliation. You can then run a reconciliation report to have a physical copy of the finished reconciliation.
Unpost Previous
Clicking “Unpost Previous” will unpost the previous reconciliation for the selected account and delete it. Any transactions from the previous reconciliation will then show up in this list to be reconciled again.
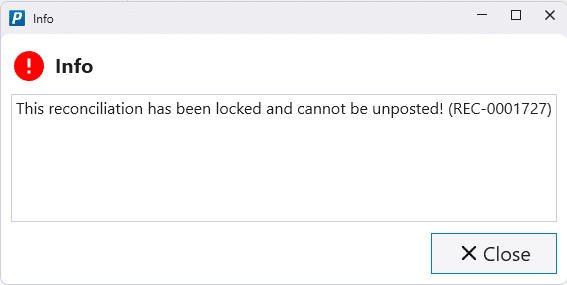
Locked Reconciliation Error
The error below appears when a user attempts to unpost a locked reconciliation. These are set up by Paragon Support, and are usually for initial reconciliations from go-live.
This reconciliation has been locked and cannot be unposted! (REC-ID)
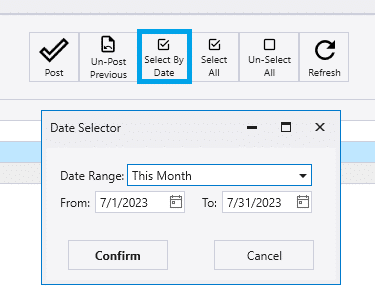
Select by Date
To select all transactions in a given date range, click the “Select by Date” button and enter in the date range.