- Home
- Administration and Setup
- Zebra and SATO Label Printer Set up
Zebra and SATO Label Printer Set up
To access the Windows Printer Settings, go to Start Menu > “Printers and Scanners” or however it is termed in your Operating System and find the label printer. Either “click > Manage” or click on the little arrow and it should take you to an option window where you can choose Printer Properties and Printer Preferences.
Zebra
Open Printer Properties > Printer Settings and check “Always use Driver Settings”.

Also go to Printer Properties > Advanced > Printing Defaults – set your page size correctly.

Make sure the Printing Preferences > Options matches the above Printing Defaults.

Open Printer Preferences > Advanced Setup and check “Use Printer Settings”.

SATO
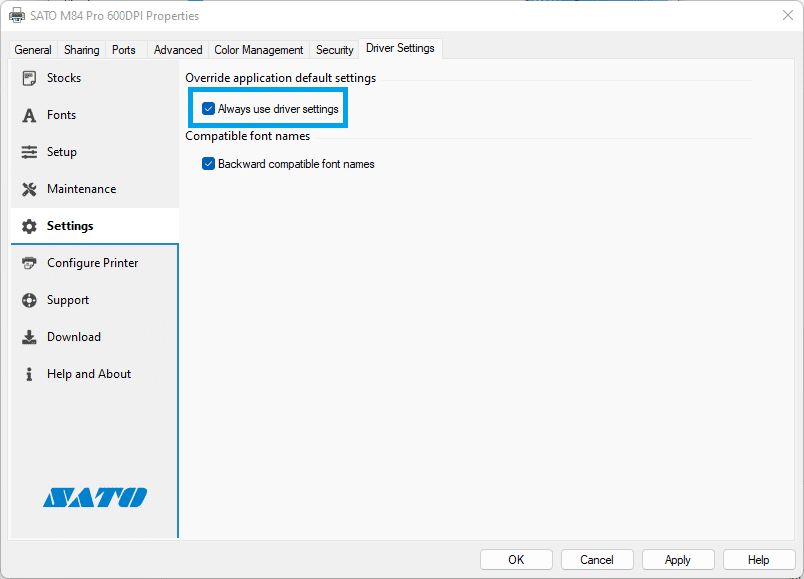
Open Printer Properties > Driver Settings > Settings and check “Always use driver settings”.

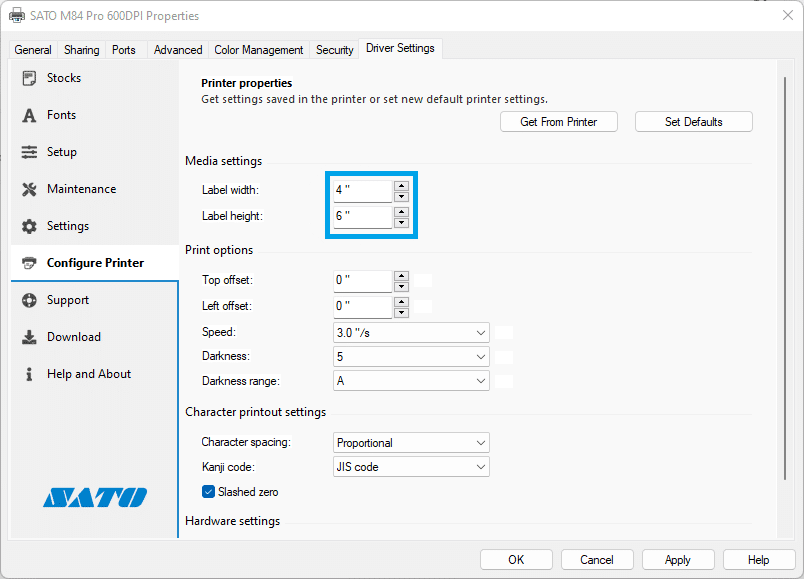
Then go to Printer Properties > Driver Settings > Configure Printer and set the page size correctly.

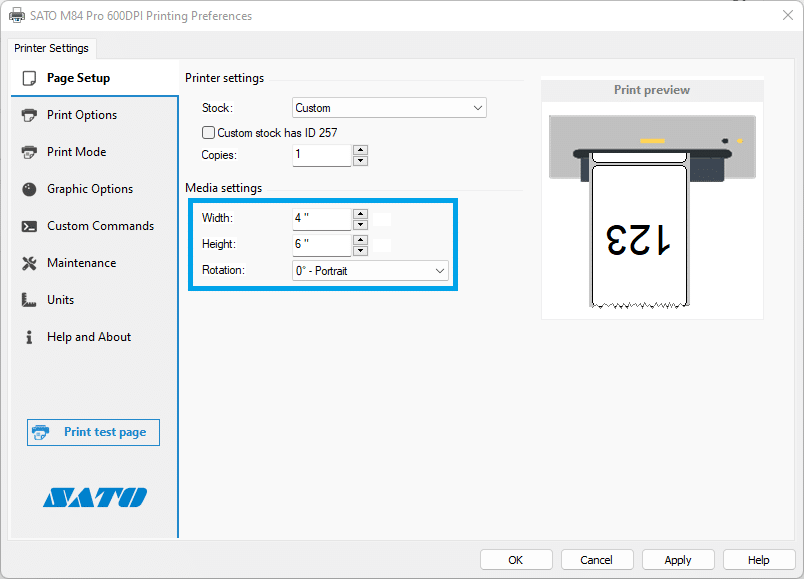
Also make sure that Printing Preferences > Page Setup matches the Printing Defaults (also is Portrait).

Contents
Categories
- Purchase Order and Vendors (19)
- Production (34)
- Order Entry and Customers (75)
- NEW! (6)
- Job Costing (16)
- Inventory and Pricing (92)
- General (54)
- Fulfillment Pro (29)
- Dispatching (23)
- Administration and Setup (39)
- Add-Ons and Integrations (29)
- Accounting (51)
