- Home
- Fulfillment Pro
- Fulfillment Pro: Packing
Fulfillment Pro: Packing
This FAQ is going to go over the pack builder in Fulfillment and the different uses that it has. A pack label allows multiple items to be grouped together and have a single label printed that relates to all the items in the pack. Additionally, the pack builder allows for existing pull labels to be scanned to assign items to packs, greatly speeding the process of creating packs.
Opening Pack Builder
There are two main ways to access the pack builder. The first way is to click the “Pack” button in the Fulfillment header, beside the “Settings” button.

After opening the pack builder this way, an existing pull label must be scanned in the “Open Order” field in the top right corner to load the lines from that order into the pack builder.
The second way of opening the pack builder is by clicking the “Pack” button from the row of action buttons that are displayed after expanding an order from the pull list. This method immediately loads the lines from the selected order into the pack builder.

Pack List
The list on the left side of the pack builder shows the items on the order that have not yet been assigned to a pack, and the list on the right shows the packs for the order. Note that the unpacked item list is grouped by label, so a line that had two labels printed will show one line for each label.
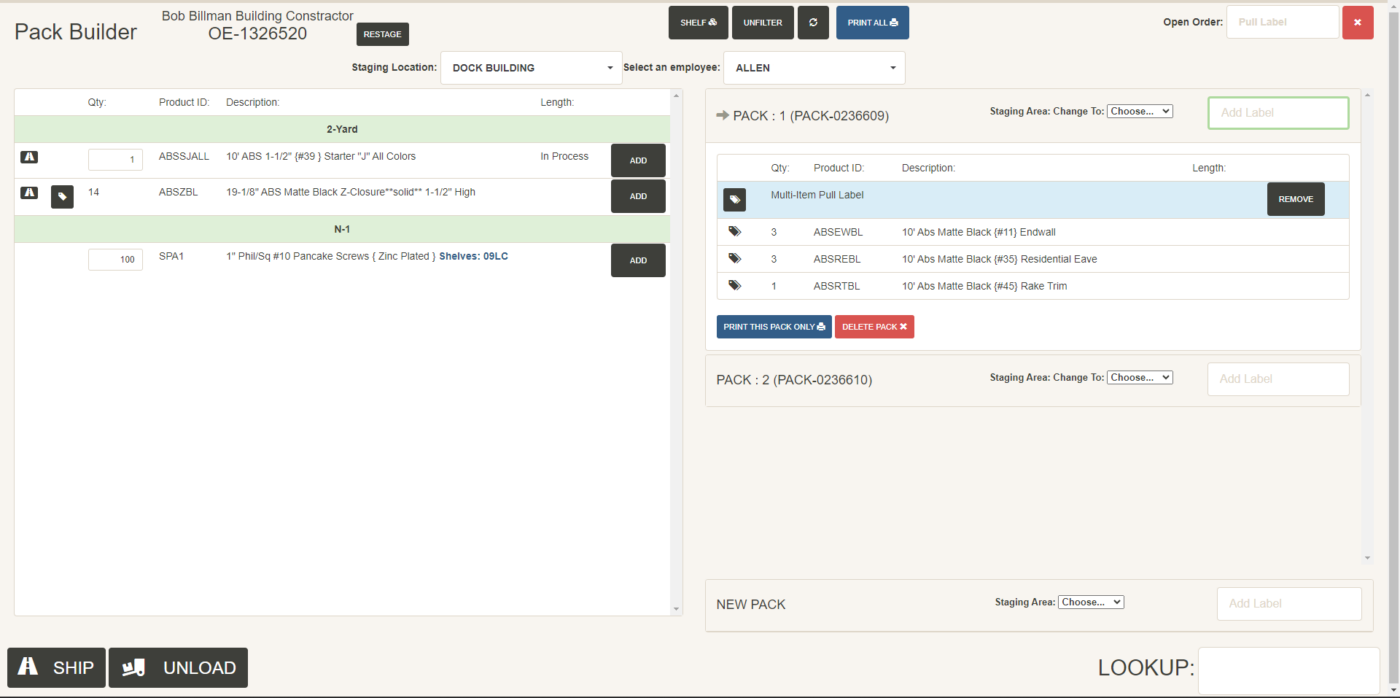
If the pack list is filtered, the only packs that will display are packs that have at least one item in the locations the user has selected (all of the items in that pack will then display, even if they are not in the selected locations). Multi-Item labels will be grouped under a light-blue header when added to a pack, as the multi-item label is treated as a singular object.
If a line has not been pulled or packed yet, (and therefore not locked from changes in Paradigm) and the quantity is changed, a warning sign will appear beside the quantity to draw attention to the quantity to make sure that the proper quantity has been pulled. A slightly different warning will show if the line was added to the order after the order was released.
The “Description” will also show the shelf where the items are stored if the optional shelf-builder tool is being used. Please contact Paragon if you are interested in this feature.
Packed and Total
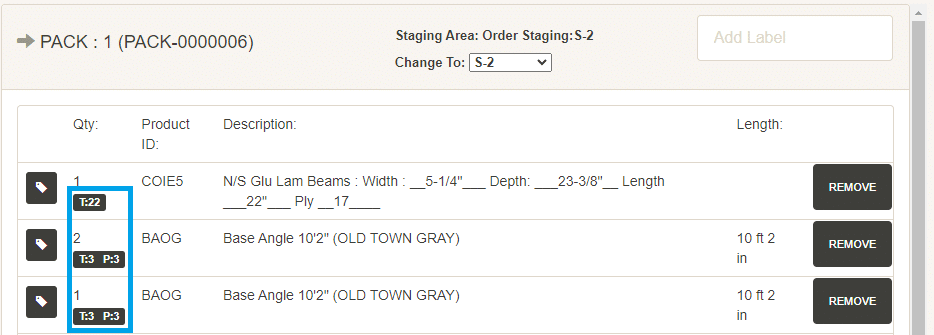
When two or more lines of the same product ID are on an order, a T: and P: label will show. “P” is the number of that item for the pack and “T” is the total number of that item on the order.
Creating Packs
To create the first pack for an order, either scan a label or click “Add” on an item. Scanning a label that is already assigned to a pack into a different pack will move it from the pack it had been on to the new pack. Scanning all the items out of a pack will delete the pack from the list. Note that prior to doing this, an arrow appears to the left of the “New Pack” text at the bottom of the list of packs on the right, indicating that the products will be added to a new pack.
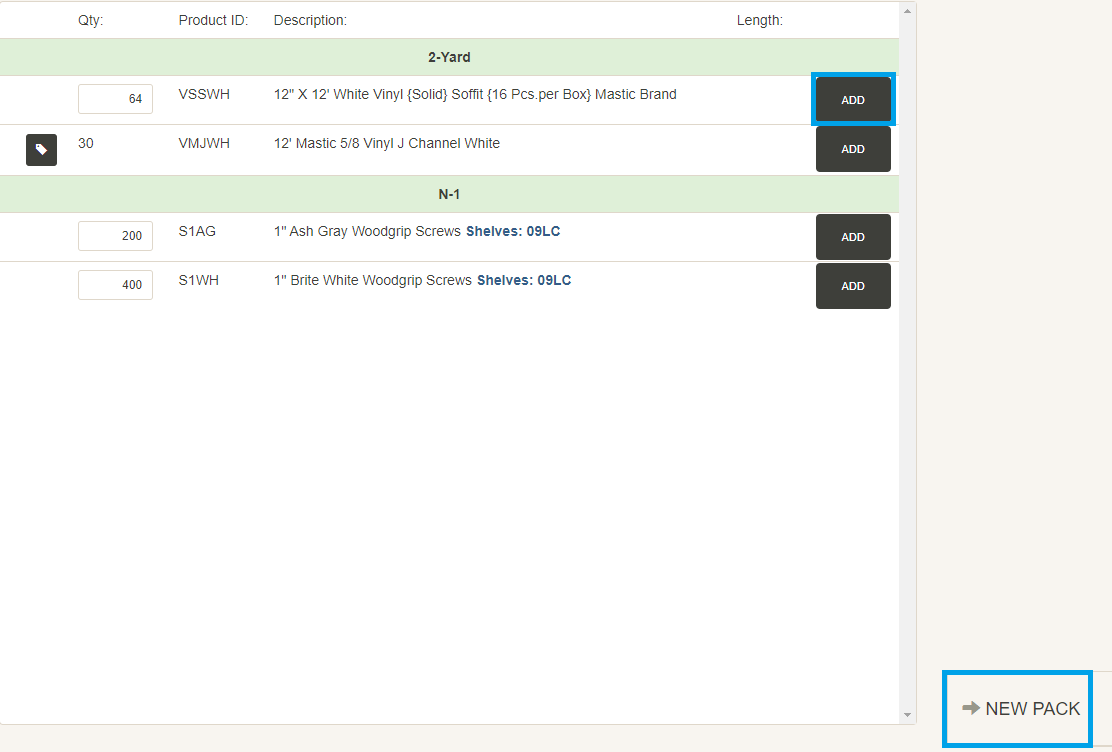
After entering the first item, a new pack will be added to the top of the list of packs, and the item that is selected will be added to the pack. By continuing to click products or scan labels, the additional items will be added to the same pack (note that the arrow will be pointing to the newly-created pack ID at the top of the list). Creating additional packs can be done by selecting “New Pack” from the bottom of the list and scanning or adding another label. When multiple packs are being used for an order, be sure to select the correct pack from the list before scanning a label.
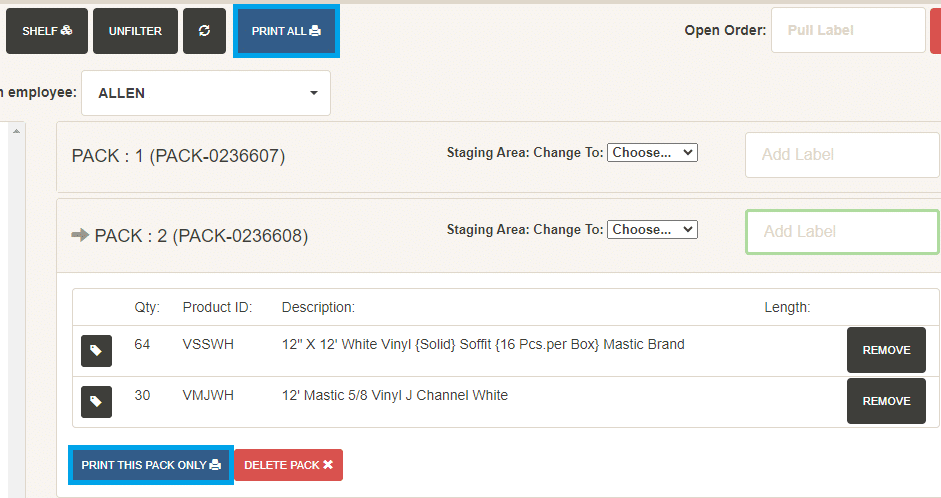
Packs can be expanded or collapsed by clicking their headers. Items can be removed from a pack by clicking the “Remove” button to the right of the line. All the items in a pack can be moved to the left-hand list at once by using the “Delete Pack” button at the bottom of the pack.
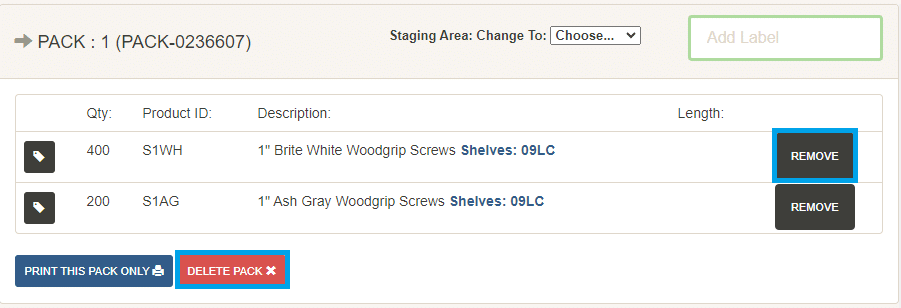
Pack labels can be printed by either expanding a pack and clicking “Print this Pack Only” at the bottom, or by clicking “Print All” at the top of the screen, which will print all the pack labels for that order at once. Packs that have not been assigned a staging area (if staging areas are being used) cannot be printed.
Label Splitting
Information on label splitting can be found here: Fulfillment Pro: Label Splitting
UPC Scanning
UPC Scanning is available when enabled by an Admin user. By scanning any Item ID or an Alias (UPC, alternative ID) that is linked to the Item ID can be scanned into the “Pack Builder” > “Add Label” field.

This number is linked to the Sales Unit of Measure (UoM) which is set in the Paradigm inventory. If there is an item scanned that is either an invalid reference number, or if it is a valid reference number but it is not on the order, an error message will appear. For items with different UoMs, it is helpful to have different barcodes for those aliases (Bag/250, Box/1,000, etc.). They can be scanned as explained above to select the appropriate UoM to add the pack. If the item does not have a UPC, a label can be printed and placed on the shelf where the item is stored to utilize this feature.
Contents
Categories
- Purchase Order and Vendors (19)
- Production (34)
- Order Entry and Customers (75)
- NEW! (6)
- Job Costing (16)
- Inventory and Pricing (92)
- General (54)
- Fulfillment Pro (29)
- Dispatching (23)
- Administration and Setup (39)
- Add-Ons and Integrations (29)
- Accounting (51)
