- Home
- Fulfillment Pro
- Fulfillment Pro: Pulling (Picking)
Fulfillment Pro: Pulling (Picking)
This FAQ will go over using the pull list in Fulfillment Pro. The pull list is the regular list of orders that appears in the main screen of Fulfillment after choosing the filtering options. More information on pull list filters can be found here: Fulfillment Pro: Filtering

- “MF” – This shows where or not the manufacturing has be completed.
- “X” = Not Complete
- A checkmark = Complete
- “% Complete” – This is a progress bar for the percentage of the entire order (including items not in the selected locations) that has been pulled, shown in blue. As those lines are marked shipped, the color changes to green. Hover the cursor over the bar to see the exact percentage.
- “# Items” – This column contains two pieces of information. The checkbox will become checked after every location of product on that order is claimed. Directly beside the checkbox is the number of lines on the order included in the selected warehouse locations.
- “Bill To” – This is the bill to company name or bill to first and last name from the order.
- “Ship To” – This is the bill to city and state on the order.
- “Customer PO”, “Salesperson”, “Ship Date”, and “Ship Via” – These come from the order.
- “Weight” – This is the weight of the items on the order that are in the selected warehouse locations. Depending on company settings, it may be the total weight of the order.
- “Load Time” – This will be populated with the load time on the trip after the order is scheduled for delivery through Dispatching.
- “Truck” – This will be populated with the truck name after the order is scheduled for delivery through Dispatching. This column may be turned off in the “Setup” form.
- “Driver” – This will be populated with the driver name after the order is scheduled for delivery through Dispatching. This column may be turned off in the “Setup” form.
- “Trip-Stop” – This column may display, depending on the settings in the “Setup” form and will be populated with the trip ID and stop number after the order is scheduled for delivery through Dispatching.
Some of these fields may be hidden, depending on the display settings and screen size.
Refreshing
If the refresh button in the top right is used, it will keep the current filters and just refresh the data in the list. This is the button that should be used to update the pull list (to bring in new orders or update information on the current orders). The pull list will automatically refresh every five minutes.

Using the browser refresh button will apply any changed settings and will clear the filters.

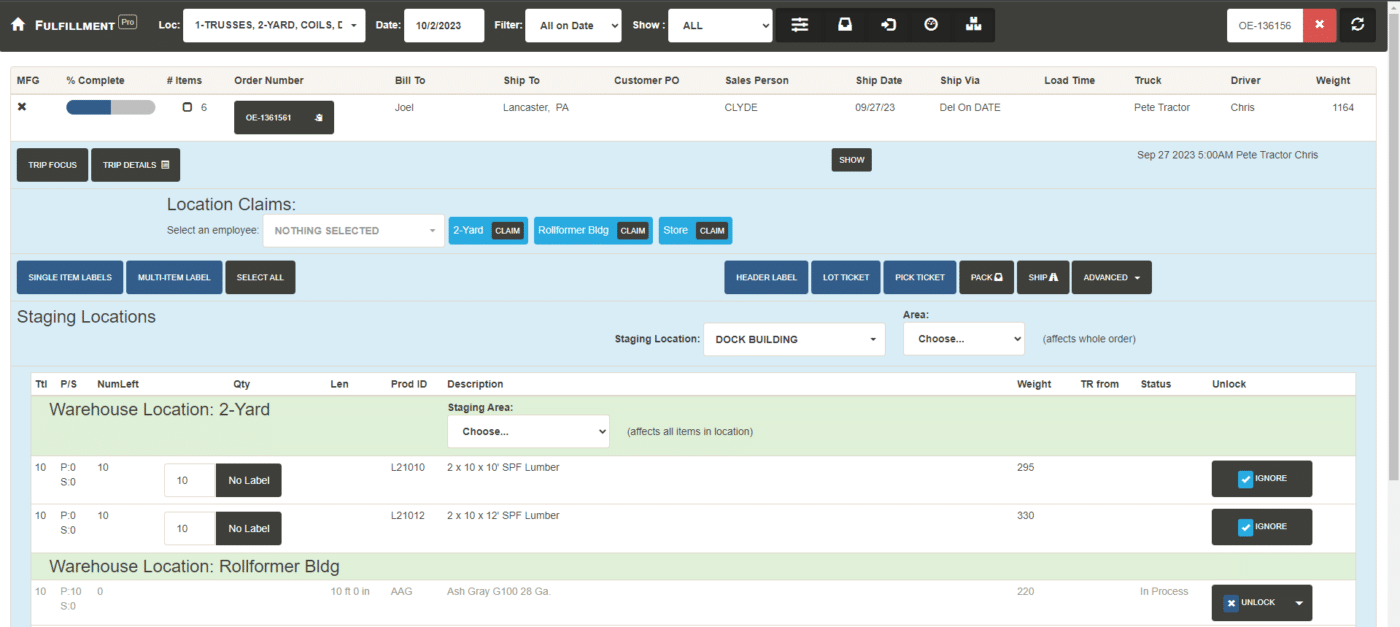
Clicking on an order will expand it to show the items in the selected warehouse locations. The entirety of the order that was clicked will be surrounded in a light-blue box, and there will be additional headers for each bundle and warehouse location on the order. Immediately above the first line of product will be a row of buttons, called action buttons. Above the line of action buttons may be additional rows of options, depending on the user/company settings.
Each line of product has multiple columns of information, including:
- “Ttl” – This is the total quantity of that product ordered. Note that lines for the same product are not grouped together (two lines for 5 do not become one line for 10). Consider using packs to pull multiple lines of the same product at once. More information on packing can be found here: Fulfillment Pro: Packing
- “P/S” – This is the quantity of the line that has been marked pulled (“P”) or shipped (“S”).
- “NumLeft” – This is the quantity of that product that still needs to be printed/pulled.
- “Qty” – This is the number of the product to be printed.
- “Len” – This is the length of the product, if one has been entered on the order. This can be set to only show for products that have customizable measurements.
- “Prod ID”, “Description”, and “Weight” – These come from the line on the order.
- “Description” will also show the shelf where the items are stored if the optional shelf-builder tool is being used. Please contact Paragon if you are interested in this feature.
- “TR from” – This stands for “Transferred From” and will display the origin warehouse for items that need to be transferred. The warehouse will show in red until the product is transferred out of the origin warehouse.
- “Status” – This column will have different text based on the manufacturing and special-order status of the line.
- “In Stock” means the product does not need to be manufactured.
- “In Process” means the product must be manufactured for this order but is not done yet.
- “MFG Complete” means the product must be manufactured and it has been completed.
- “MFG: x, STK: y” this will be shown when the item is being pulled from stock (STK) and being manufactured (MFG).
- “PO Created” means a special order has been created, but it has not been entirely received yet.
- “PO Received” means a special order has been created, and it has been entirely received.
- “Attachment” becomes available when enabled in user settings. This option will display a button to view any .pdf attachments on the order detail line.
- “Unlock” – This will only show if the user has permissions for it, and it allows for lines to be ignored without printing a label for them (in other words, manually mark as completed by clicking “Ignore”), as well as allowing lines that have been printed to be unlocked (by clicking “Unlock”). Unlocking a line removes all the pulling, packing, and shipping information for that line and marks it as open again. Clicking the dropdown arrow to the right of the unlock dropdown will display an “Unlock Labels” option, which allows removing just one label from a line that may have several pull labels created for it (a line of 10 qty printed on 5 labels of 2 qty each), which prevents needing to reprint all of the labels for that line. The “Unlock” button changes, depending if the line has any labels printed for it yet. Special order lines may be marked as “Ignored” when they originally appear in the list, but will be marked as open again automatically when the PO for that line is received in Paradigm (as long as the PO is linked to the order).
Some of these fields may be hidden, depending on the display settings and screen size.
Trip Focus And Details
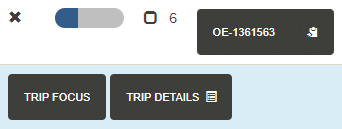
- Trip Focus – Filters the pull list to the selected trip ID.
- Trip Details – This displays the “Trip ID”, “Driver”, “Truck”, “Trailer”, and “Delivery Status” which pulls the info from Dispatching. The “Truck” and “Trailer” info are still editable, only if “Truck” and “Trailer” are set to “TBD” in Dispatching. Example: If a trip is created and the user is unsure which truck and trailer combo for the selected driver that the load will fit best on, a yardman can update that once known. Once “Truck” and “Trailer” are set to the correct values, they can not longer be edited, although “Delivery Status” will still remain editable.
Pick Ticket
Printing pick tickets allows for all the product for an order that is showing in the pull list to be printed onto a single document with one click, typically onto 8.5”x11” paper. The printed document groups the items by location to assist in the gathering process and displays the vital information about the order, such as customer name, address, PO number, ship date, etc. This document can be configured to include a scannable barcode for tracking purposes. As soon as the pick ticket is printed, all the lines that were printed are locked from changes in Paradigm. Additionally, the lines are immediately marked as pulled in Fulfillment Pro (or as printed, depending on the user settings.), even though they may not have been physically gathered yet. Coupled with the fact that printing a pick ticket for a large order can lock the lines from changes in Paradigm potentially hours prior to the product being pulled, pick tickets may or may not be the best option for every warehouse location. To gain more detail from Fulfillment Pro, consider using pull labels, pack labels, or lot tickets.
The pick ticket groups by product ID, so if part of a line has been marked as pulled, the quantity column will show [Pieces remaining to pull]/[Total of this product] (i.e. 4/17).
Pull Labels
Pull labels are a way of marking each line as pulled as it is gathered, allowing the salesperson to make changes literally up to the last second. Additionally, pull labels can/should be printed onto sticky-backed labels and affixed to the product that was pulled to aid in the tracking of that product until it leaves the warehouse, as well as avoid confusion about the order to which the product belongs. Pull labels include a scannable barcode that can be scanned in several places to track the path of the product through the warehouse.
To print a pull label, simply click the dark gray button (which will show “No Label” to start) in the “Qty” column after expanding an order in the pull list to mark that line to print.

The user can edit the “Qty” to any number less than the quantity ordered to pull a partial amount of that line. Changing the quantity on a line automatically marks it to print and changing the quantity to zero removes it from the lines marked to print. Additionally, an entire bundle can be marked to print at once by using the “Select Bundle” button, or an entire order can be marked by clicking “Select All” in the row of action buttons.
Single item labels will print one label per line that was selected, with a barcode on each label. Multi-Item labels will print one label that lists all the items selected, with a single barcode relating to the entire set of items. Multi-item labels are commonly used for small items that are placed into a box, with a single label on the outside of the box that can be scanned to reference everything in the box. Once the lines are printed, they are marked as pulled and locked on the order.

Printing Partial Amounts
The default pull label report will enter the quantity to pull on the label as simply a number, if the label contains all of that product in the bundle. If a partial amount is printed, or there are two (or more) lines for the same product and bundle, the quantity will print as: [Printed Qty] of [Total Quantity] (i.e. 4 of 17).
Printing Multiple Labels for A Single Item
Some items, such as screws, may need to have a label printed for each multiple of the pre-packaged quantity (an order for 1,500 screws may need 6 labels, one for each bag of 250 screws). To quickly accomplish this, click the “Settings” button and uncheck the option for “Simple Qty”.
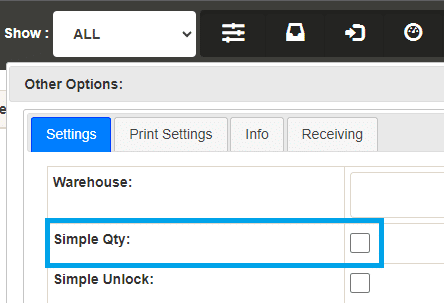
Each row in the pull list will now show both a “qty” and a “lbl” field. Use “qty” to specify what quantity to print on each label, and “lbl” to specify how many labels to print.

- Entering the per-label “Qty” and clicking the “lbl” button will auto-fill the number of labels needed at that quantity per label.
- If the quantity does not break out evenly, for example three in a pack and ten ordered, entering a quantity of three and clicking “lbl” will print three labels with three quantity and one with one quantity.
Multi-item labels cannot be printed for a non-simple quantity line (this would be the same as a regular pull label).
Ask Name
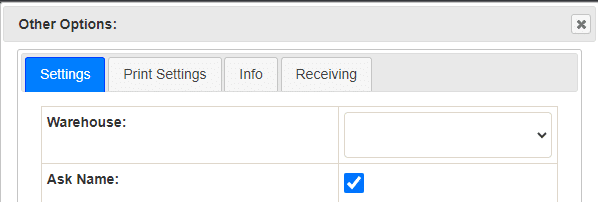
Depending on the user settings, Fulfillment Pro may prompt the user to select their name from a list when the label prints. If the user account settings have the “Force Ask for Name” option selected, they have no control over this. If that option is not selected, they can turn the prompt to select their name on or off by clicking the “Settings” button at the top of the screen and changing the “Ask Name” option.
After a Label Is Printed
Printing a label will do one of two things to the line: either mark it as pulled or mark it as printed, depending on the user settings. If the user account is configured to mark the lines as pulled automatically, the quantity that was printed will immediately be deducted from the “NumLeft” column and will be added to the “P” (pulled) quantity in the “P/S” column. The user’s name will be recorded as the person who pulled the order and the line will be locked from all changes in Paradigm.
If the user account is not configured to automatically mark the lines as pulled, the line will be marked as printed instead. This will deduct the printed quantity from the available “Qty” to be printed but will not add it to the “P” (pulled) quantity in the “P/S” column. The line will not be locked from all changes in Paradigm, instead, the quantity ordered will remain unlocked (There is a setting in Paradigm under Company Preferences > Sales > Limits to lock the quantity on printed lines, if that is preferable for the company). If the quantity is changed in Paradigm after the label is printed, a warning will appear in Fulfillment Pro under the “NumLeft” for that line.
When the product that was marked printed has been gathered, the barcode will need to be scanned in the “Mark Scanned” field which appears after clicking the “Scan” button in the bottom-left corner of the screen (depending on the user settings, a “Pull” field may be in this position instead, in which case it should be used), at which point the user scanning the label will be recorded as the person who gathered the product, and the line will be locked from all changes in Paradigm. If the quantity has been changed from what was printed on the label, the user scanning the barcode will be presented with a warning that they have pulled too many (if the new quantity is smaller) or with a message asking whether to mark the labeled amount or the ordered amount as pulled (if the new quantity is larger).
After every line on the order at the selected locations has been marked as pulled, the order will be removed from the “Unpulled” filter. If additional actions need to be taken for that order, adjust the “Show” filter at the top to “All”. If labels are not being marked as pulled as soon as they are printed, consider using the “Unprinted” filter by default. When the last line of an order is printed, the order will be moved to the “Unpulled” filter, and after all the lines have been scanned, it will be moved again to the “All” list.
Most companies opt to have the pull labels and pick tickets mark the lines as pulled immediately and do not have the lines marked printed then scanned to mark them as pulled. Marking the lines as printed works best in cases where changes to the order are likely to happen while the order is being gathered, as it grants a larger window where the quantity ordered is still editable in Paradigm. They are also commonly used when pick tickets, not pull labels, are being printed, but the company still wants to know when that order is completely gathered.
If a line is added to the order after it is released, a small warning icon will appear under the “NumLeft” for that line to note that it was added after being released.
Lot Ticket
A second alternative to using pick tickets is to use lot tickets. The lot ticket printout looks identical to a pick ticket (except for the report name at the top of the printout and the lack of a barcode) but has different functionality. When a lot ticket is printed, the lines on the order are immediately marked as printed, which locks down everything about that line in Paradigm except for the quantity ordered. If the quantity ordered is changed after a lot ticket is printed, a warning will appear in Fulfillment Pro under the “NumLeft” for that line.
After the product has been gathered and the order has been checked for any edited quantities, either pull labels or a pick ticket should be printed out for that order to mark the lines as pulled, which locks the quantity ordered in Paradigm.
Lot tickets, like pick tickets, do not pay attention to the lines or quantities that have been marked to print, they always print everything that is showing for the selected order.
The lot ticket groups by product ID, so if part of a line has been marked as pulled, the quantity column will show: [Pieces remaining to pull]/[Total of this product] (i.e. 4/17).
Header Label
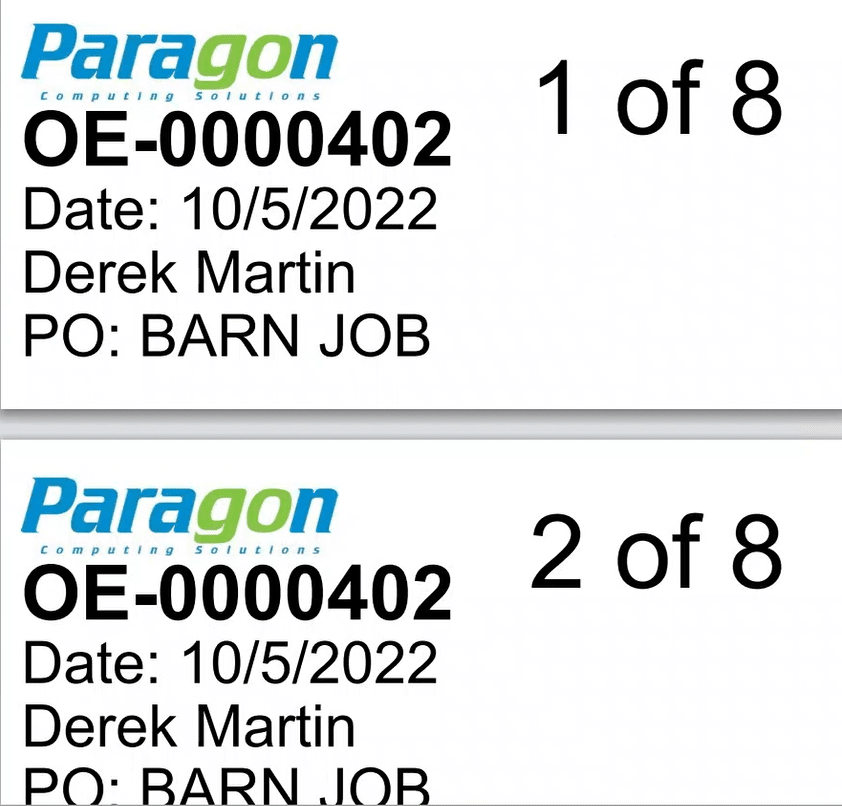
Header labels are a version of pack labels with diminished functionality. Depending on the company’s setup, it may not make sense to create pack labels, yet the user may still combine many products for one order into a single pallet, crate, box, etc. In this case the user may still want to be able to print a label for an order to affix to the pack of product simply to know which order the product is for, along with other important information.
When a header label is printed, it will include the order number, ship date, customer name, and customer PO; as well as including an “X of Y” number for the number of header labels printed.
Contents
Categories
- Purchase Order and Vendors (19)
- Production (34)
- Order Entry and Customers (75)
- NEW! (6)
- Job Costing (16)
- Inventory and Pricing (92)
- General (54)
- Fulfillment Pro (29)
- Dispatching (23)
- Administration and Setup (39)
- Add-Ons and Integrations (29)
- Accounting (51)
