- Home
- Fulfillment Pro
- Fulfillment Pro: Shipping
Fulfillment Pro: Shipping
This FAQ will go over the shipping list in Fulfillment. The shipping list extends the functionality of the pull and pack list by allowing pull and pack labels as well as pick tickets to be scanned as they are being loaded on the truck for delivery to ensure that the correct products are delivered. When the shipping list is used properly, the likelihood of a product being ordered but not included on the delivery greatly decreases.
Opening the Ship List
There are two main ways to access the shipping list. The first way is to scan a label into the “Ship” field at the bottom of the pull list (depending on the way the options are set, the user may have to first click the “Ship” button to see this field). This will open the ship list, load the lines from the scanned order in to the ship list, and mark the label that was scanned as shipped.
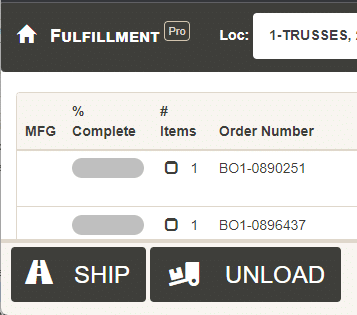
The second way to access the ship list is by clicking the “Ship” button from the row of action buttons that are displayed after expanding an order from the pull list. This method immediately loads the lines from the selected order into the shipping list. Depending on the way the options are set, the user may also be able to access the shipping list by clicking the “Scan” button at the bottom of the pull list and scanning a label into the “Mark Shipped” field.

Shipping List
The list on the left side of the shipping list shows items that are on the order and not yet marked as shipped, and the list on the right shows the lines that have been shipped for this order. At the top of the screen is a list of the order numbers being shown – clicking the order number will display information about the order. Also, at the top of the screen is a piece of text showing how many lines have been shipped out of the total lines to be shipped for this order. Directly beside this is a refresh button which updates the information shown in the shipping list (the shipping list auto-refreshes every 20 seconds).
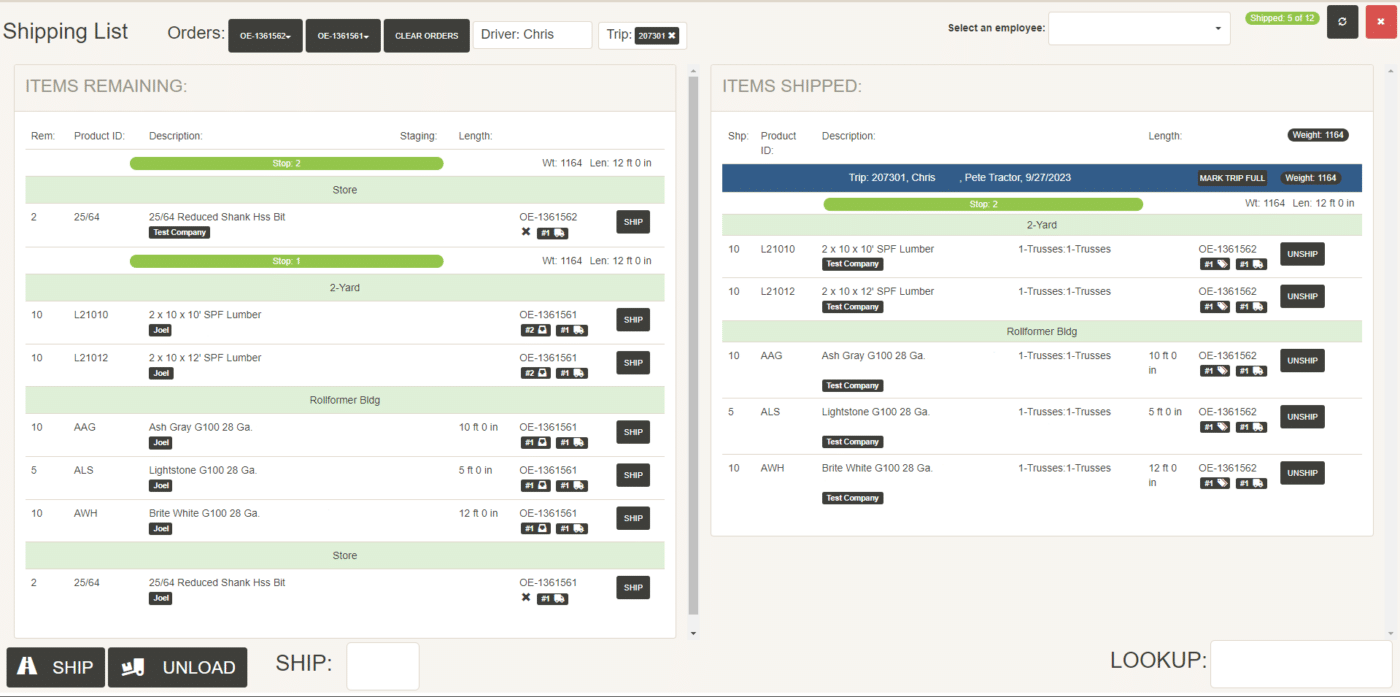
In the list of unshipped items, there will be colored header lines for each location (green) and bundle (blue). Underneath the order number for each line is the status of that line, with separate icons for “Pulled on a single label”, “Pulled on a multi-item label”, “Packed”, and “Unpulled”; along with what number of label it is (pack number 1, 2, 3 etc). There is an additional icon that will show if the line has been marked as printed, but not pulled. Each unshipped line also includes a “Ship” button that can be used to manually mark a line as shipped (in the case of bundles, the “Ship Bundle” button in the group header can be used to mark the entire bundle as shipped at once). Depending on the user settings, the button to manually mark a line as shipped may not appear.
If a line has not been pulled or packed yet, (and therefore not locked from changes in Paradigm) and the quantity is changed, a warning sign will appear beside the “Rem” quantity to draw attention to the quantity to make sure that the proper quantity has been pulled/shipped. A slightly different warning will show if the line was added to the order after the order was released.
As labels are scanned or lines are manually marked as shipped they will move from the list on the left to the list on the right. The list on the right shows all the items that have been marked as shipped, with group headers for location (green) and bundle (blue). A line can be marked as unshipped by clicking the “Unship” button.

Scanning a single pull label that is part of a pack, manually marking one of a pack’s lines as shipped, or manually marking one line of a multi-item label as shipped will move all the items associated with that label at once. However, scanning a production label that is part of a pick ticket will not move the entire pick ticket, only scanning the barcode on the pick ticket or manually marking one of its lines will move the entire pick ticket. Scanning a production label that is part of a pick ticket will remove it from the pick ticket and mark the scanned lines as shipped.
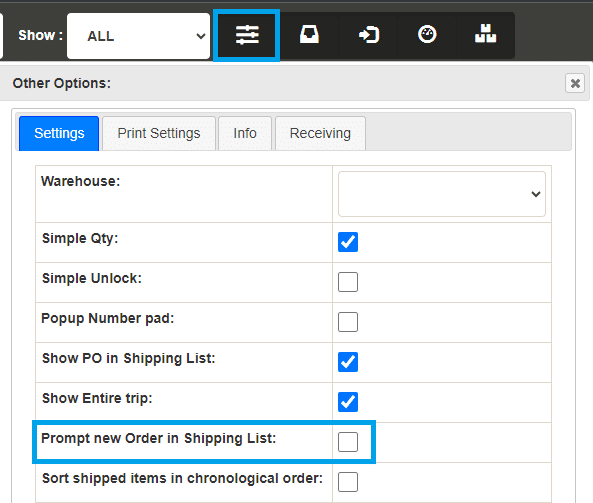
When scanning labels to mark them as shipped, if a label from a different order is scanned, the details from that order will be loaded into the shipping list as well (or the entire trip, if the new order is part of a trip). Orders can be removed from the shipping list by closing the shipping list, clicking the “Clear Orders” button to remove all orders, or by clicking “Remove Order” in the order number dropdown to remove a single order. Optionally, Fulfillment can be set to prompt the user before adding the new order into the shipping, list, more on that below.
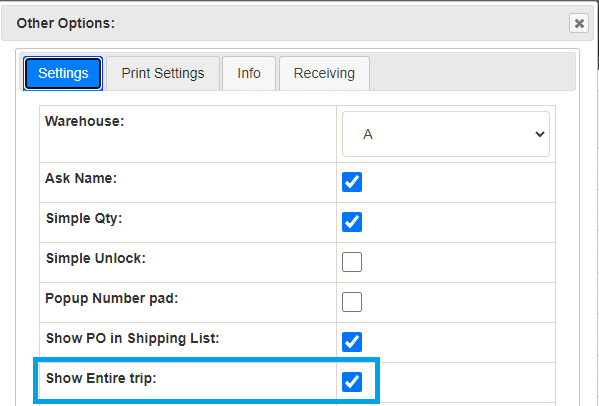
Note that if the company is using Dispatching to schedule trips, the shipping list can be configured to open the entire trip, sorted and grouped by last stop to first stop, when an order on that trip is selected. Each stop includes the weight of the stop and the maximum length of products in that stop. Enable this by clicking the “Settings” button at the top of the screen and checking the “Show Entire trip” option.
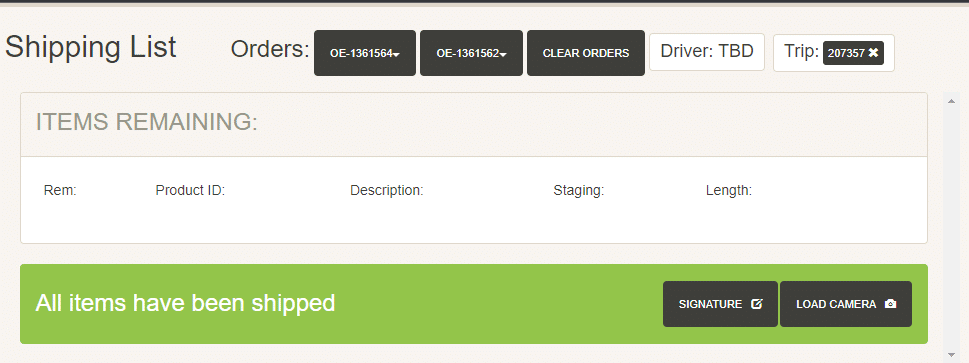
After all the items are shipped, the option to get a signature and to open the camera to take a picture of the shipment will appear. These will be saved and can be accessed from the order screen by the attachments button.
Scanning A Label for An Order That Is not on the Trip
If a label for another order that is not on the trip is scanned the following error will appear: You’ve scanned a label for another order. Would you like to add it to the list?
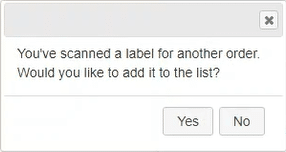
Clicking “Yes” will bring in the other order into the shipping list. If the shipping list should instead load the trip that the order is on, uncheck the box beside “Prompt new Order in Shipping List” from the Fulfillment settings.
UPC Scanning
UPC Scanning is available when enabled by an Admin user. By scanning any Item ID or an Alias (UPC, alternative ID) that is linked to the Item ID can be scanned into the “Ship” field. This number is linked to the Sales Unit of Measure (UoM) which is set in the Paradigm inventory. If there is an item scanned that is either an invalid reference number, or if it is a valid reference number but it is not on the order, an error message will appear. For items with different UoMs, it is helpful to have different barcodes for those aliases (Bag/250, Box/1,000, etc.). They can be scanned as explained above to select the appropriate UoM to add the pack. If the item does not have a UPC, a label can be printed and placed on the shelf where the item is stored to utilize this feature.
Contents
Categories
- Purchase Order and Vendors (19)
- Production (34)
- Order Entry and Customers (75)
- NEW! (6)
- Job Costing (16)
- Inventory and Pricing (92)
- General (54)
- Fulfillment Pro (29)
- Dispatching (23)
- Administration and Setup (39)
- Add-Ons and Integrations (29)
- Accounting (51)
