- Home
- Fulfillment Pro
- Fulfillment Pro: Staging Areas
Fulfillment Pro: Staging Areas
This FAQ will go over how to use staging and restaging in Fulfillment. Using staging areas allows pull and pack labels to record exactly where the product is being placed (i.e. the shelf, section of the floor, or bin). This staging area will then show in the pack builder and shipping lists (and optionally on printed paperwork as well) to make gathering product go much faster, as the employee does not have to waste time figuring out where the product has been placed.
Creating Staging Areas
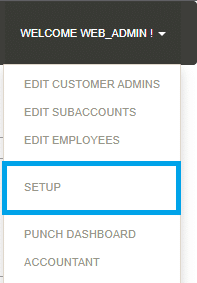
To begin working with staging areas, the list of available staging areas for each warehouse location must be defined. To do this, click the dropdown in the top right corner and select “Setup”.
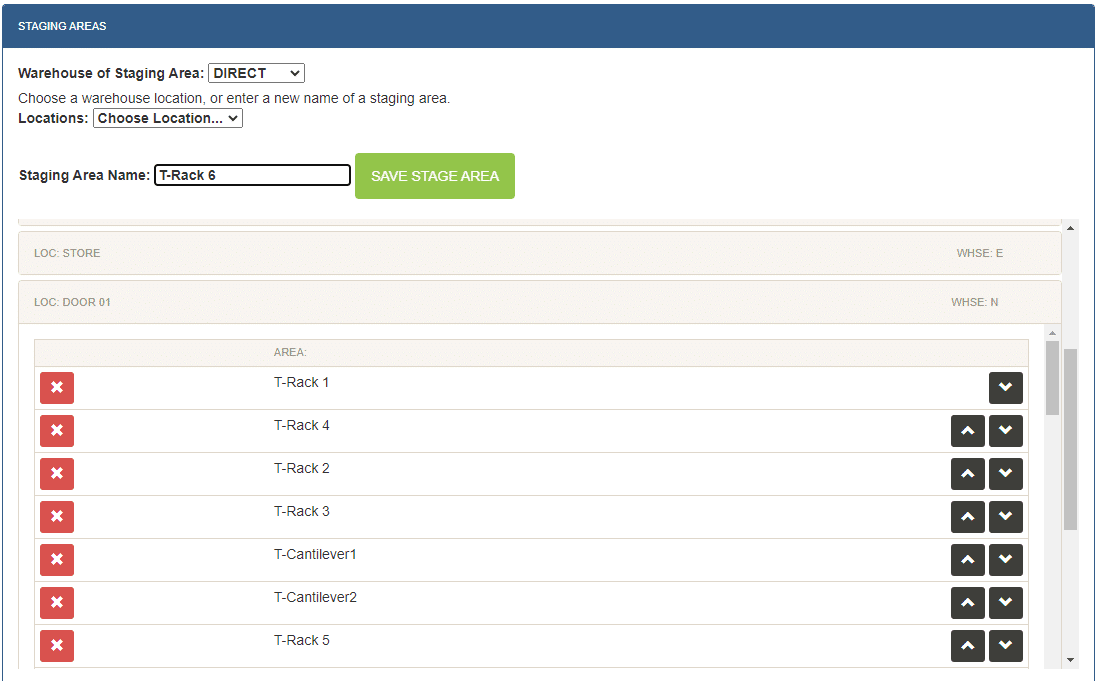
In the “Fulfillment” tab, scroll down to section titled “Staging Areas”, select the warehouse and warehouse location for which to add staging areas. Next, type the new staging area name in the “Staging Area Name” field and click “Save Staging Area”.
A list will appear under the “Staging Area Name” field that groups the staging areas under their respective staging locations. Use this area to reorder or delete staging areas. Note that staging locations are essentially just a group of staging areas.
To define a staging area for a location that is not a warehouse location (somewhere product is staged for the customer, but not stored), select the location “Other”, define a location name, and then define the staging area name. Staging areas that are used by employees pulling from a different warehouse location should also be configured as “Other” staging locations for ease of use.
Choosing Staging Areas
The most popular option when using staging areas is to enable the restage button in the header, and then scan items to assign them to the staging area.
After creating the staging areas and enabling the “Use Staging Areas” setting in the Fulfillment settings for the employee account(s), fields to define the staging area will appear in the pull list and the pack builder in Fulfillment Pro, along with “Restage” buttons. By default, the staging area selector appears in the order header and the location header for an order—selecting a staging area in the order header applies that area to all the products on the order, selecting the area in the location header only sets it for that location. The staging area is not finalized and stored until the label is printed, it may be changed multiple times as the order is pulled. The staging locations available are the warehouse locations selected at the top as well as the generic “Other” locations.
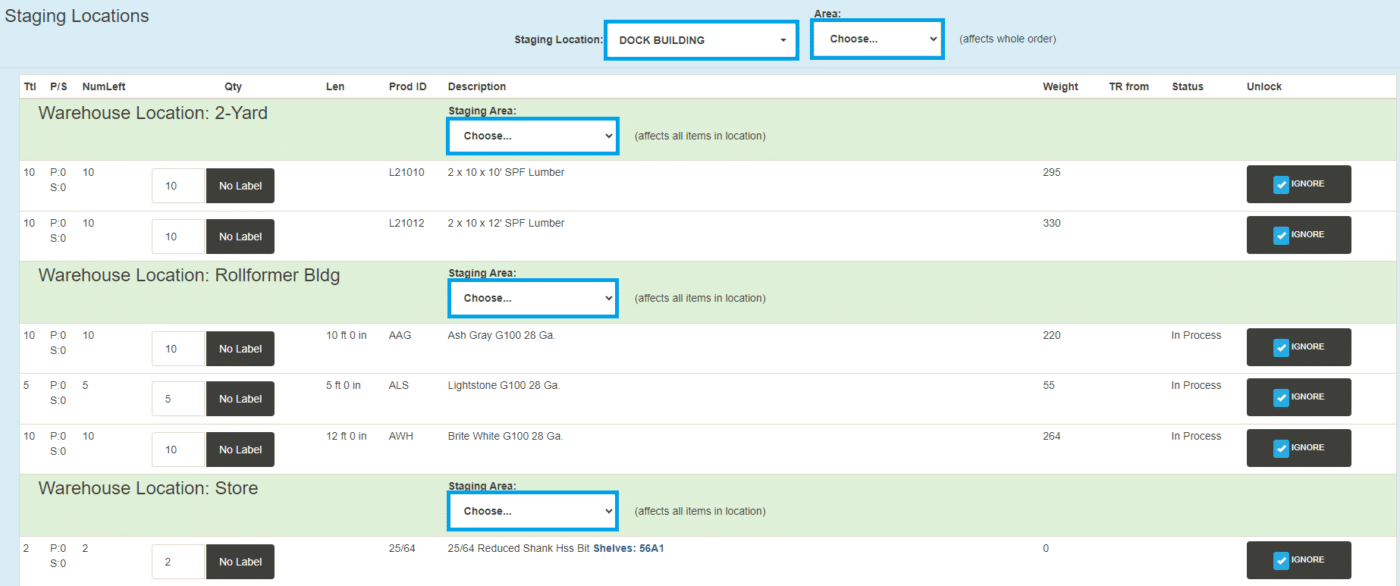
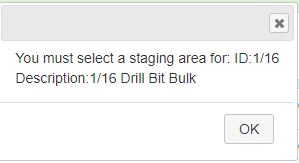
Before printing a pull label, a staging location and staging area will need to be selected. If the user does not select a staging area, and attempts to print a label, the print will fail and ask the user to select a staging area.
Restaging
If the staging area of a label is found to be incorrect, or the product is being moved to a different staging area, the restaging form should be used. Note that once a label has been marked as shipped, it can no longer be restaged.
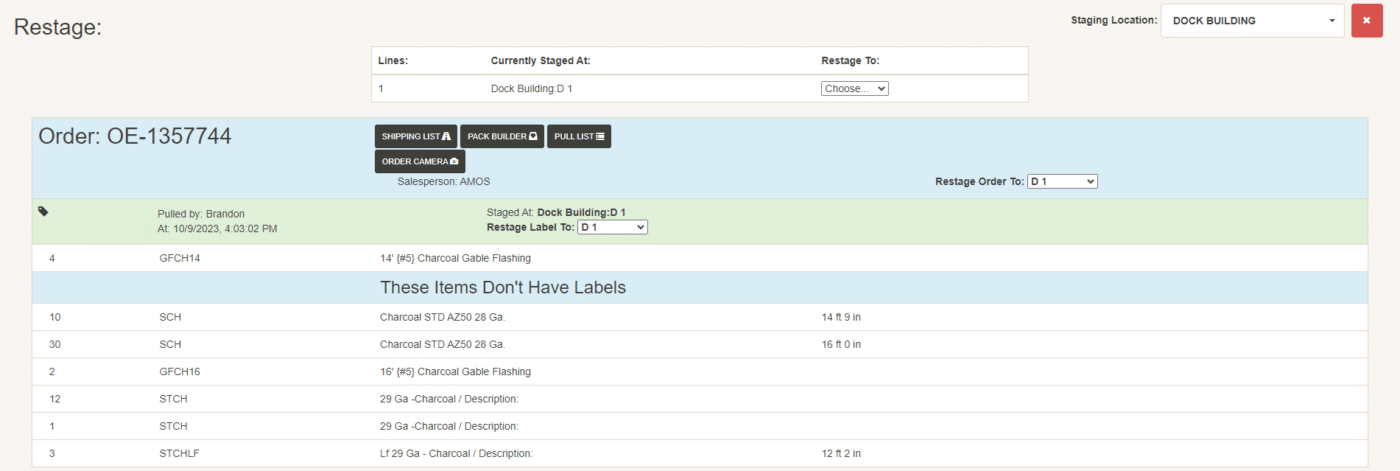
To view the staging areas of the products on an order, click the “Restage” option under the “Advanced Options” dropdown from the row of action buttons that are displayed after expanding an order from the pull list.

This will display a list of all the lines that have had labels printed (along with the pulling information of that label), a summary of the number of lines at each location, and the lines that have not been printed yet. The staging areas for each line can be changed individually, or all the lines staged at one area can be restaged to another area by using the summary list at the top of the screen.
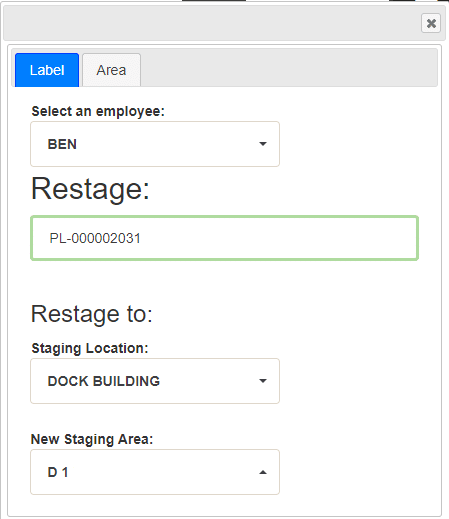
Labels can also be restaged with a scan of their barcode by using the “Restage” button in the Fulfillment header.

Select the new staging location and area, then scan a label to assign it to that staging area. Selecting a staging area can be achieved by scanning a Staging Area ID barcode that has the following syntax “>STG-[Area cntID]” or for example “>STG-252”. Note that the scan will only work if the location that the staging area is a part of is selected in the location drop down. This can be printed on a barcode and placed in that area to easily choose it. Please contact Paragon for a list of the staging area cntIDs. Utilizing this feature streamlines restaging significantly.
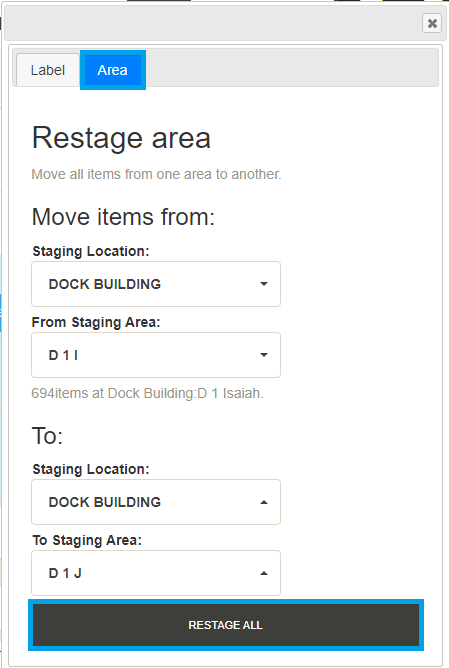
Entire staging areas of items can now be moved to another area through the “Area” tab in the “Restaging” window by selecting the current “Staging Area” and the new “Staging Area”. Then click “Restage All”. All items assigned to the current staging area will be reassigned to the new staging area.
Restaging – Pack Builder
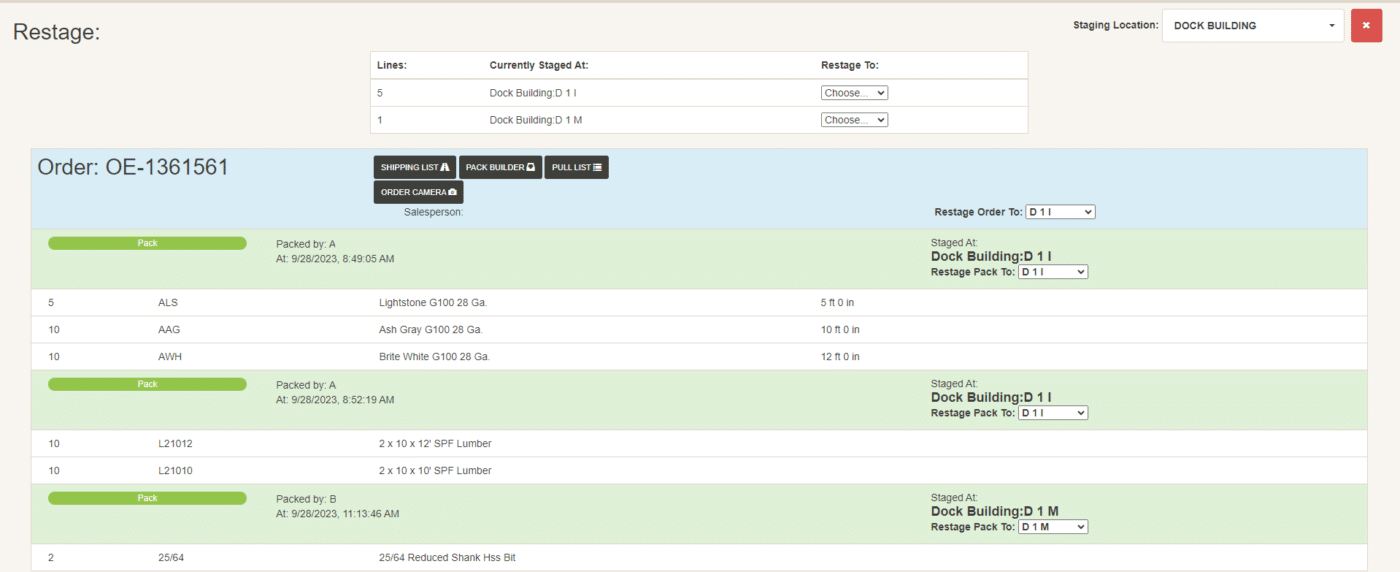
Enabling staging areas also enables a button in the pack builder header to open the restaging form for the order to allow employees to quickly switch between the pack builder and restaging forms in case they find mistakes, or if they want to see where all the products are at once

From here, choose new areas to restage the items at.
Production
Staging locations can be recorded through production by changing a setting on the machine (Settings>Machine list). When a build is completed, they will be prompted to enter the staging area. More information on that can be found here: Assigning Staging Areas In Production
Contents
Categories
- Purchase Order and Vendors (19)
- Production (34)
- Order Entry and Customers (75)
- NEW! (6)
- Job Costing (16)
- Inventory and Pricing (92)
- General (54)
- Fulfillment Pro (29)
- Dispatching (23)
- Administration and Setup (39)
- Add-Ons and Integrations (29)
- Accounting (51)
