- Home
- Fulfillment Pro
- Fulfillment Pro: Transfers
Fulfillment Pro: Transfers
Fulfillment Pro can assist in the process of transferring inventory from one warehouse to another for both regular inventory transfers and transfers for customer orders. Processing transfers through Fulfillment Pro assists with ensuring that the proper items are being transferred, marking the proper quantities of items as transferred, and marking transfers and transfer trips as completed/posted.
To begin, enable the “Transfers” setting in the employee Fulfillment settings and create a filter for that login that has the “Transfers” option selected – this needs to be done for any login that either sends or receives transfers. More information on filtering can be found here: Fulfillment Pro: Filtering

Transferring Out
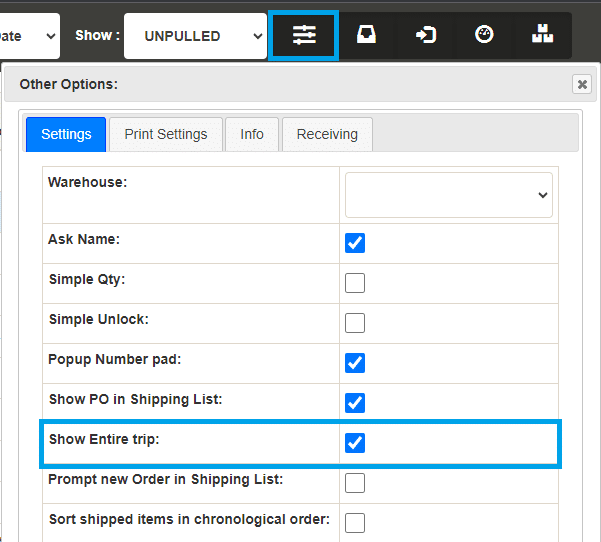
The transfer process begins by transferring the product out of the origin warehouse. This process is nearly identical to the process of pulling/packing/shipping a customer order. Pull/pack labels are printed for the items being transferred from the list of transfers in the pull list. These labels are then scanned off in the regular shipping list to make sure that all the requested items are loaded and to tell Fulfillment Pro what items to expect at the destination warehouse. Note that if multiple transfers are assigned to a transfer trip through dispatching, the shipping list will load all of the transfers on that trip to be scanned at once, provided the setting for “Show Entire Trip” is enabled under the “Settings” button in Fulfillment Pro.

One key difference in the transfer out process is that in the pull list for regular inventory transfers, there is an option called “Adjust Qty” in the “Advanced” dropdown in the row of action buttons to adjust the quantity to transfer.

A transfer may be released for 100 of a product, but it is more convenient to send 95 – using the “Adjust Qty” option allows the person transferring out to easily record how much of the product is actually being sent. This is only an option for regular inventory transfers, not transfers for sales orders.

Transferring In
After the transfer has been loaded and scanned out at the origin warehouse, the next step is to transfer the product into the destination warehouse, or “Unload” it. This step will be done by the employee at the destination warehouse that is responsible for unloading the transfer truck.
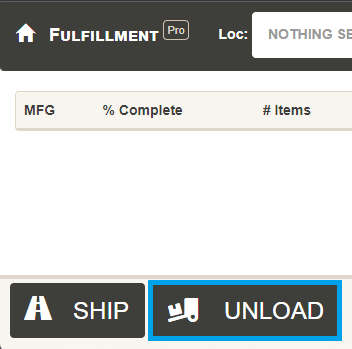
To unload the transfer and mark it as having arrived at the destination warehouse, click the “Unload” button in the bottom left corner of the pull list.

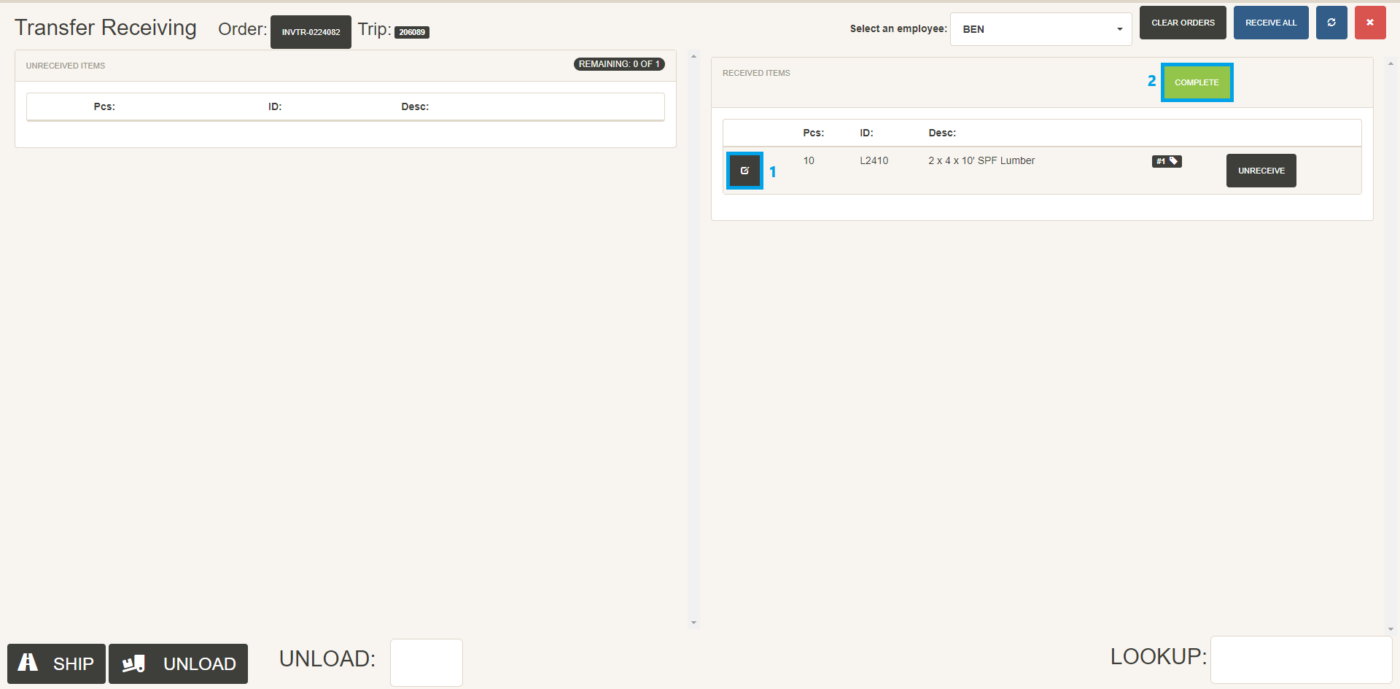
Scanning the first label of an item on the transfer trip will load the entire list of transferred items on the left side of the screen and scanning those items will move them to the right side of the screen. The left-hand list only includes items that have been marked as transferred out at the origin warehouse. Scan all the items that have been transferred, and the list on the left should be empty. If the list is not empty after scanning all products, the remaining items should be scrutinized to see if they were transferred or not.
If a transfer quantity is found to be incorrect (Fulfillment Pro shows 10 to be transferred, but there are only 8 on the truck), the quantity received can/should be edited on the right-hand list to match what has actually arrived via the “Edit” button [1]. When all items have been marked as received and the transfer is completed, click the “Complete Transfer” button [2] at the top of the right-hand list to finalize that transfer trip. Completing the transfer posts any related inventory transfers, marks order detail lines as transferred, and marks the dispatching trip as completed.

The pull/pack labels that were used to transfer the product out of the origin warehouse and into the destination warehouse can be scanned again into the shipping list of the destination warehouse as the product is loaded for delivery, no need to reprint labels.
Contents
Categories
- Purchase Order and Vendors (19)
- Production (34)
- Order Entry and Customers (75)
- NEW! (6)
- Job Costing (16)
- Inventory and Pricing (92)
- General (54)
- Fulfillment Pro (29)
- Dispatching (23)
- Administration and Setup (39)
- Add-Ons and Integrations (29)
- Accounting (51)
