Conversations
The Conversation feature in Paradigm provides an internal way for users to communicate messages and attachments with each other. The goal of the feature is to allow users to collaborate more easily and effectively without needing to leave Paradigm to find and share information.
The organizational structure puts each conversation into a thread that helps keep track of the discussion. Conversations can be shared with individual Users, multi-user User Groups, linked to Customers, Vendors, or Jobs, or linked to any type of Transaction, including Quotes, Orders, Invoices, Requests For Quote, Purchase Orders, and Purchase Invoices.

Where to Find Conversations
On the Home Page

The Conversation Panel is on the right side of the Home page in Paradigm. There are three buttons at the top of the panel, and below them a space for viewing recent conversations. This is designed to be a way to get a quick overview of what’s happening in the most recent conversations.
The four buttons at the top of the panel:

- Open Conversations – Opens the Conversations window.
- New Conversation – Opens the Conversations window to start a new conversation.
- Refresh – Updates the conversations list.
- Collapse Conversations – Collapse the list of recent conversations.
The Conversation Sidebar
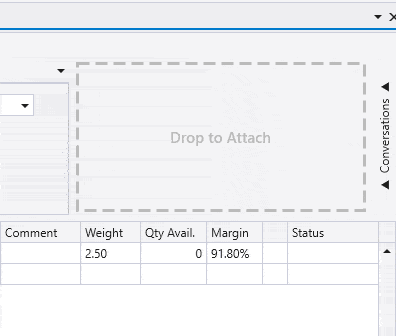
On the far right side of any Transaction page (Quote, Order, Invoice, Purchase Order, etc.), there is a button with the text “Conversations” on it. Clicking this will open the Conversations sidebar panel. To hide the sidebar, click the Right Arrow >> button.
If there is a conversation linked to that quote or order that you have permission to see, the conversation history will load into the panel. If there is no available conversation yet linked to that quote or order, the panel will allow you to start a new conversation that is linked to that order.
Convert Transactions With Conversation
When a Conversation has been linked to a Transaction, such as an Order, the conversation will automatically be linked to any other transactions that are created by converting the original transaction. Using the “Convert” button in the ribbon to, for example, Convert an Order to Invoice will link the conversation to the new Invoice. When the program opens the newly created Invoice, the Conversation Sidebar for both the original Order and the new Invoice will show the same linked Conversation.
The Conversation Tab

On the Details page for Customers, Vendors, and Jobs, the last tab is labeled “Conversations.” This tab displays all conversations linked to the selected customer. You can view and start conversations related to the customer directly from this tab.
The Conversation Window

The Conversation Window offers the most full experience for viewing and managing conversations. It can be opened two ways: from the button in the Conversations Panel on the Home page, or from the button in the ribbon toolbar.
Home Page Search
Conversations can be viewed for a record when using the home page search.

Message Notifications
Sending messages that are visible to other users triggers audible sounds and visual notifications.
Message Sounds
When a message arrives within a user’s visibility scope, the user will hear a notification sound.
Unread Message Badge
Sending a message will cause notifications to appear for other users in the conversation. A Toast message will appear on screen, and an unread message badge will appear multiple places. When a toast message appears for a conversation that links to a single item, clicking on the toast message will cause Paradigm to open the page for the linked item.

Toast Notification

Unread Message Badge on the Transaction Tab

Unread Message Badge on the Home Page

Unread Message Badge in the Conversation Window

Unread Message Badge on the Windows Taskbar
Additional Message Visuals
Users can elevate the prominence of a message in two ways.
Messages that include a tag for a specific user display a red “@” character in the reading pane above the message This is visible only to the tagged user.
Toggling the Important button below the message text input box before sending causes the message to show in the reading pane with the word “Important” above it in red text. When important messages are received, the notification sound is different than the normal notification sound.

Organizing Conversations
Conversations can be organized and linked using several tools.
- Conversations can be started directly from a transaction or customer page, which automatically links the conversation to that document.
- In the main Conversations window, Transactions, Customers, Vendors, Jobs, and Users can be linked to a conversation by sending a message in the conversation that includes the selected tag.
- There is no limit on the number of items to which a conversation may be linked.
- Setting a type for a conversation allows it to be filtered through the Types filter.
Conversation Visibility

Once a Conversation is linked to a Transaction, Customer, Vendor, or Job, the conversation in its entirety is visible in the Conversation Sidebar or Tab for all users. To make a conversation visible to additional users, or to draw a user’s attention to it, you can tag the user (or a User Group in which they are a member) in the conversation. This will add the User or User Group to the Conversation’s listed Users, and cause the user to receive notifications for new messages in the conversation.
Using the Selector Menus
Tag Selector
Typing the “@” symbol into the message text input box triggers the Tag Selector menu to appear. Note that this only triggers the menu if the message text input box is empty, or the character in front of the insertion point is a space. From here, there are a number of different ways to get a specific tag selected and into the message text input box. Following the “@” symbol, further typing refines the search until the intended item is found.
When the correct tag is highlighted, pressing “Enter” or double-clicking on it puts the tag into the message text field.
For example, in this illustration, typing “@” and then beginning to type the username “Admin” causes the Tag Selector to filter down to showing the intended user. Pressing “Enter” adds the tag to the text input box. Then, typing “@” to bring up the Tag Selector and typing “q/” causes the list to show Quotes. Pressing “Enter” adds the tag to the text input box for the quote that was focused.
Searching for Transactions by typing a few digits from the Transaction ID is also supported. The program tries to match the digits with Transaction IDs by comparing against the last digits in IDs. For example, typing in “@134” will match all Transactions that contain the digits “134” at the end of the ID, but not Transactions that contain “134” in the middle of the ID.

User Selector
Clicking on the “Tag Users” button will show the User Selector menu. All users are loaded into the list. To filter down the list, type letters into the filter row above the data in the table. To add as many users as intended, click the plus buttons beside the correct rows. Until the message is sent, the users are not added to the conversation. User Groups are helpful for adding any number of users with a single action. For conversations that are created in a transaction window, the transaction will automatically be tagged. Otherwise, the user who originates the conversation will automatically be tagged.

Transaction Selector
Clicking on the “Tag Records” button makes the Transaction Selector menu appear, and typing some letters into the search text input box causes items to load. To add the intended item to the message, click the plus button on the correct row. This puts the tag link into the message text field. The conversation is not linked until the message is sent.
When the Transaction Selector is initially opened, before any search text is entered, it loads the currently open tabs, and any available Related Transactions to give suggestions. Typing text into the search text input box inside the menu functions as previously described, searching through Transactions to link.

Removing Links
Above the Reading Pane, the display for “Users” and “Visible in” (Transactions, Customers, etc.) are each visible above the Reading Pane. Clicking on them will open a menu that displays the Users or items to which the conversation is currently linked. To remove a link, click the red X next to the link. From the “Visible in” menu, an item can be opened by clicking the Folder icon next to the link.


Filtering Conversations By User
If a user is part of the Admin User Group, the user filter will show at the top of the Conversations window. By default, this shows the username of the logged-in user, and the list of conversations is filtered to only show conversations that the user sees. To view the conversations that load by default into a different user’s view, click the user filter and select the user from the list. To see all conversations in the system, set the user filter to “All.” This view shows every conversation in the system, regardless of tags or links.

Conversation Type
Conversation types can be set and changed for conversations. This allows an easier way to control visibility of conversations. Setting a type for a conversation causes the left border of the conversation to change color to match the type color. These color codes make it easier to see which type a conversation is linked to. Details on setting up Conversation Types are discussed in a later section of this article.
Clicking the filter button will show the Types Filter sidebar.


Searching Conversations
To search all conversations, type keywords, participant names, or linked record IDs into the search bar at the top of the Conversations window. The upper section of the results will list out any messages that match the search criteria, while the lower section will display conversations that match the search criteria. Click on a message or conversation in the results to open it in the reading pane.

To search through the messages within the current conversation, click the magnifying glass located to the right of the conversation title above the reading pane, or press Ctrl + F. This opens a search input box. To search within the current conversation, type keywords into the search box, and press Enter or click the magnifying glass beside the search input box. The result panel will show all messages within the current conversation that match the search criteria. Click on a message in the results to jump to that message in the reading pane.

Managing Conversations
Leave A Conversation
To leave a conversation, open the Conversation Window and right-click on the conversation in the history list. Select “Leave Conversation” from the context menu. A conversation must have a link to a User or an item. This option will not be available if the current user is the last remaining participant in the conversation, and the conversation is not linked to any items. In that case, the conversation must be ended instead. Leaving

Mark A Conversation As Ended
Conversations can be ended by any participant in the conversation. Once ended, the conversation is moved out of the active list but can still be accessed by enabling the “Show Ended” filter.
If a user does not have Admin-level permissions and is not a participant in the conversation, this option will not be visible.

View Ended Conversations
To view ended conversations, enable the “Show Ended” filter in the Conversations window. The conversation list will change from showing open conversations to displaying ended ones. Select a conversation to read its messages.

Reopen a Conversation
To reopen an ended conversation, select it from the Conversation History list, and type a new message in the input area. Before Paradigm sends the message, it will show a confirmation prompt. The prompt gives the option to send the message in a new conversation, or to reopen the ended conversation and send the message there.

Conversation Titles
When starting the conversation within a Quote, Order, or Customer, the current page ID will be used as the conversation title, for example “QO-001234.” When starting a new Conversation from the main Conversation Window, the title defaults to the date and time, for example, “7/12/2027 1:51 PM”. Titles can be set before sending the first message, or changed after the conversation is already started. Renaming a conversation after it starts adds a message to the log. Setting the title before the first message does not cause this message to be shown.

Additional Message Options
There are a number of different actions available to help with messages. The available actions include message attachments, message replies, and message forwards. Messages can also be copied to the clipboard or deleted.
Hovering on a Message
When the mouse pointer hovers over a message, a menu appears above it that contains three action buttons: Copy, Reply, and Forward. The first icon is Copy, which looks like a square. Selecting it places all of the message text onto the clipboard. The second icon is Forward, with an arrow pointing to the right. Selecting it opens a dialog box that puts the forwarded message into the attachments area, and allows entering additional text in the message input area before sending. The third icon is Reply, with a left-pointing arrow. Selecting it puts the message text into the attachments area within the current conversation, and allows entering additional text in the message input area before sending.

Right-Clicking On A Message
Right-clicking a message opens a context menu the following options: Copy, Forward, Reply, Create Task, Edit, and Delete. These buttons give the user the ability to copy the message text, reply directly to the message, forward it to another conversation, create a task from it, edit, or delete it. The copy, forward, and reply options function as previously described.

Selecting Create Task triggers a new task to be created. Paradigm opens the Edit Task dialog with the text of the selected message in the “Notes” field, and the “Assigned User” set to the currently logged in user.
Clicking edit will allow the user to adjust an already sent message. Any message that a user has sent can be edited by the user that sent it, there is not a time out period on when that can be edited. The text “Edited” will appear above any edited message.

Clicking the delete option immediately removes the message from the conversation for all participants.
Important Message
A message can be marked as important when the user needs a response right away. If the user preferences have it enabled, this will show a message pop up and cause the notification sound to play until the receiving user(s) have closed the message pop up or open the conversation.


Conversation Attachments
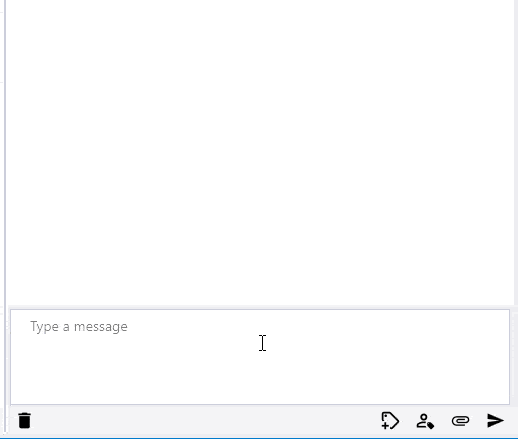
Conversations support adding attachments to messages, allowing users to share files directly within the chat.
- To add an attachment through the Windows File Selection dialog, click the attachment button paperclip icon located in the message input area. This opens a file selection dialog where you can choose one or more files from your computer.
- Files can be added via drag-and-drop directly into the message text input box.
- To insert a file from the system clipboard, click to focus in the message text input box, and press Ctrl + V, or use the Paste option from the right-click context menu.
When attachments have been added to a message, a preview panel will display a thumbnail of the file above the message.

To remove an attachment from a message before sending it, click the X in the corner of the attachment thumbnail.

To change the format of any text in a message, select the text and use the formatting toolbar buttons. Standard keyboard shortcuts also work, such as Ctrl + B for bold.

Conversation Settings
Enabling or Disabling Conversations
Conversations can be enabled or disabled in Company Preferences > Add-Ons. The check box to adjust it is towards the right side of the Add-Ons page.

Setting up Conversation Type
To manage the Conversation Types, navigate to System > Company Preferences. The Conversation Types button is within the Company Preferences ribbon buttons. Click the Conversation Types button to open the dialog that allows editing the Types and colors.

User Preferences
The ability to set the options for how Paradigm behaves on the local workstation can be found within System > User Preferences > Conversations. Within this portion of the User Preferences dialog, the user can customize the default behavior and notification options.

User Security
The ability to set the options for how Paradigm behaves on the local workstation can be found within System > User Security. Two permissions can be found within the General Permissions portion of this page:
- Allow viewing conversations as admin
- Allow using external conversations

Behavior Settings
- Auto open the Conversations Sidebar: When enabled, the Conversations sidebar will automatically open if a transaction is accessed that has an open, linked conversation. This helps ensure users are immediately aware of relevant discussions tied to the transaction.
Notification Settings
These settings control how users are alerted to incoming messages, especially important ones.
- Show Popup and Repeat Sound for Important Messages: Displays a popup and continues to repeat the notification sound until the notification is addressed. This feature is useful for situations in which the user is not present at the screen at all times, such as a production employee.
- Repeat Interval
- Configurable between 1 and 30 seconds.
- This applies only to messages marked as “Important.”
- Treat All Messages as Important: When enabled, all incoming messages, regardless of priority, will trigger the same popup and sound repetition behavior as important messages.
- Enable Sounds: Toggles all sound notifications on or off.
- Sound Settings
- Incoming Message: Use this drop down menu to choose the sound that will play when a message is received.
- Incoming Important Message: Use this drop down menu to choose the sound that will play when a message that is marked “Important” is received. If “Treat All Messages as Important” is turned on, this sound will be used for all messages.
- Sound options are limited to built-in choices.