- Home
- Dispatching
- Daily Deliveries
Daily Deliveries
The Daily Deliveries screen displays the orders that need to be delivered and allows for the orders to be assigned to trips.

This screen can be found by going to Dispatching > Daily Deliveries.

Filter down the list to find the orders that need to be added to a trip. Orders can be filtered by ship from warehouse ID, ship via, and ship date. They can then be sorted by ZIP, trip ID, or ship date by using the sort by options at the top. Creating Dispatch Filters
Then select the checkboxes beside orders to be placed on a trip and create the trip from the form at the bottom. The order that they are selected in will determine the stop order of that trip when it’s created. If “CTRL” is held while clicking the maps link, it will put in the warehouse address into Google Maps as well as the ship to addresses.
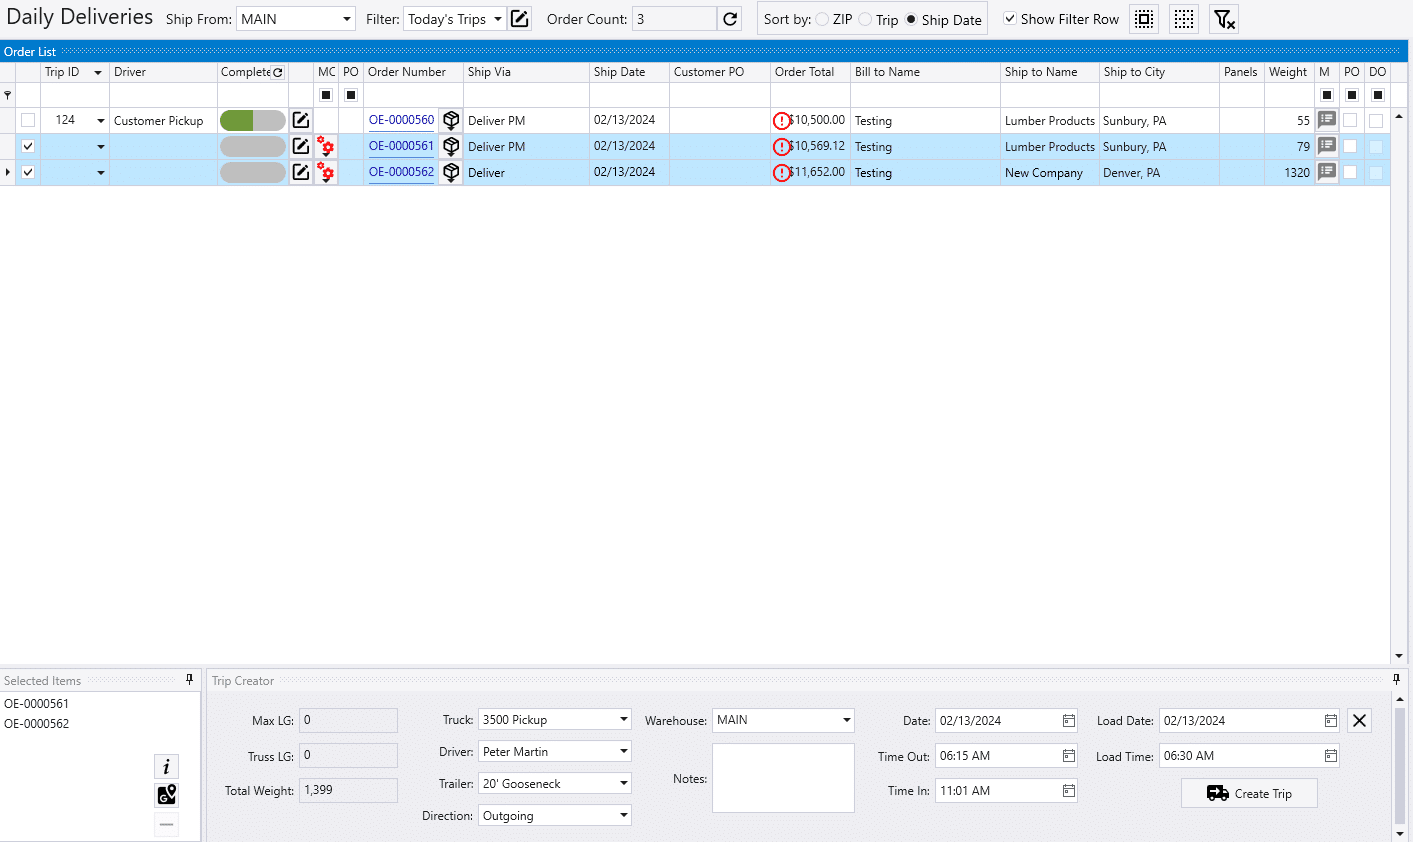
In the Daily Deliveries screen, orders can be individually assigned to a trip using the trip ID dropdown. Select the “<Unassign>” trip to remove the order from all trips.

Order Right-Click Options
Right-clicking on an order from the list will bring up four different options.
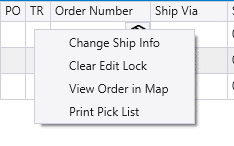
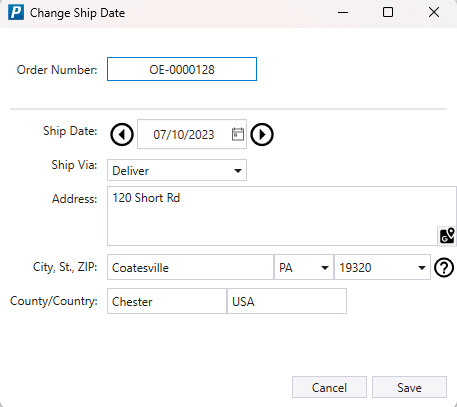
- Change Ship Info – This will bring up a window where the ship date, ship via, and address can be changed.
- Clear Edit Lock – Clears the edit locks for the order. More info on clearing edit locks can be found here: Edit Locks
- View Order in Map – This will open Google Maps in Paradigm and will show the shipping address on the map.
- Print Pick List – Prints the pick list.
Daily Deliveries Columns
There are many columns to choose from for this list, so be sure to check out all of the different ones from the column chooser.

- Trip ID – Click this drop down to view a list of the available trips, or to assign the order to one.
- Driver – The driver for the trip that is assigned to the order. This can be changed by double-clicking the trip from the list on the right and changing the driver. More info on the driver list can be found here: Driver List
- Complete – A status bar that displays how much of the order is pulled/shipped based off of information from Fulfillment. The bar will fill up blue for pulling and green for shipping like the picture below.

- Clicking the pencil icon highlighted below will give the user the option to split the order between two trips, which is useful if the order needs to be delivered on more than one truck. Note that splitting the order in this way will cause the order to show up in Daily Deliveries twice, once for each trip (learn more).
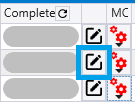
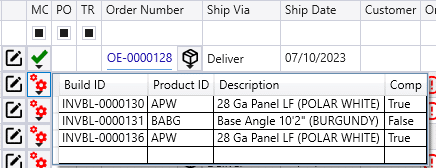
- MC – Manufacturing Complete: Red gears means items need to be manufactured yet, green check mark means that manufacturing is complete, and if it is blank it means that nothing needs to be manufactured. Clicking on the icon in that column will display the list of builds for that order.
- PO – PO Received: Green Arrow = Received, Red Arrow = Not Received, White = No PO. Clicking on the icon will display a list of the items on the purchase order.

- TR – Transferred: Green = Transferred, Red = Not yet Transferred, White = No transfer is needed. More info on inventory transfers can be found here: Inventory Transfers
- Order Number – Clicking on the order number will open the order. Clicking on the box icon will display a list of the items in the order.

- Ship Via – The ship via assigned to the order.
- Order Total – If an exclamation mark is displayed, it means the order is assigned to COD terms (Payment Terms) and the order has not been fully prepaid, meaning the driver will need to collect payment.
- Max LG – The length of the longest item on the order, that is not a part of the categories specified in the column beside it. So in this case, the longest item that is not in the “Panel” or “Panel Trims” categories. If this is orange, it means that there is an item on the order that is over the max length for that truck or trailer. More info on setting up trucks and trailers can be found here: Truck List, Trailer List. There is also the option to exclude some items from the length check, more info on that can be found here: Length Check Product Exclusion
- Panels & Lumber – The length of the longest item from the selected category. This will turn orange if an item in that category is over the max length. Info on setting these up can be found here: Max Length Categories
- Weight – The total weight of all the items on the order. If it is orange, it means that there is an order on the trip that is over the weight limit for the truck or trailer.
- M (Messages) – Click this button to view or add driver messages or notes to the order. Driver messages will only be printed on the documents, notes just for internal use. Icon will turn green if there is a message to print.

- PO – Paper Out: Select this checkbox if the paper to pull the order is out. Once this check box is selected, the order will display this error when a user tries to edit it: Detail lines are locked. This order is marked as ‘Paper Out’. Do note that this option is no longer used and was replaced with Fulfillment Pro. This column should be removed from most layouts.

- DO – Driver Paper Out: This will be automatically checked when the driver paperwork for the trip is printed. Once that has been printed, the order will display this error when a user tries to edit it: Driver paper is out – Order may not be edited.

Custom Checkbox
A custom check box can be created for this list too, it no function other than just checking or unchecking it. For example, this might be used by a dispatcher to keep track of the orders that haven’t been confirmed yet. Then once the dispatcher calls and confirms the delivery of the order, the check box could be marked so that the dispatcher remembers it’s been completed.
It will show up as “Ysn Daily Deliveries Custom” in the column chooser until it is labeled. It can be labeled by going to Dispatching > Options > General.

Truck Summary
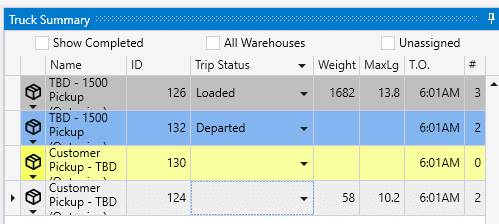
This list shows the available trucks and drivers for the selected day. More info on the trucking summary list can be found here: Truck Summary
Create Delivery XLS

- Clicking the “Create Delivery XLS” will create spreadsheet with the delivery info on it like the example below. This file can be useful when working with third-party dispatching systems.

Contents
Categories
- Purchase Order and Vendors (19)
- Production (34)
- Order Entry and Customers (75)
- NEW! (6)
- Job Costing (16)
- Inventory and Pricing (92)
- General (54)
- Fulfillment Pro (29)
- Dispatching (23)
- Administration and Setup (39)
- Add-Ons and Integrations (29)
- Accounting (51)
